
What can we help you with?
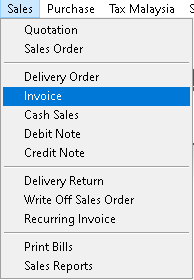


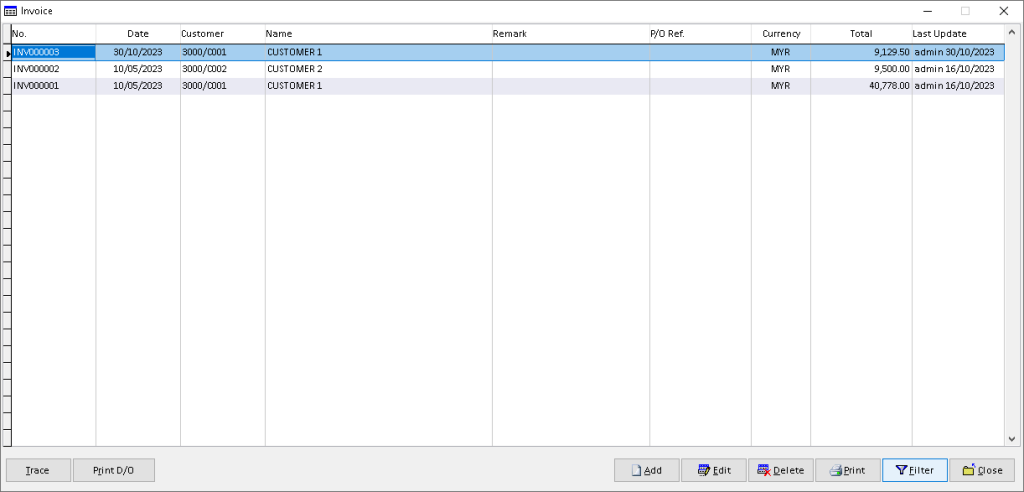
1. Go to Sales > Invoice
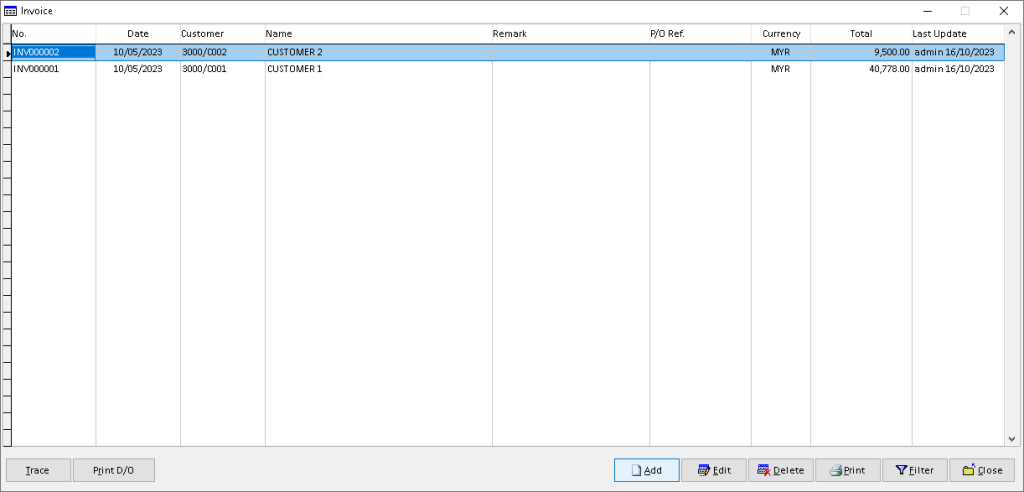
2. Click > Add button
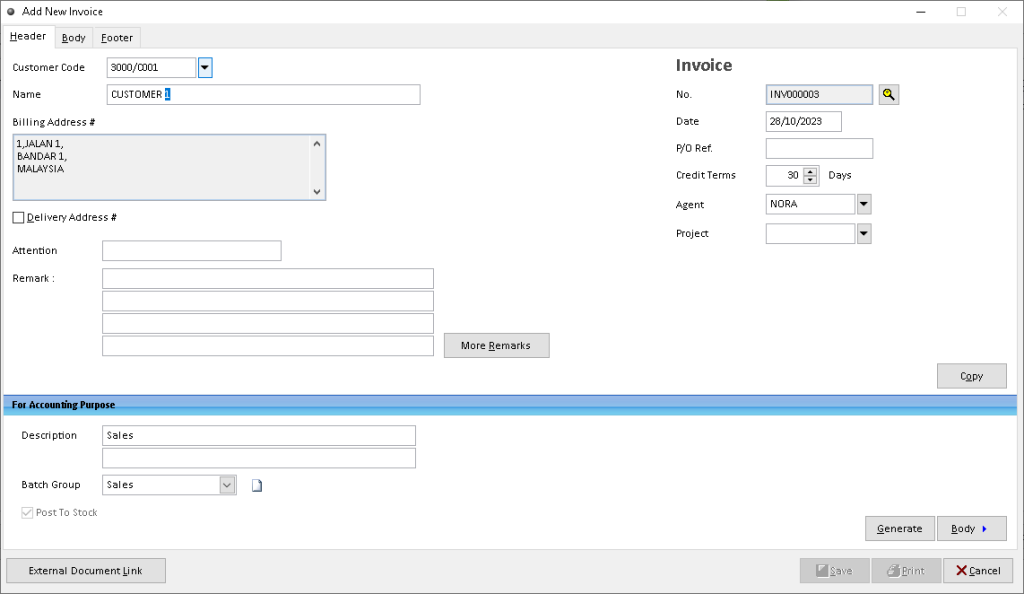
3. [Header]: Fill the associated data for debtor details, use dropdown button to find related data. Then, click > Body button to proceed
Note:-If not use Generate button. Please skip to No.8
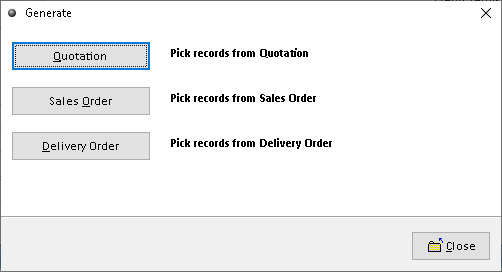
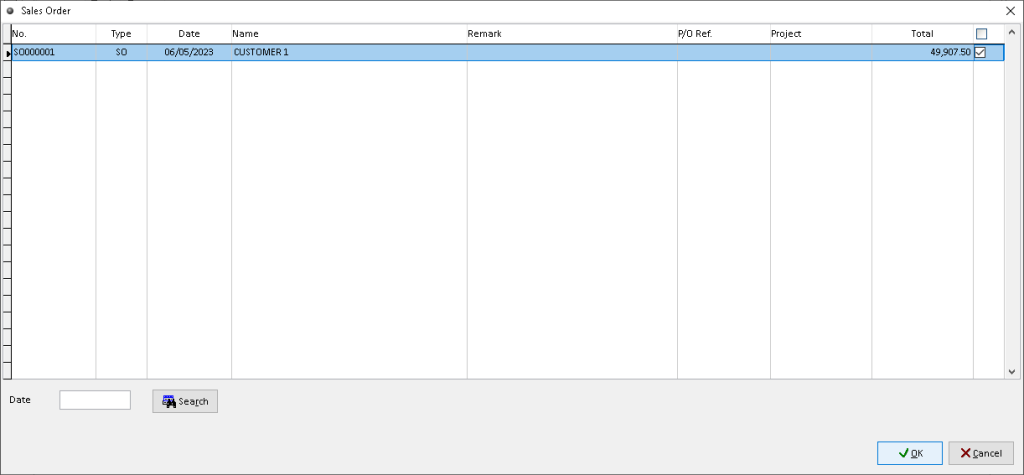
Click > Generate button to get link the order through Quotation/ Sales Order/ Invoice. [Generate button] .
4. Click an option that you want.[Generate button] through Quotation/ Sales Order/ Invoice. [Generate button].
5. Tick the record that you want to add. Then, click > OK button to proceed. [Generate button]
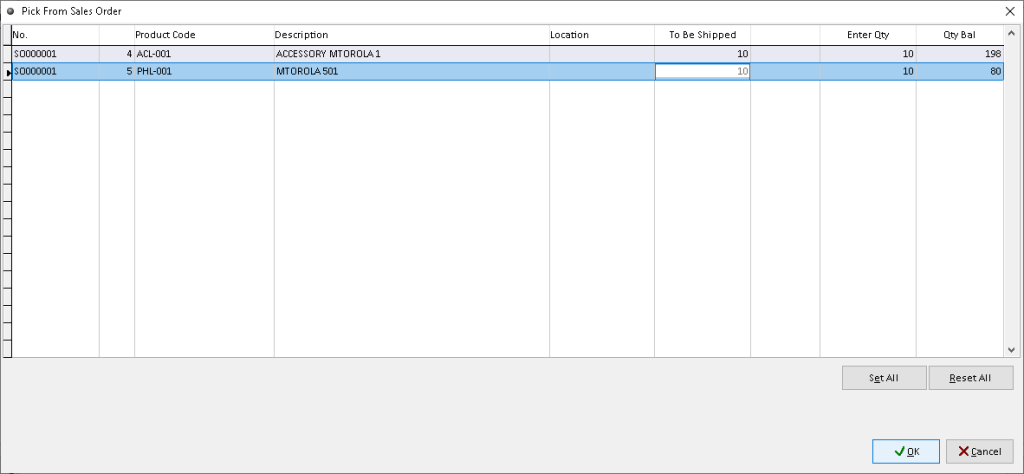
6. Click the record. Then, click > OK button. [Generate button]
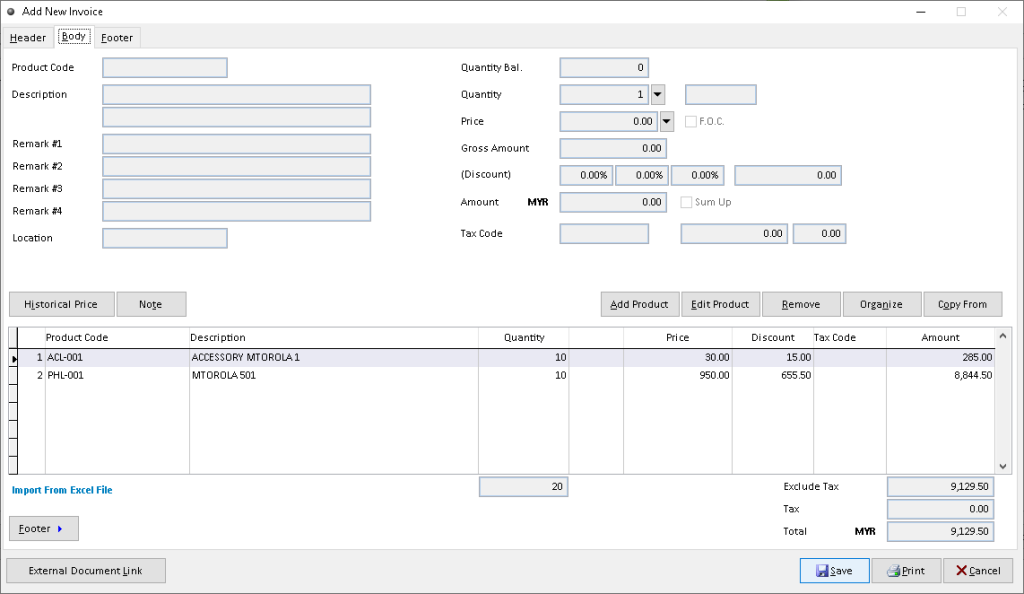
7. Now, the record successfully add. Click > Save button to save it. Finish [Generate button]
Note :- You can add/ edit / remove/ organize about product and details through function below
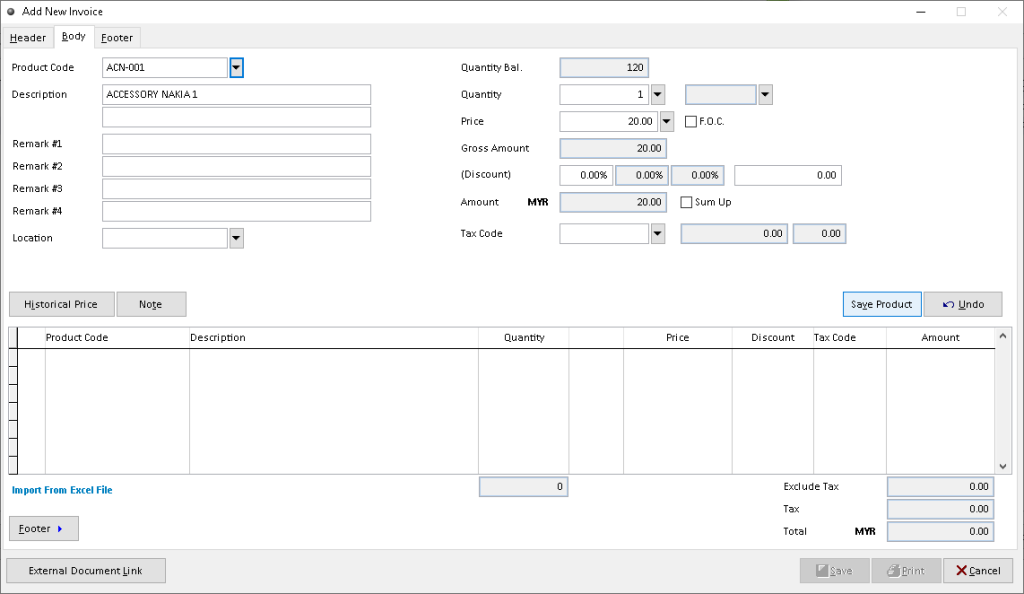
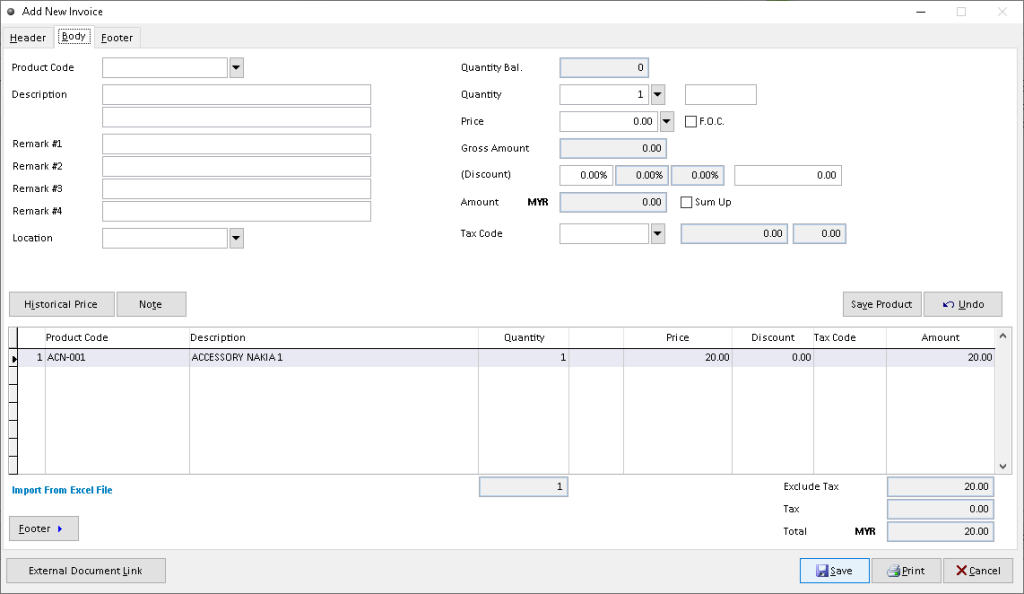
8. [Body]: Fill the associated data for product details, use dropdown button to find related data. Then, click > Save Product button.
9. After the product record available in table below. Click > Save button to save
10. The new Invoice record successfully created. Finish
1. Go to Sales > Invoice
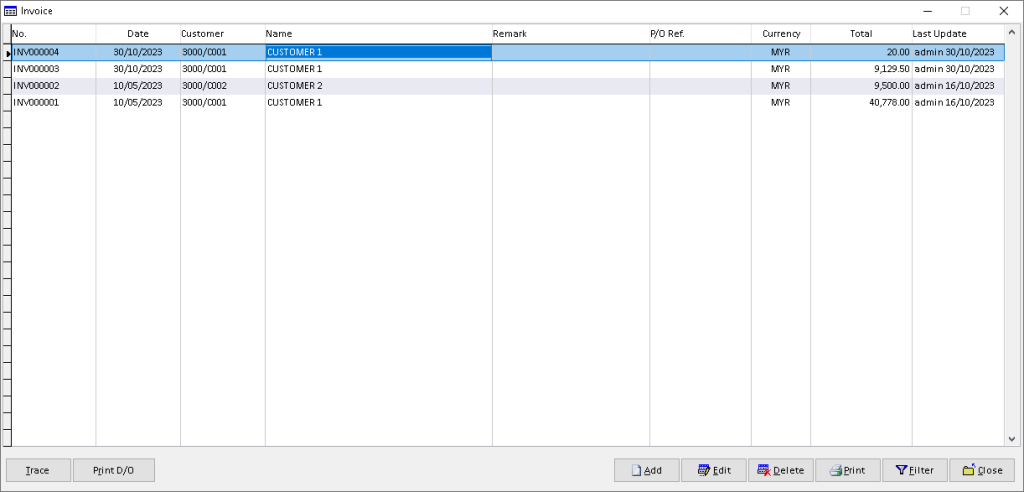
2. Click a record that want to edit. Click > Edit button
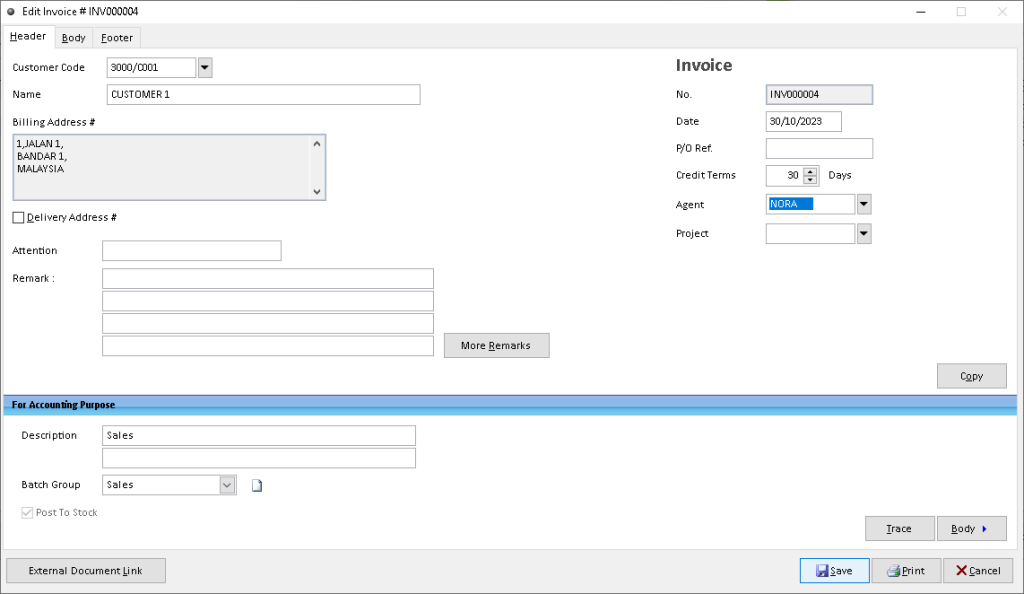
3. [Header]: Edit/ change the data that you want to edit. Then, click > Save button
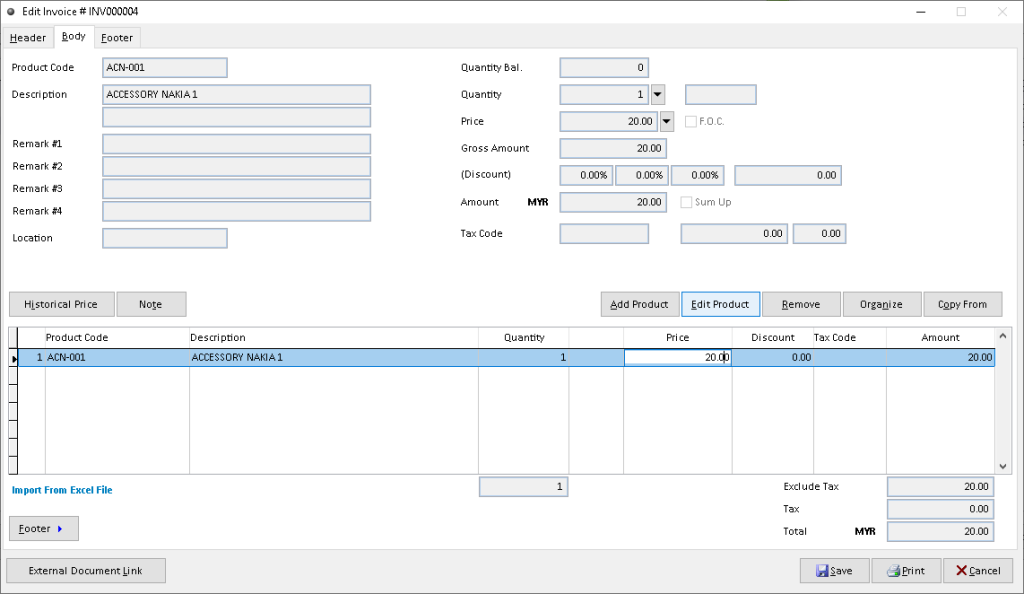
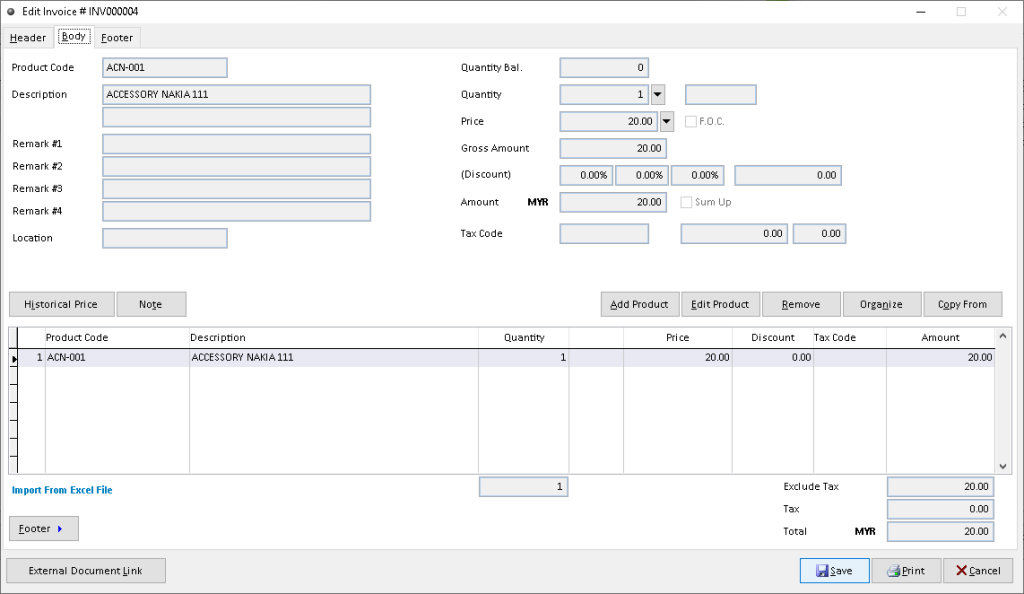
4. [Body]: Click a record that want to edit from table below. Then, click > Edit Product button
Note :- You can add/ edit remove/ organize about product and details through function below
5. [Body]: Edit/ change the data that want to edit. Then, click > Save Product
6. After the edited record available in table below, click > Save button to save it. Finish
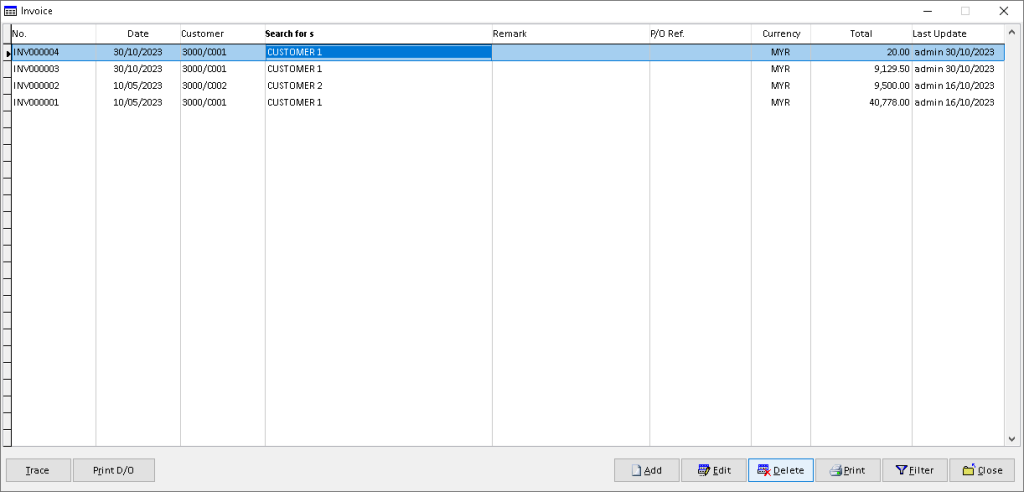
1. Go to Sales > Invoice
2. Click a record that want to delete. Click > Delete button
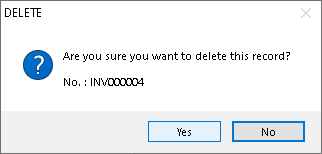
3. Click > Yes button
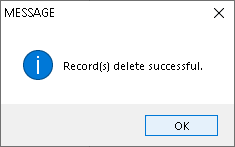
4. Click > OK button. Finish
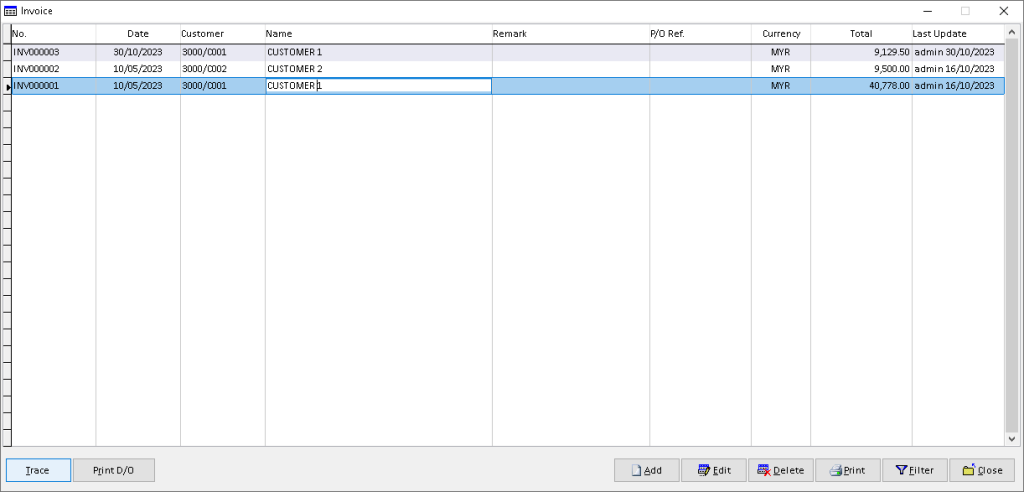
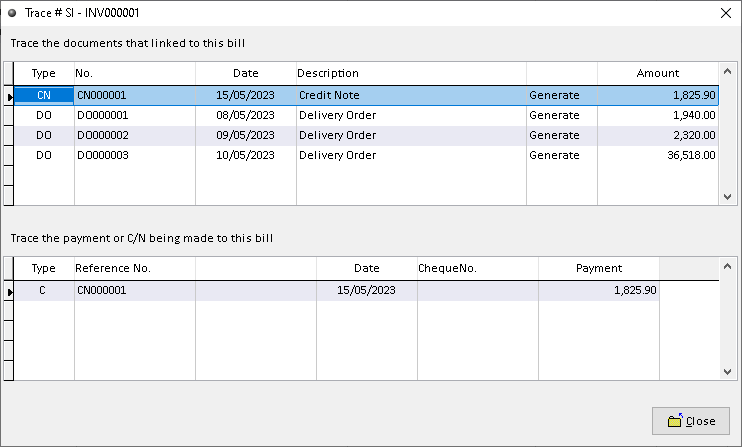
1. Go to Sales > Invoice
2. Click a record that want to trace. Click > Trace button
3. You can view the trace record. Finish
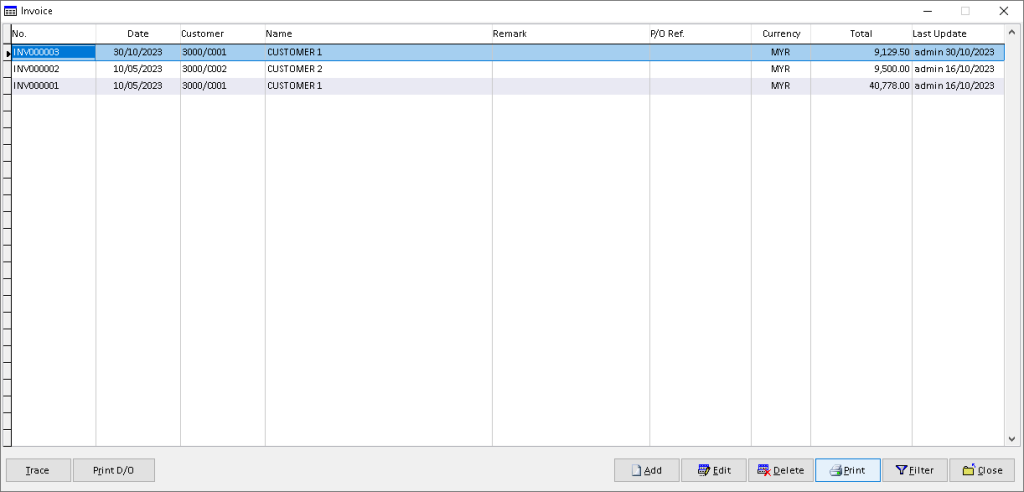
1. Go to Sales > Invoice
2. Click a record that want to print. Click > Print button
Click > Print D/O to overview order list (option)
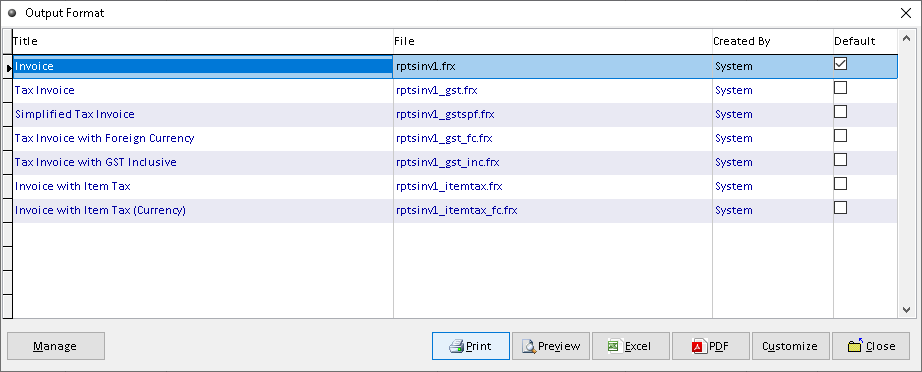
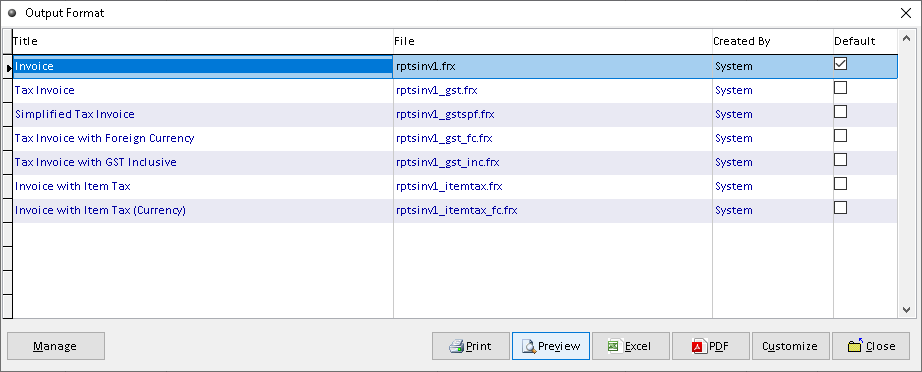
3. Click > Print button
Click > Manage to Edit/ Add/ Delete and Set Default for receipt format (option)
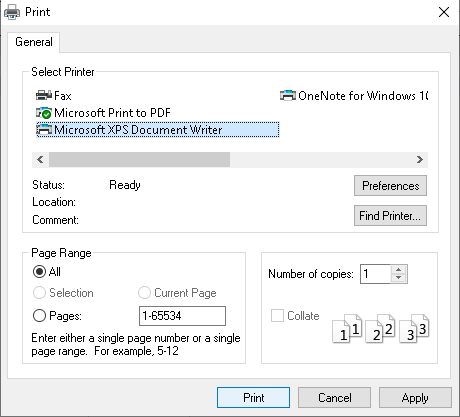
4. Click > Print button to proceed (adjust printer on your own setting). Finish
1. Go to Sales > Invoice
2. Click a record that want to preview. Click > Print button
Click > Print D/O to overview order list (option)
3. Click > Preview button
Click > Manage to Edit/ Add/ Delete and Set Default for receipt format (option)
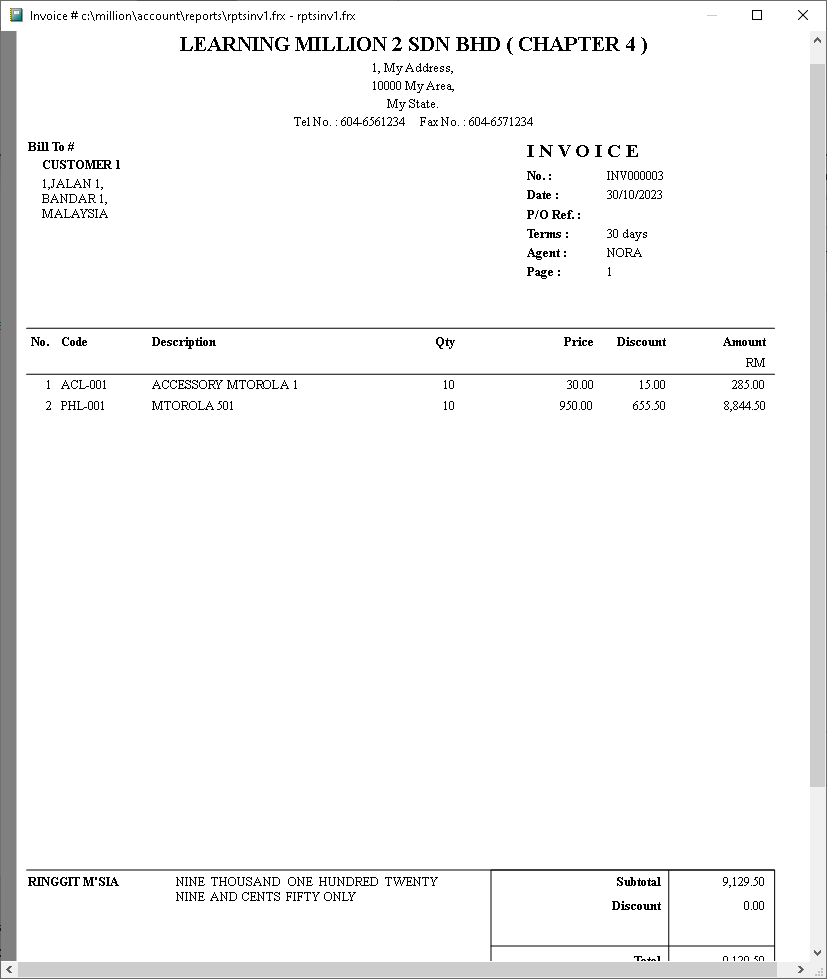
4. The invoice successfully preview. Finish
1. Go to Sales > Invoice
2. Click a record that want to export. Click > Print button
Click > Print D/O to overview order list (option)
3. Click > Excel button
Click > Manage to Edit/ Add/ Delete and Set Default for receipt format (option)
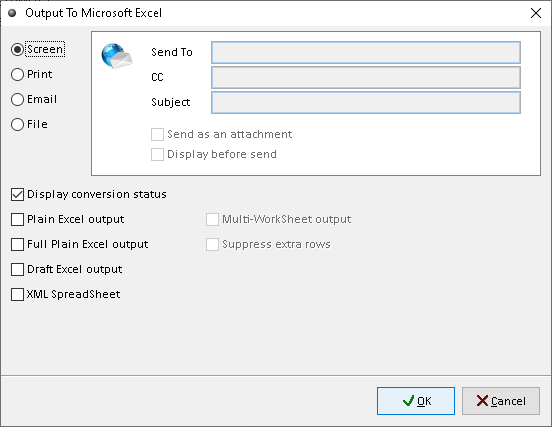
4. Tick and set the checkbox requirement base on your own setting. Then, click > OK button. Finish
1. Go to Sales > Invoice
2. Click a record that want to export. Click > Print button
Click > Print D/O to overview order list (option)
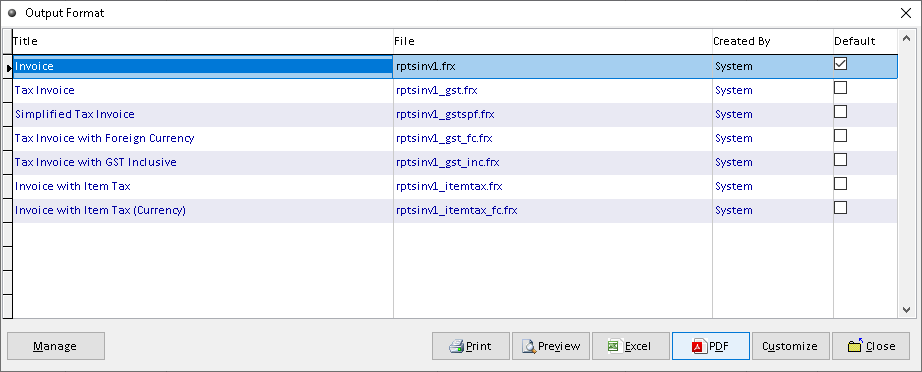
3. Click > PDF button
Click > Manage to Edit/ Add/ Delete and Set Default for receipt format (option)
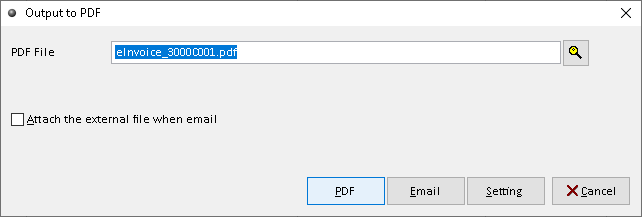
4. Click > search logo to choose folder as place to export. Then, click > PDF button to direct generate.
Click > Email to send direct to other organization (option)
Click > Setting for Advanced features (option)
5. Your PDF successfully generated. Click > Yes/ No button to continue (option). Finish
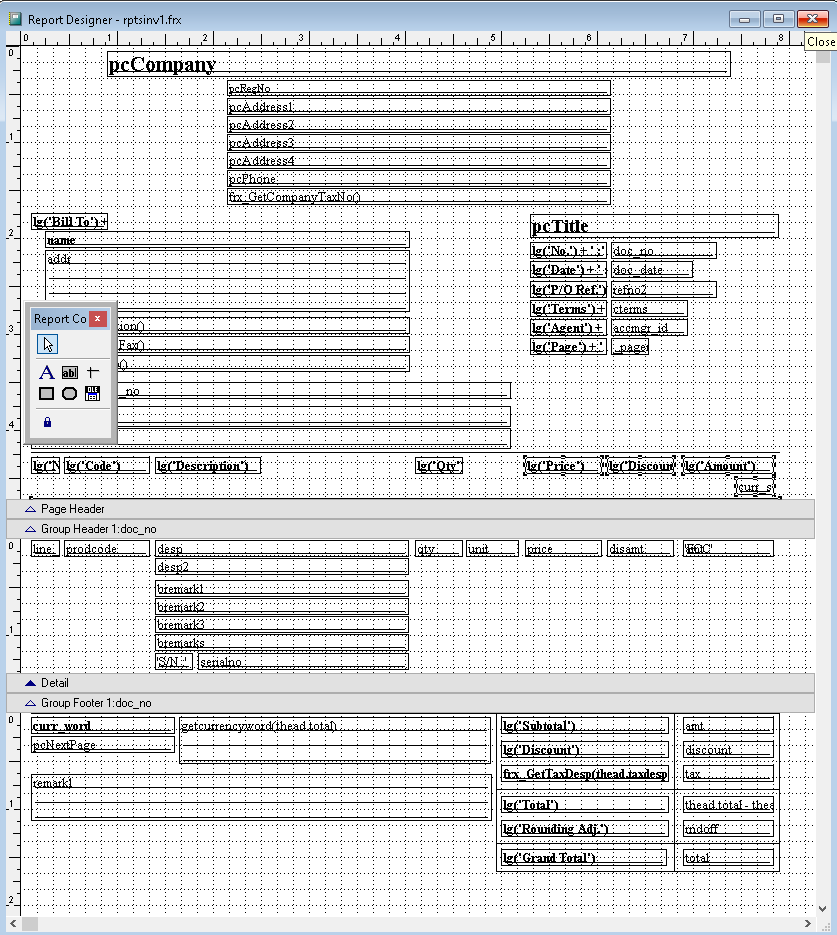
1. Go to Sales > Invoice
2. Click a record that want to custom. Click > Print button
Click > Print D/O to overview order list (option)
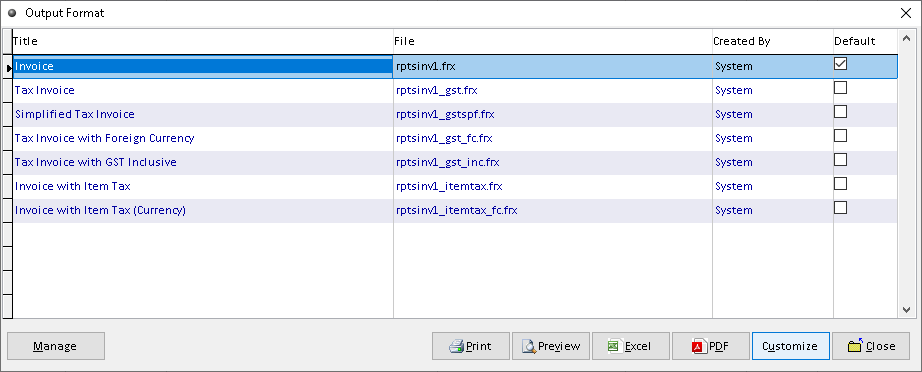
3. Click > Customize button
Click > Manage to Edit/ Add/ Delete and Set Default for receipt format (option)
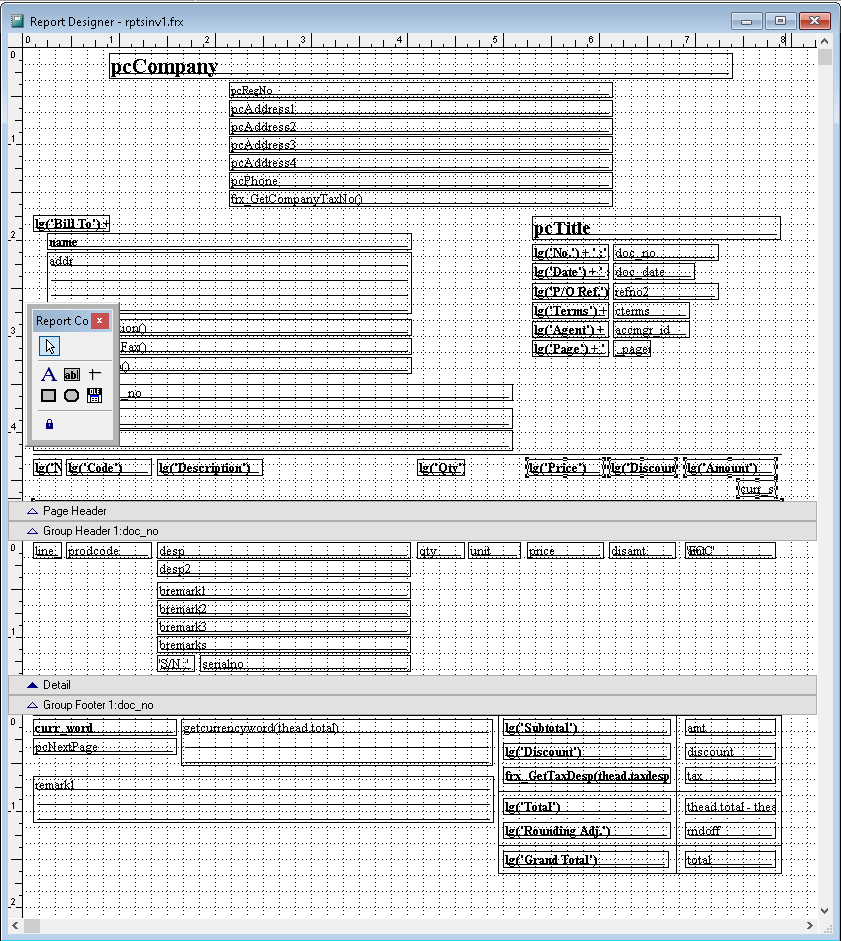
4. You can custom the design you want based on the available tools. The default the element can be drag by click it
5. After completely custom, click > X (close window)
6. Click > Yes to save customized design report. Finish
1. Go to Sales > Invoice
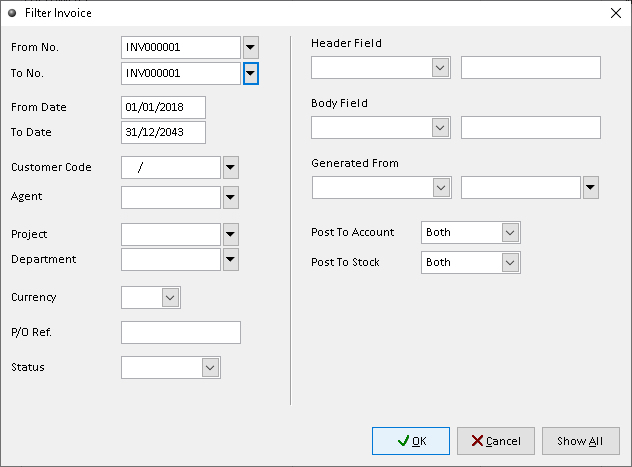
2. Click > Filter button
3. Fill the data associated, use dropdown button to find related data. Click > OK button to filter
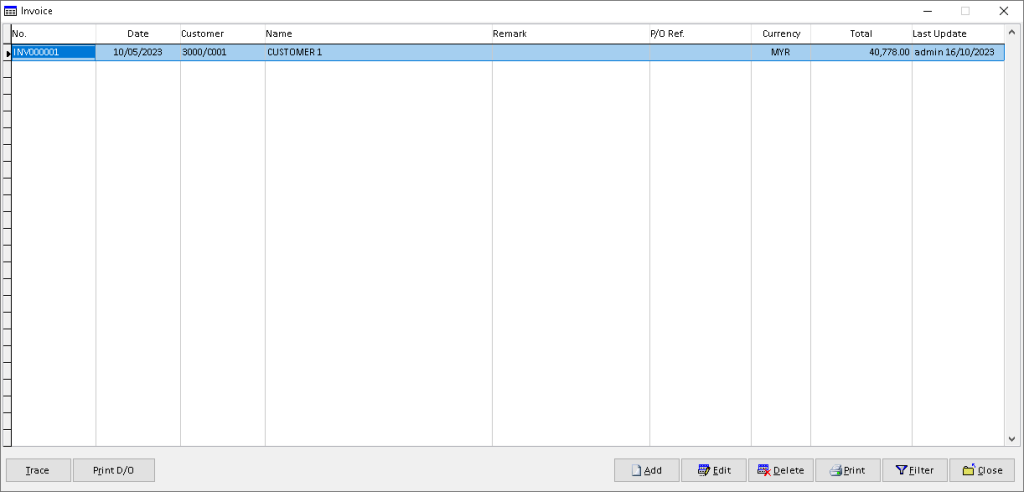
4. The filtered records will display here. Finish