
What can we help you with?


BOM is a list of raw materials or semi-finished goods that make up the final product. These features allow users to specify the quantity of raw materials and assembly cost when assembly final product. In Million, users can include up to 3 layers of semi finished goods when assembly finished goods.
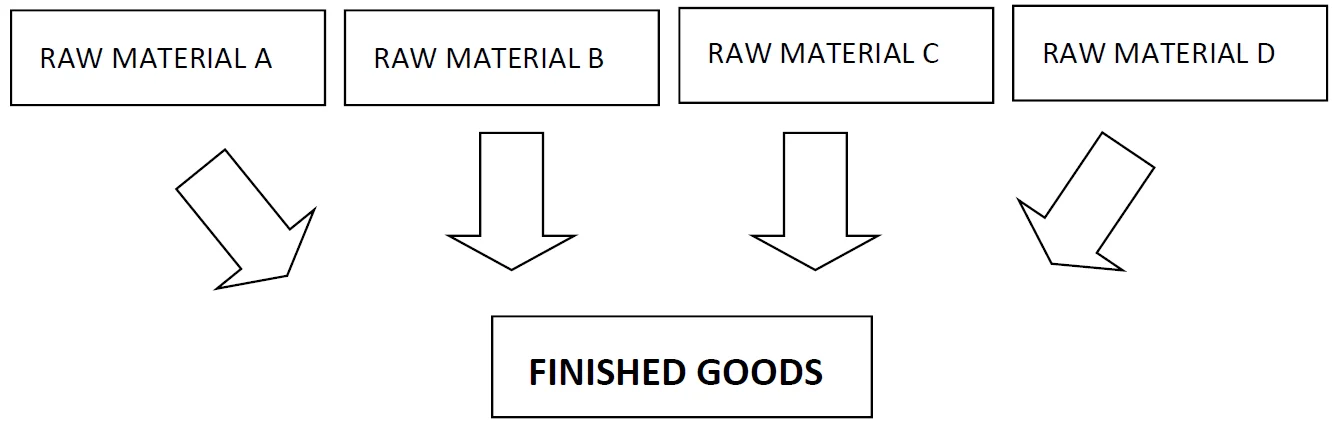
Case 1: BOM without semi-finished good
Step 1: Product Maintenance
Step 2: Add Finished Goods Components
Step 3: Issue Purchase Invoice
Step 4: Stock Assembly
Step 5: Issue Sales Invoice
Step 6: View List Bill of Material Report
Step 7: View Stock Card Report
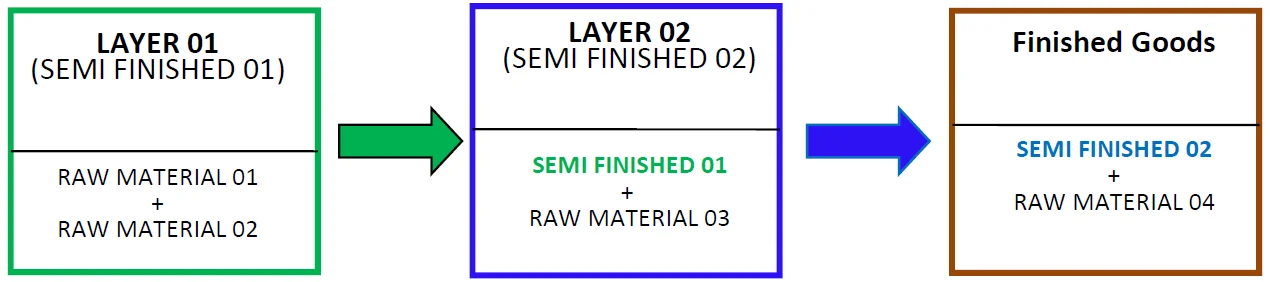
Case 2: BOM with 2 layers of semi-finished goods
Step 1: Product Maintenance
Step 2: Add Semi Finished Goods Components
Step 3: Add Semi-Finished Goods Components to Finished Good
Step 4: Issue Purchase Invoice
Step 5: Stock Assembly Semi Finished Goods and Finished Goods
Step 6: Issue Sales Invoice
Step 7: View List of Bill Material Report
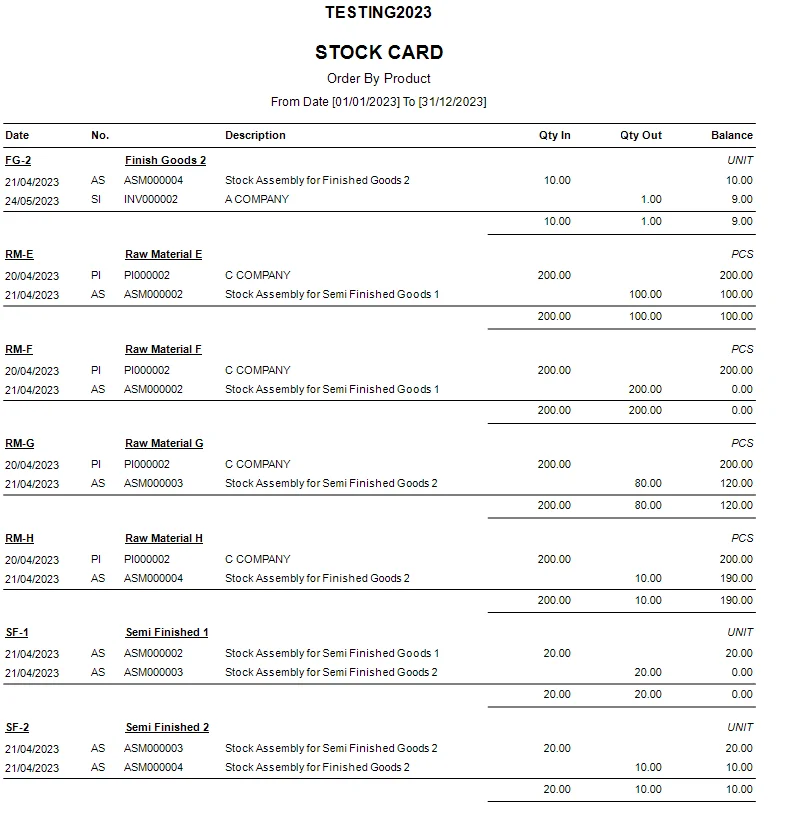
Step 8: View Stock Card Report
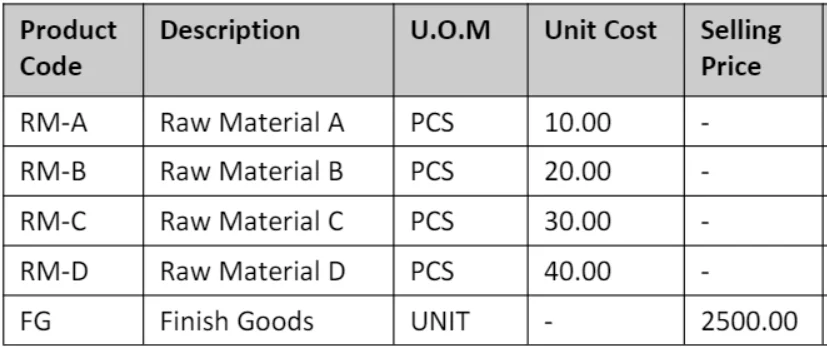
Table 1: Add product record
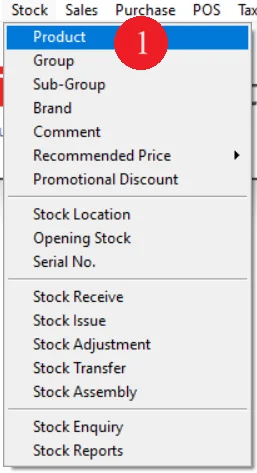
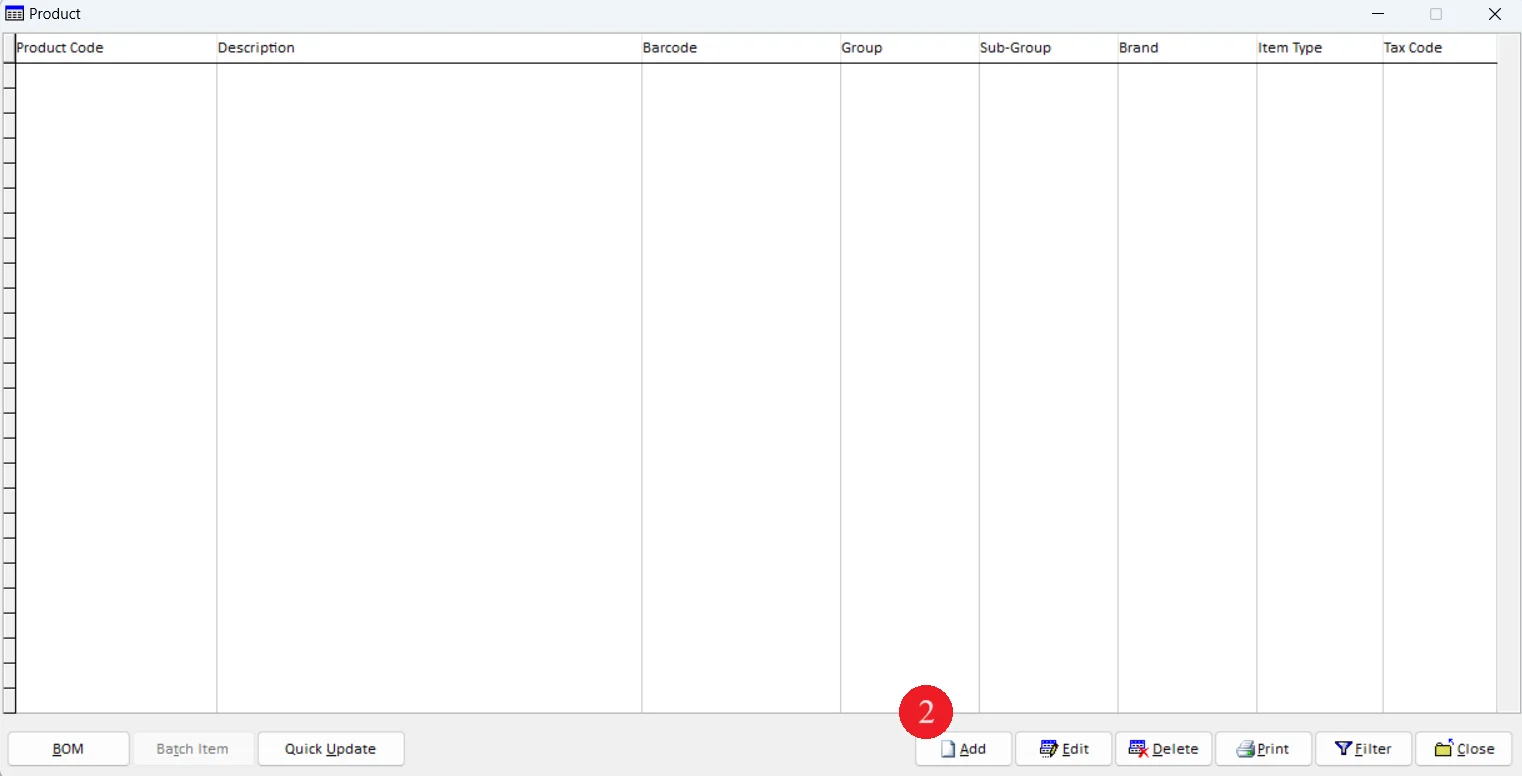
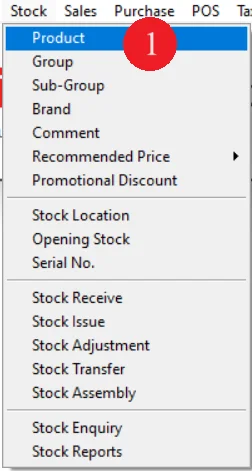
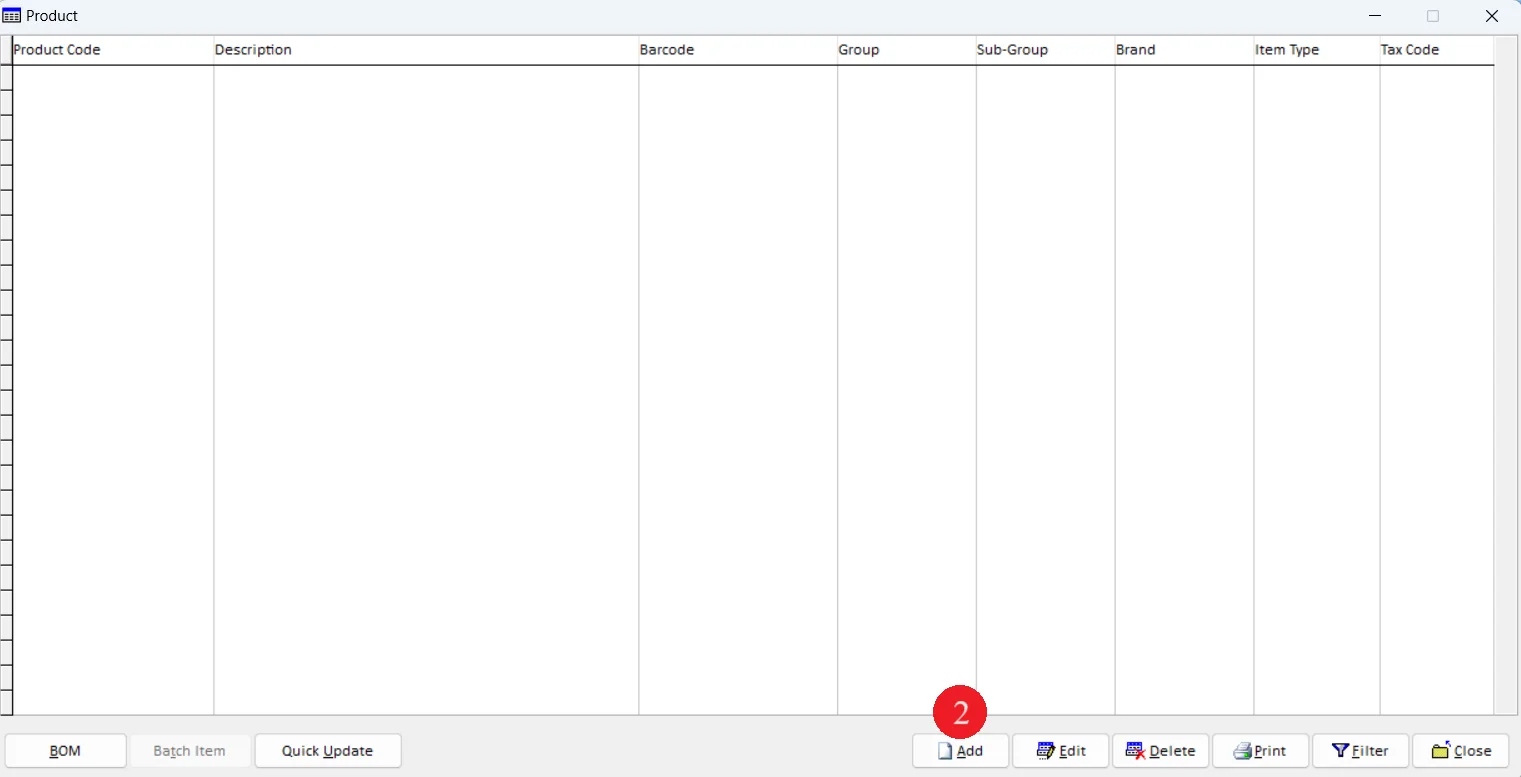
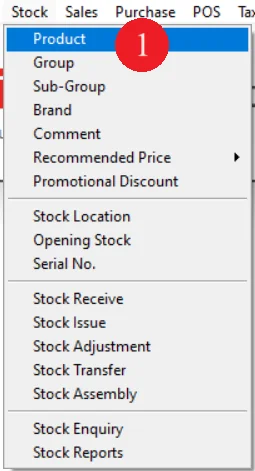
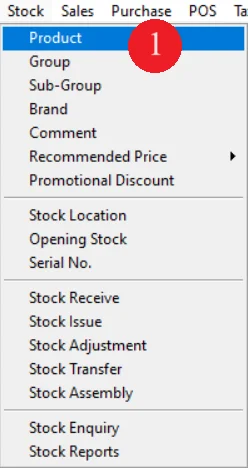
1. Go to Stock and select Product
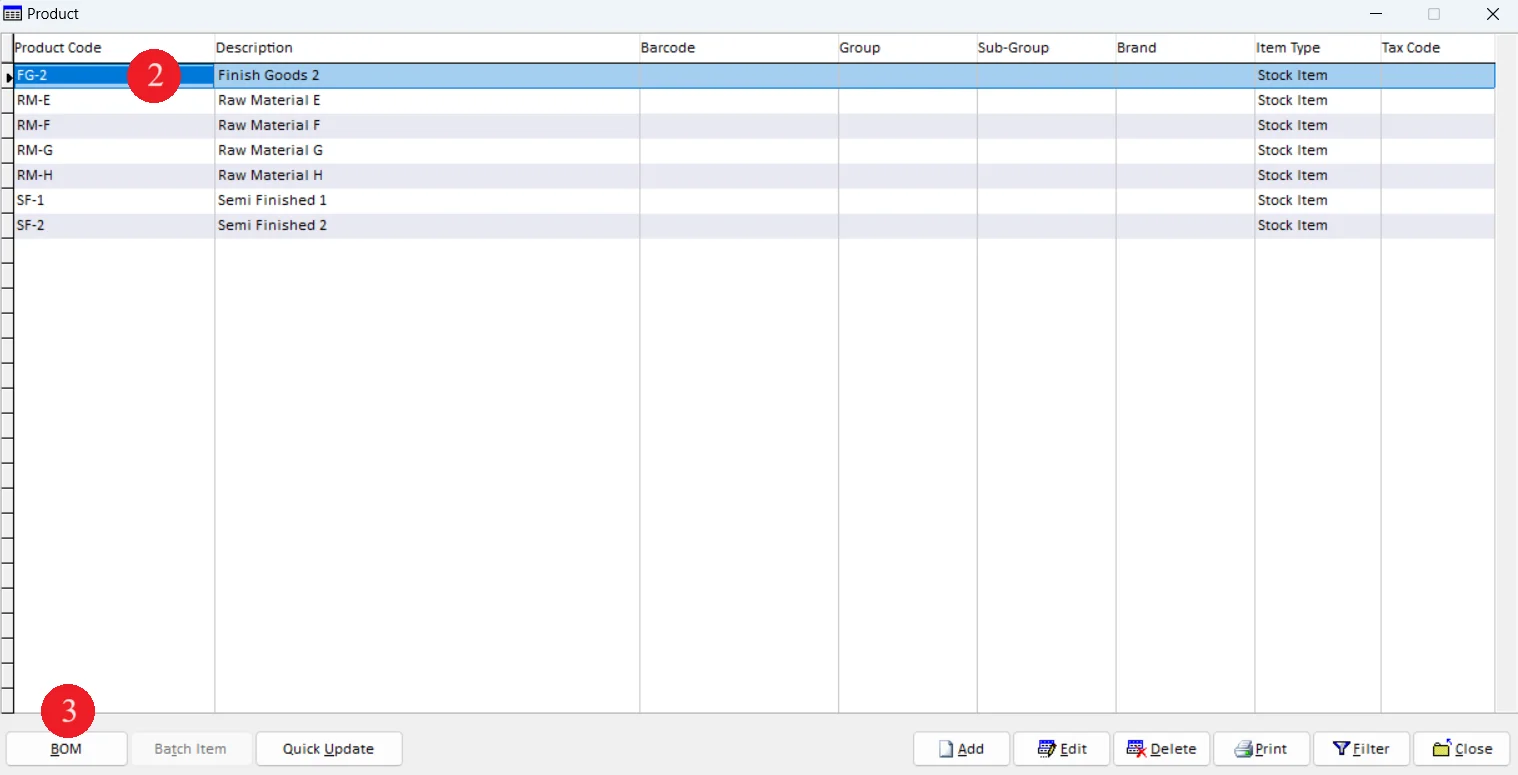
2. When Product screen appears, click on Add button
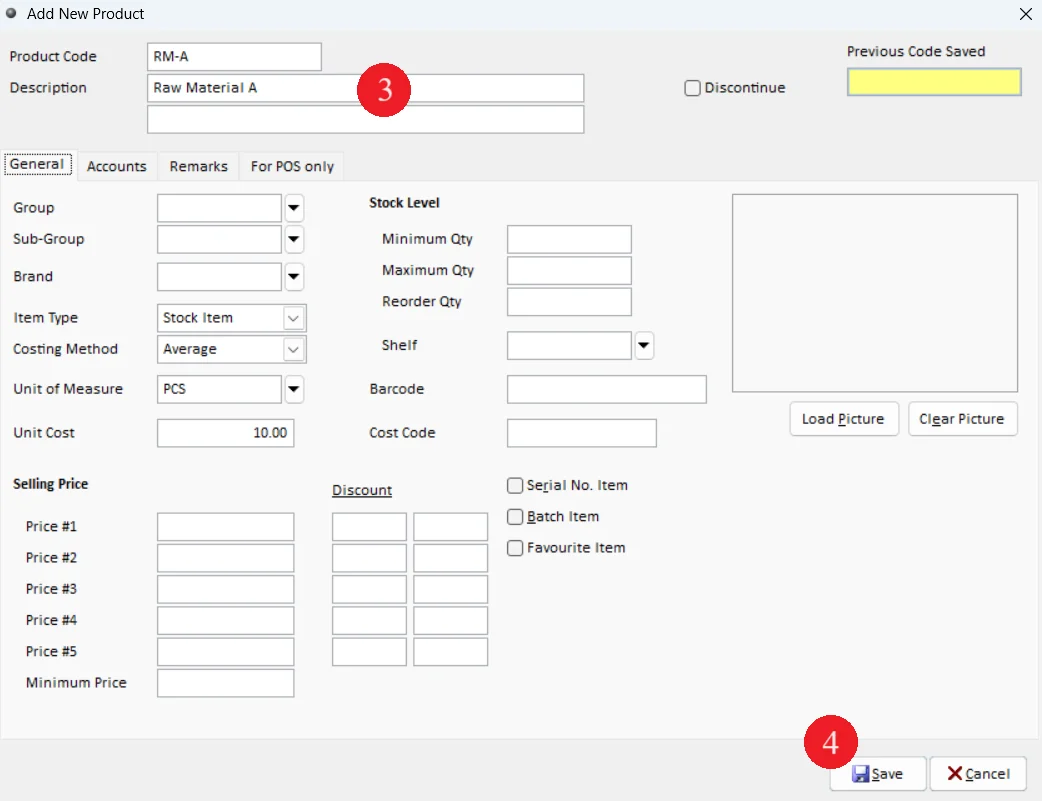
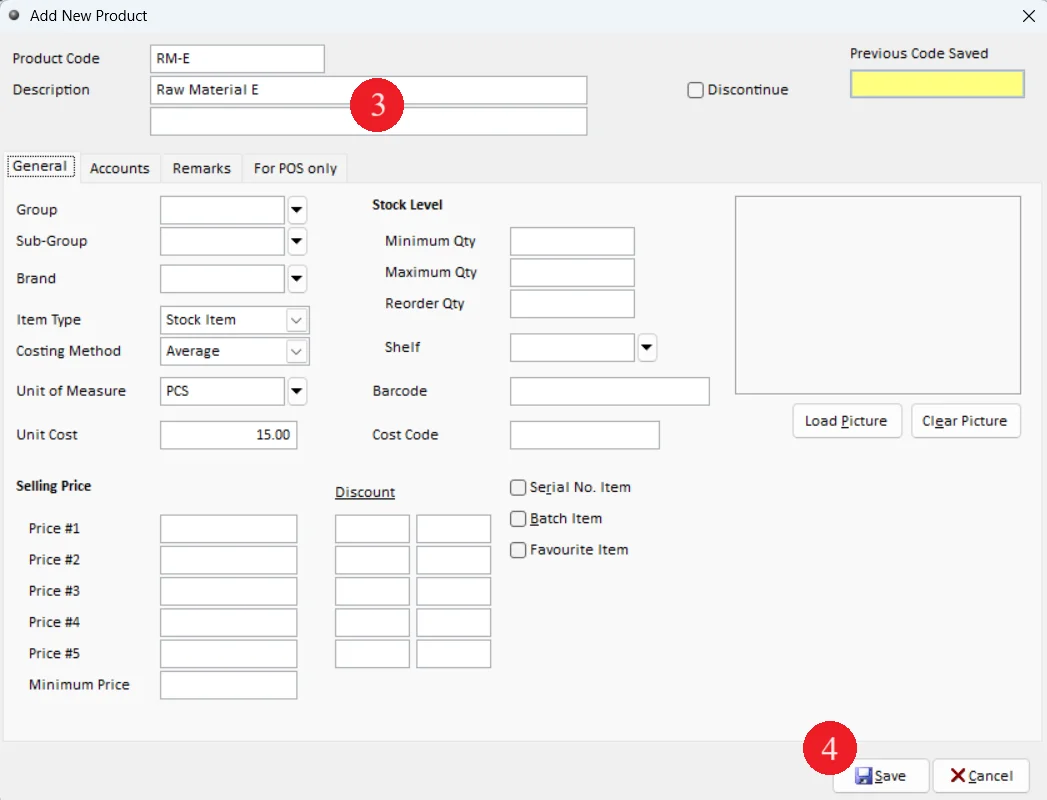
3. Enter product details on Table 1
4. Click on Save button.
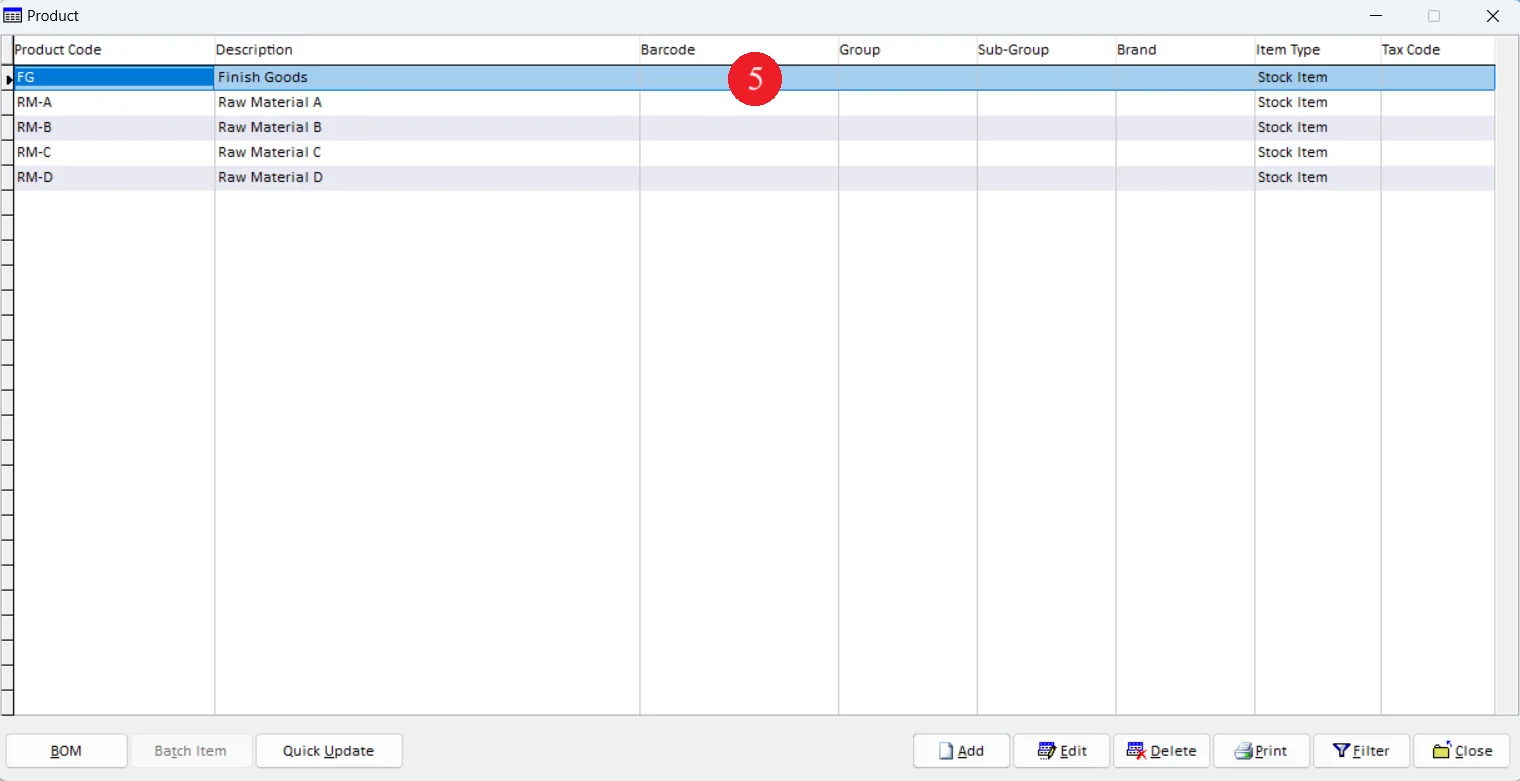
5. Continue enter next product record according to Table 1
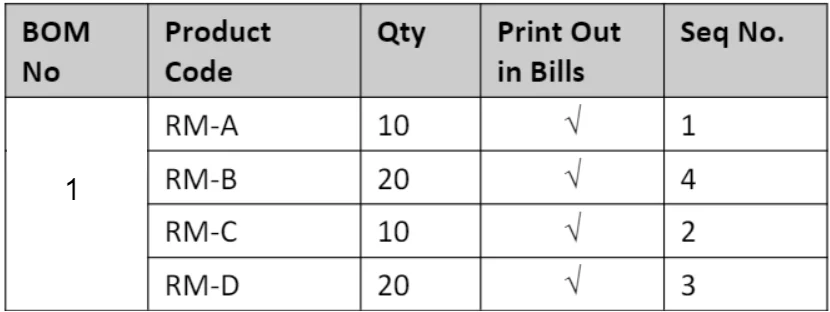
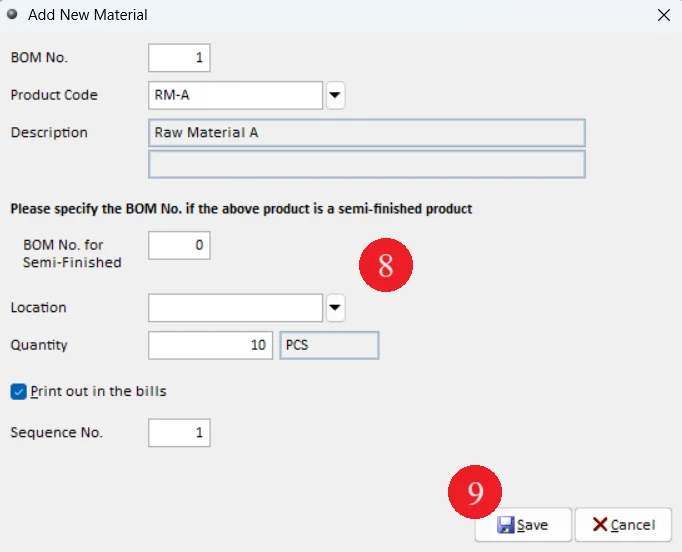
Table 2: Add components into finished good
NOTES: The purpose for Seq No. is to rearrange component sequence when print sales invoice
1. Go to Stock and select Product
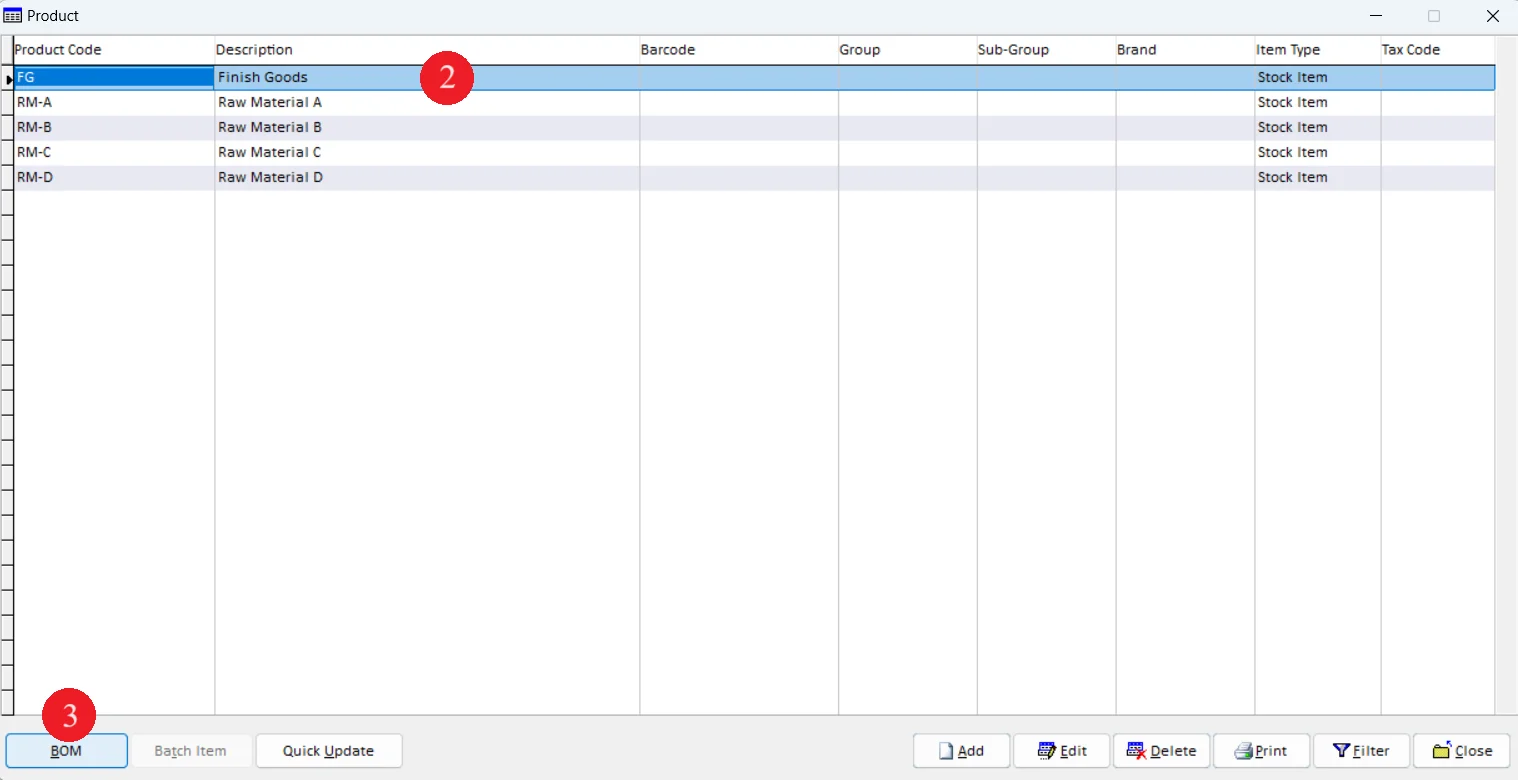
2. Select product code FG record
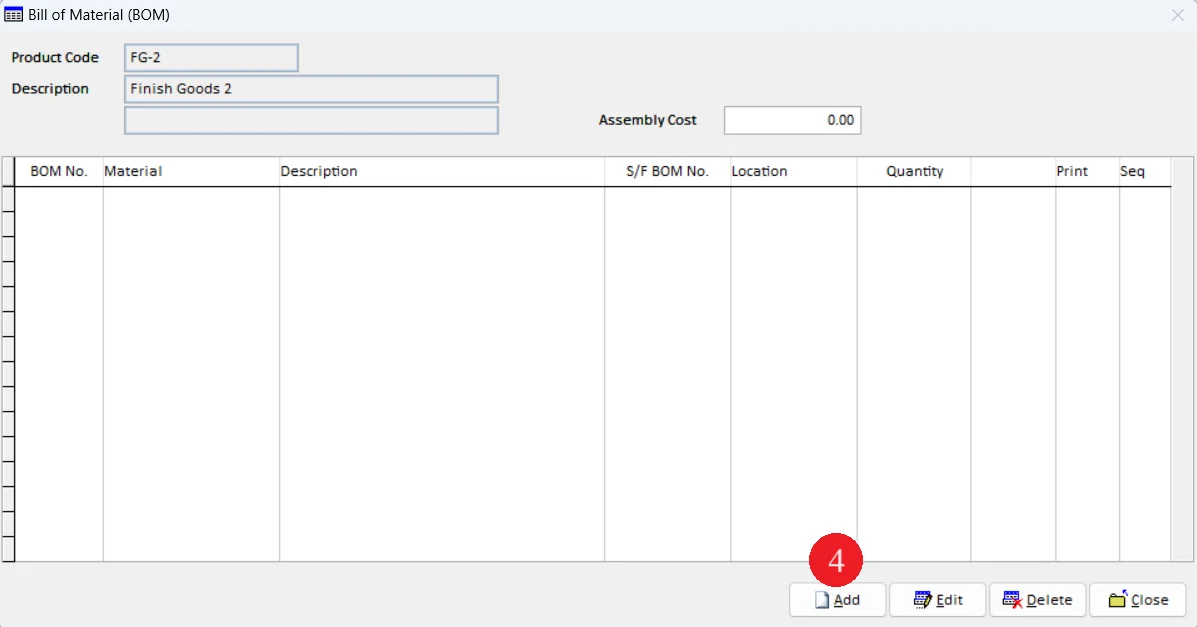
3. Click on BOM button
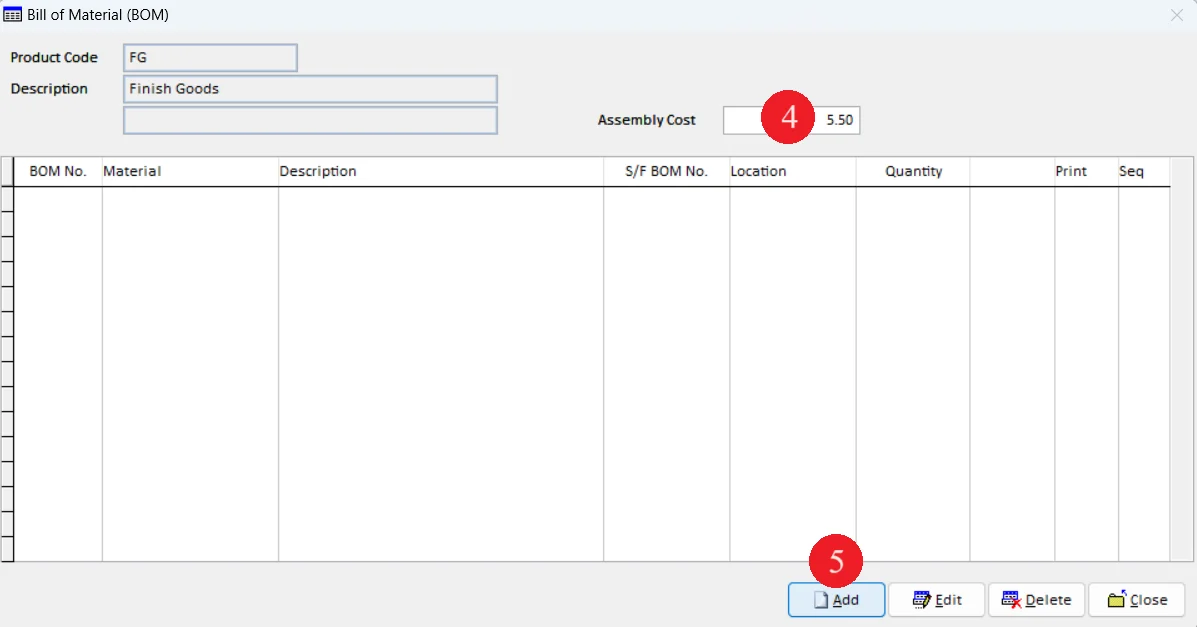
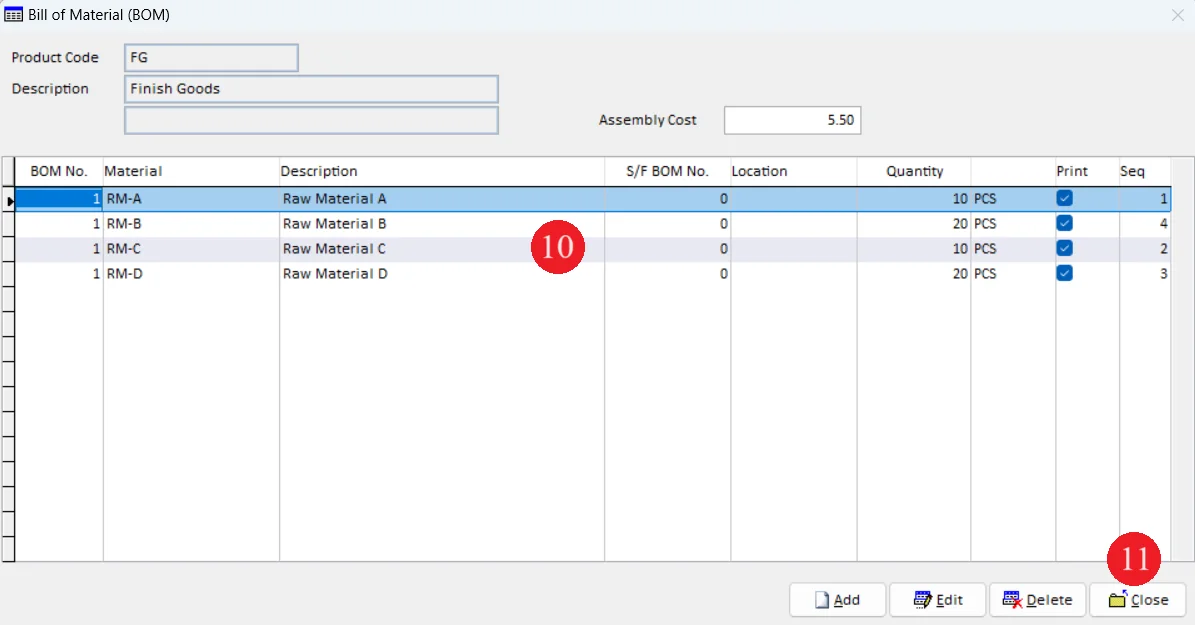
4. Enter Assembly Cost as follow:
5. Click on Add button
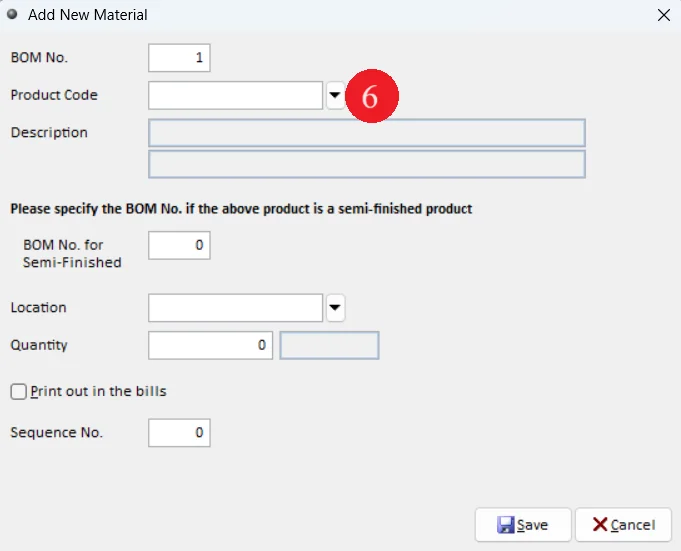
6. Select the product code
7. Click on OK button
8. Enter detail according to Table 2
9. Click on Save button
10. Repeat step 7 to 10 for second component
11. Click on Close button
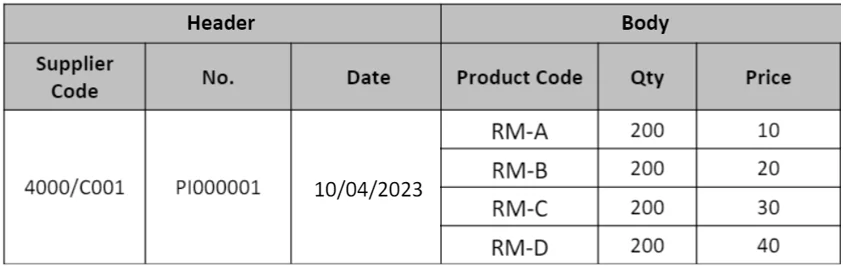
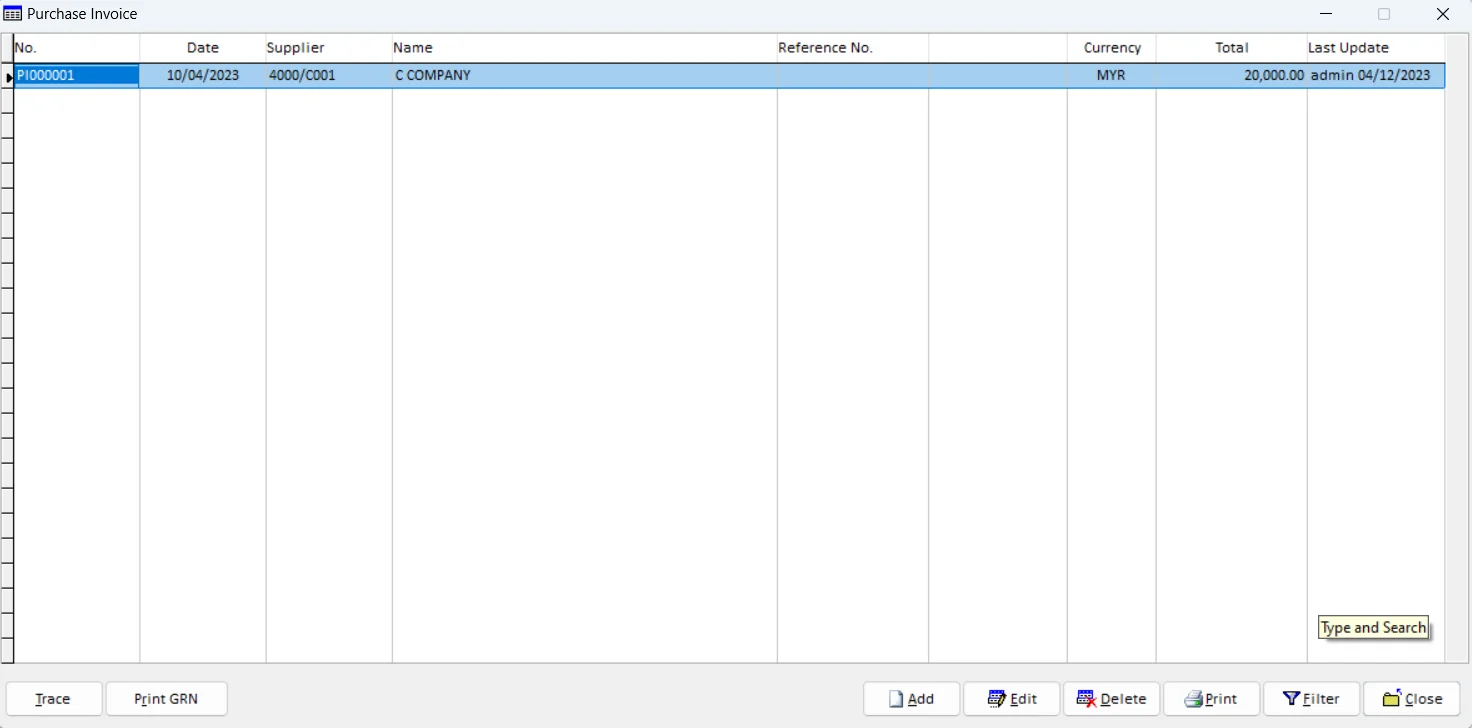
Table 3: Add purchase invoice
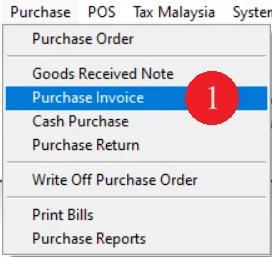
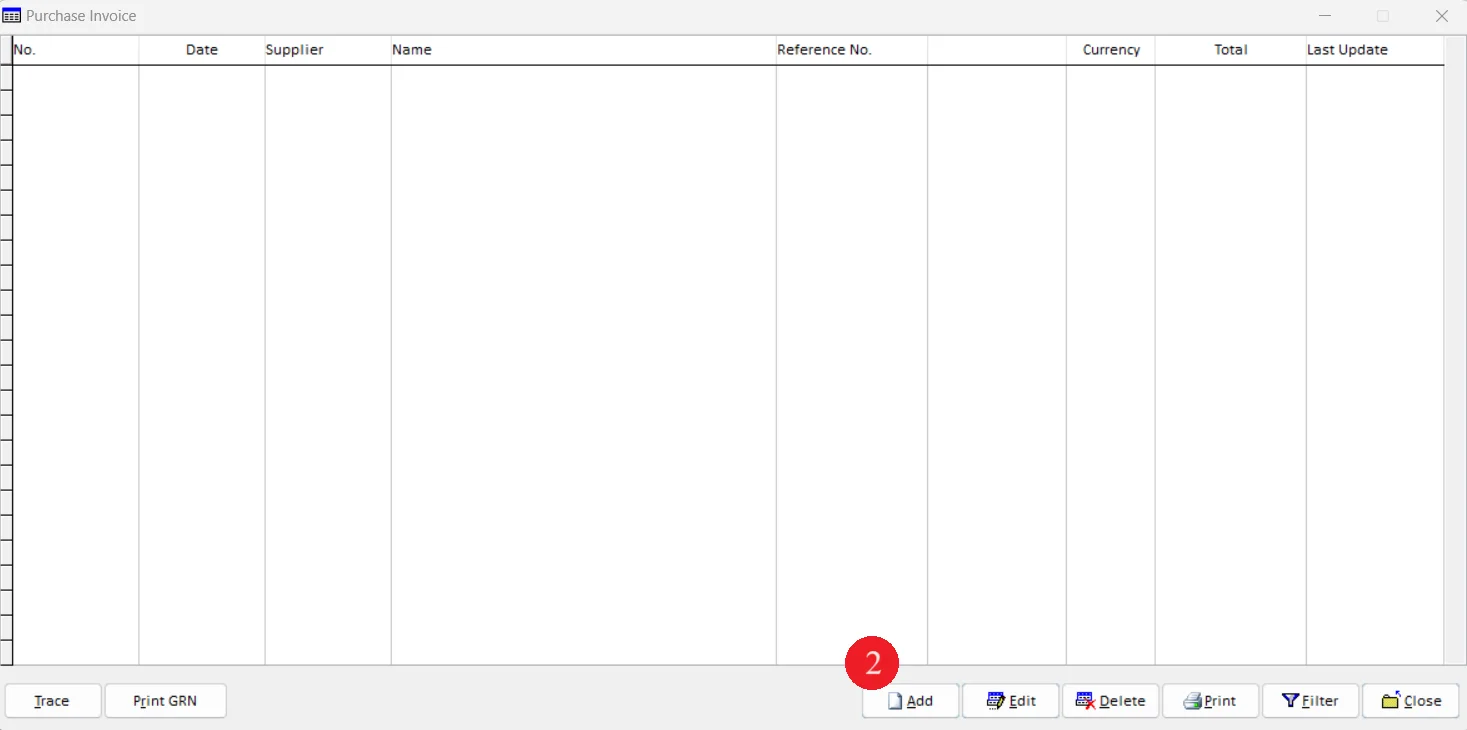
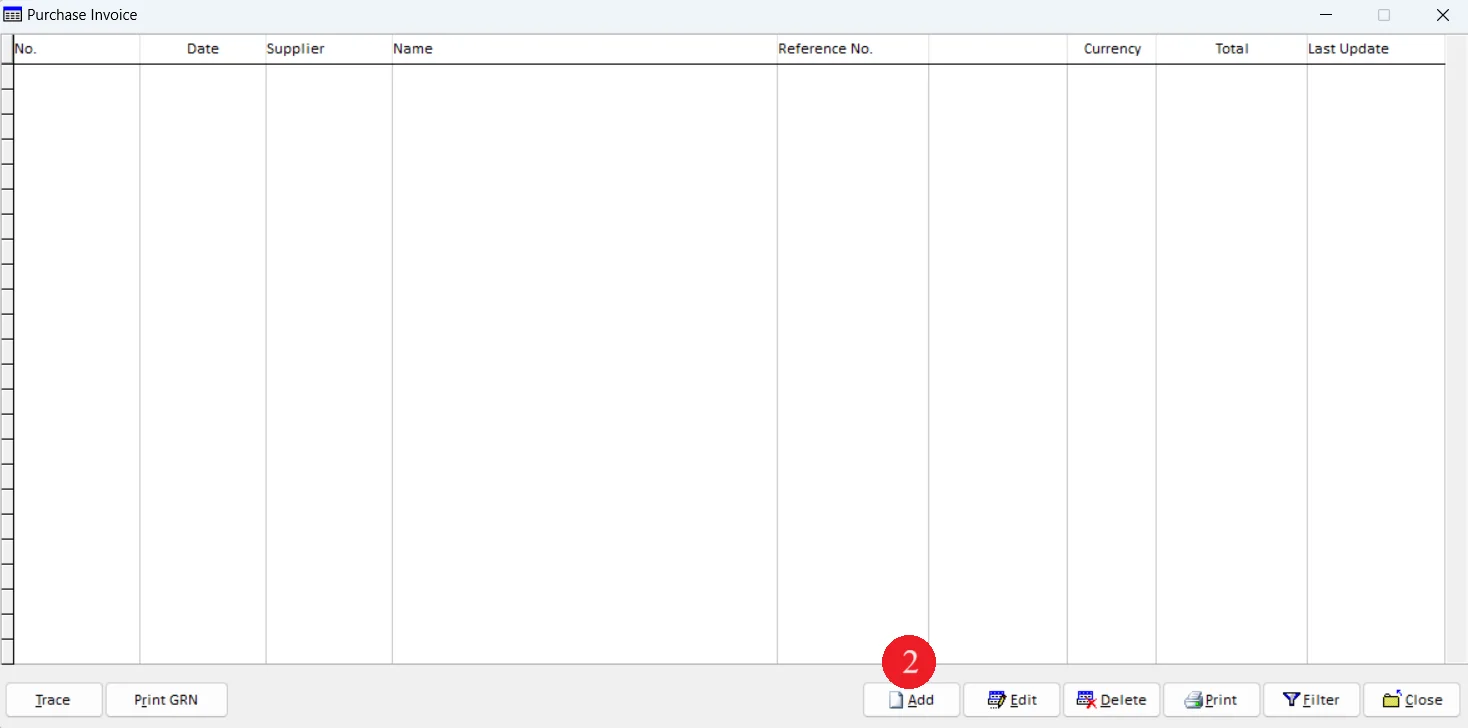
1. Go to Purchase and select Purchase Invoice
2. Click on Add button
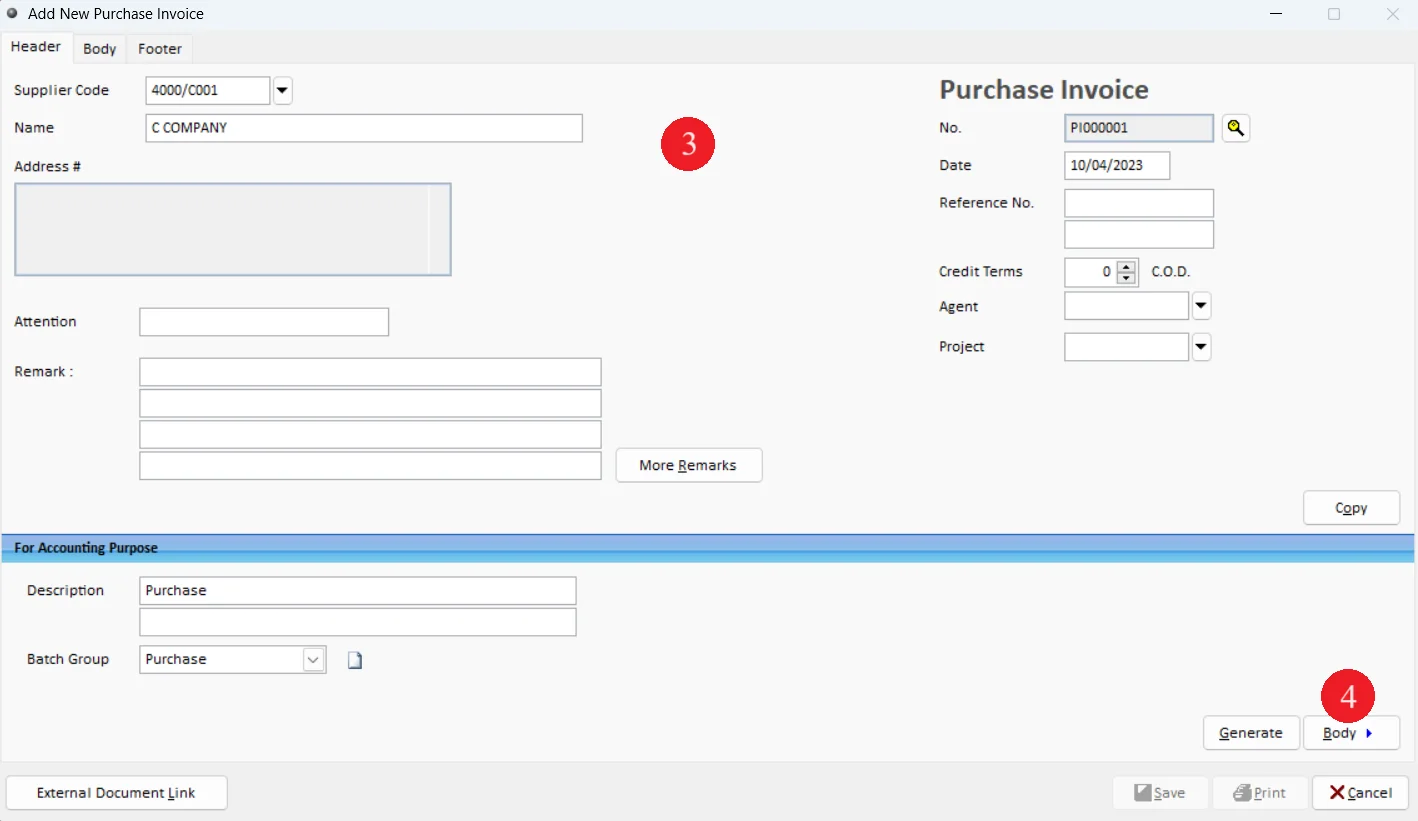
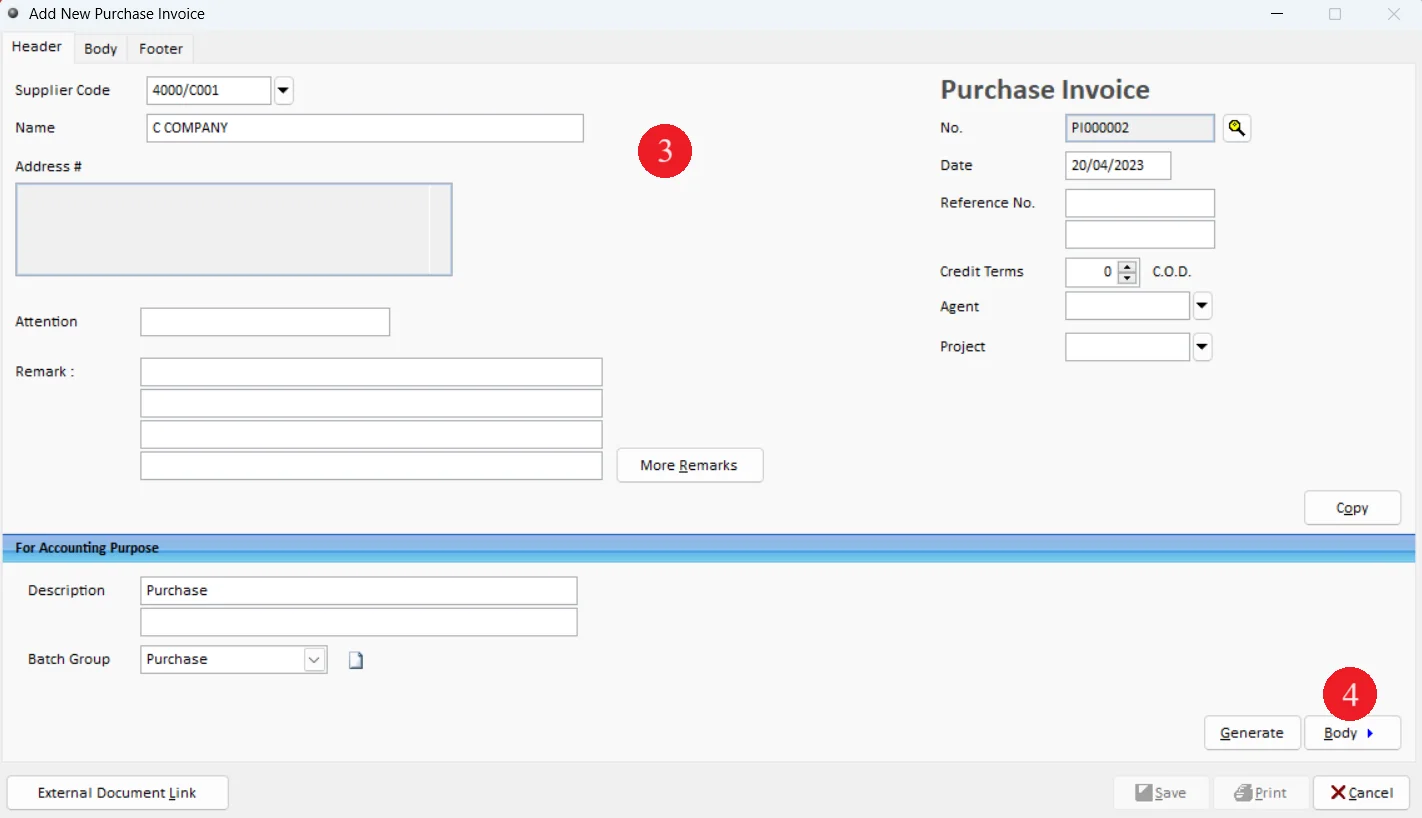
3. Enter Header detail according to Table 3
4. Go to Body Tab
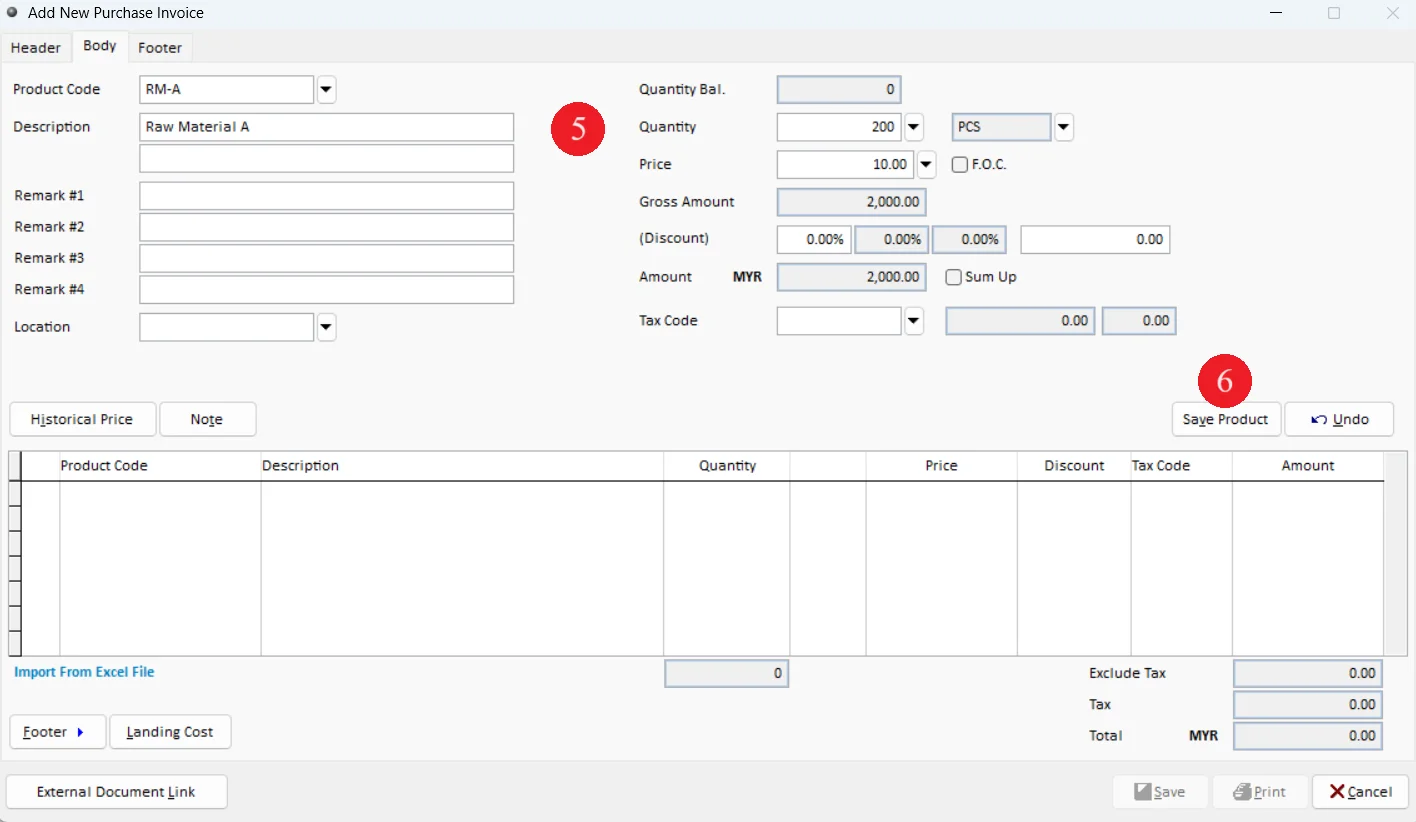
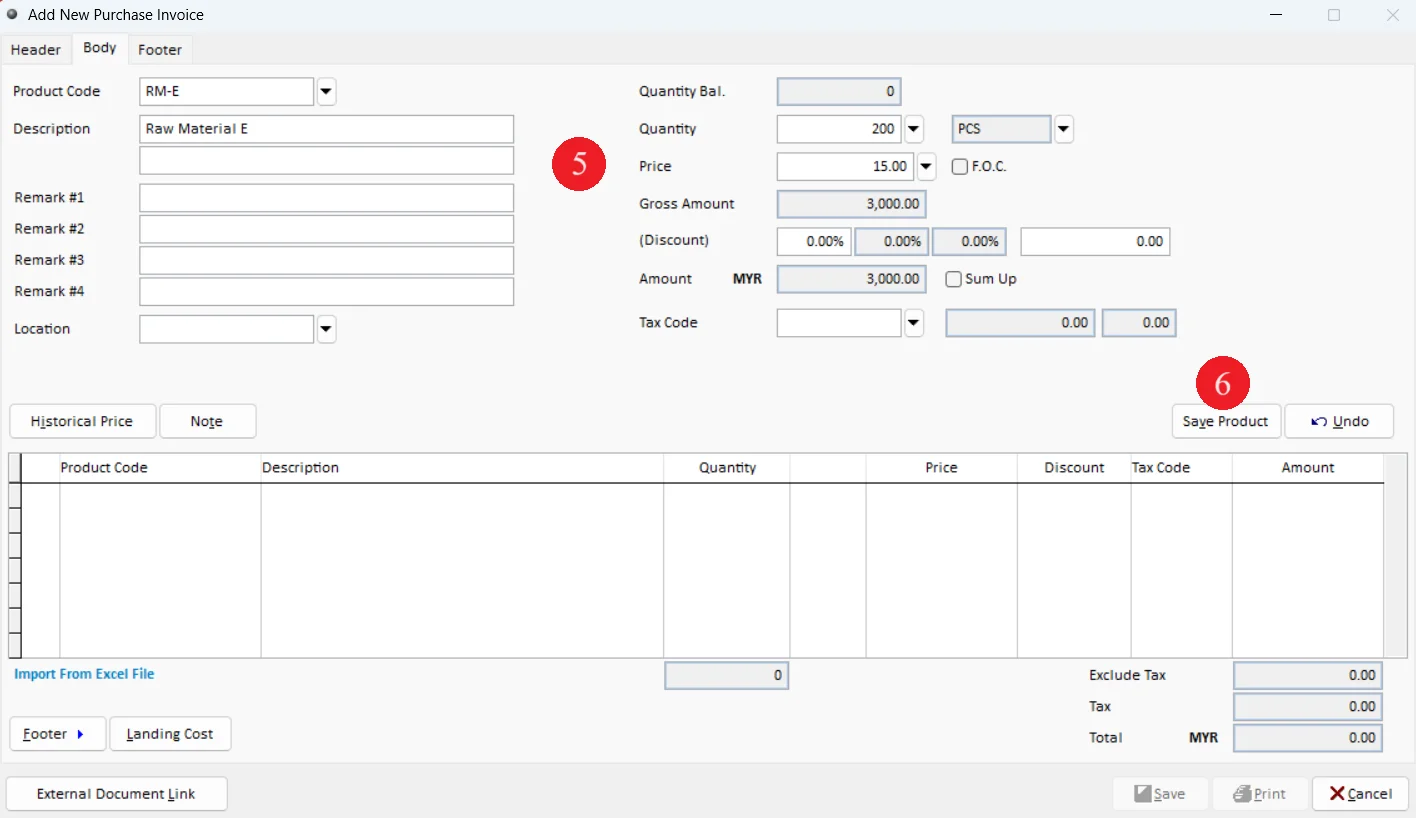
5. Enter Body detail according to Table 3
6. Click on Save A/C button
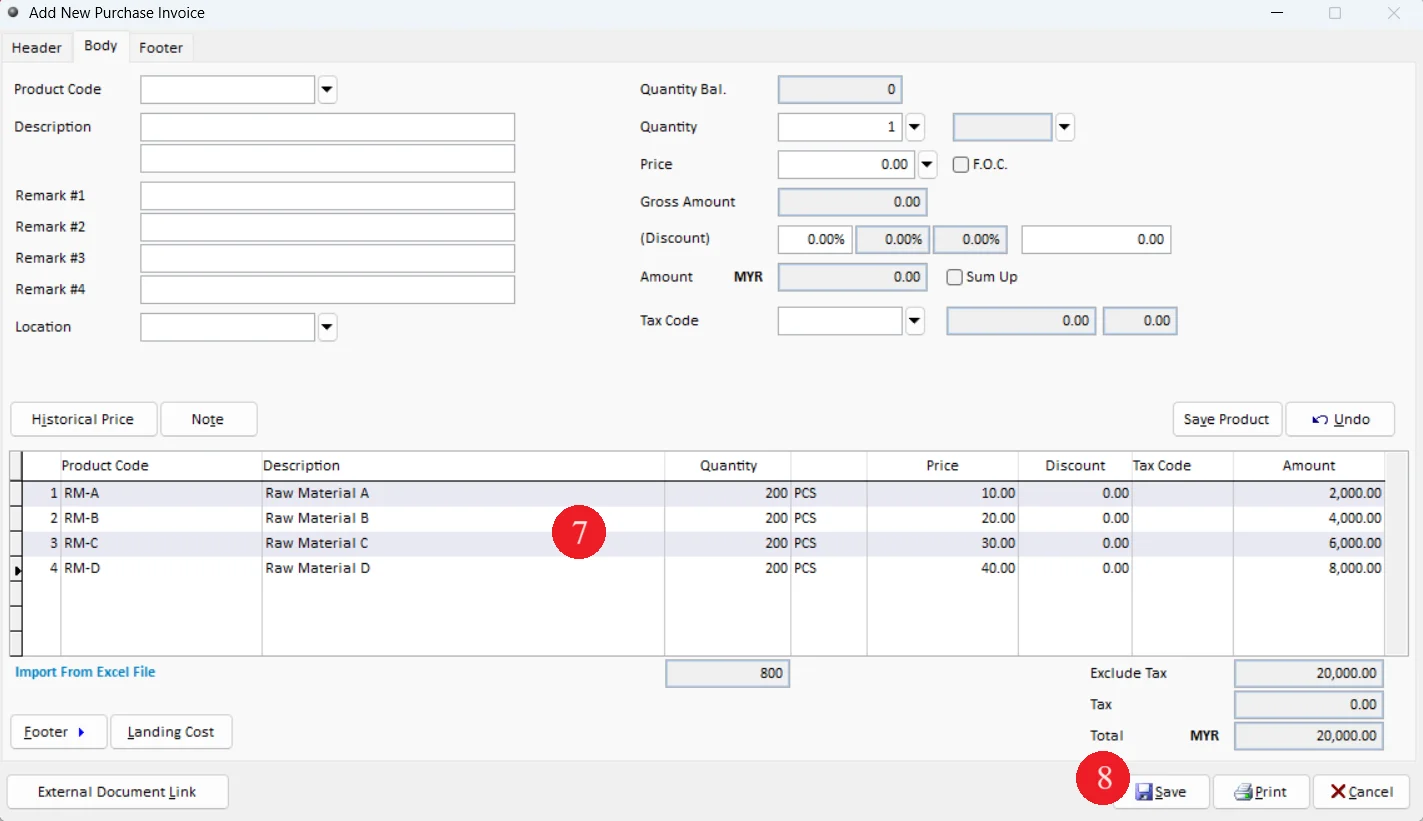
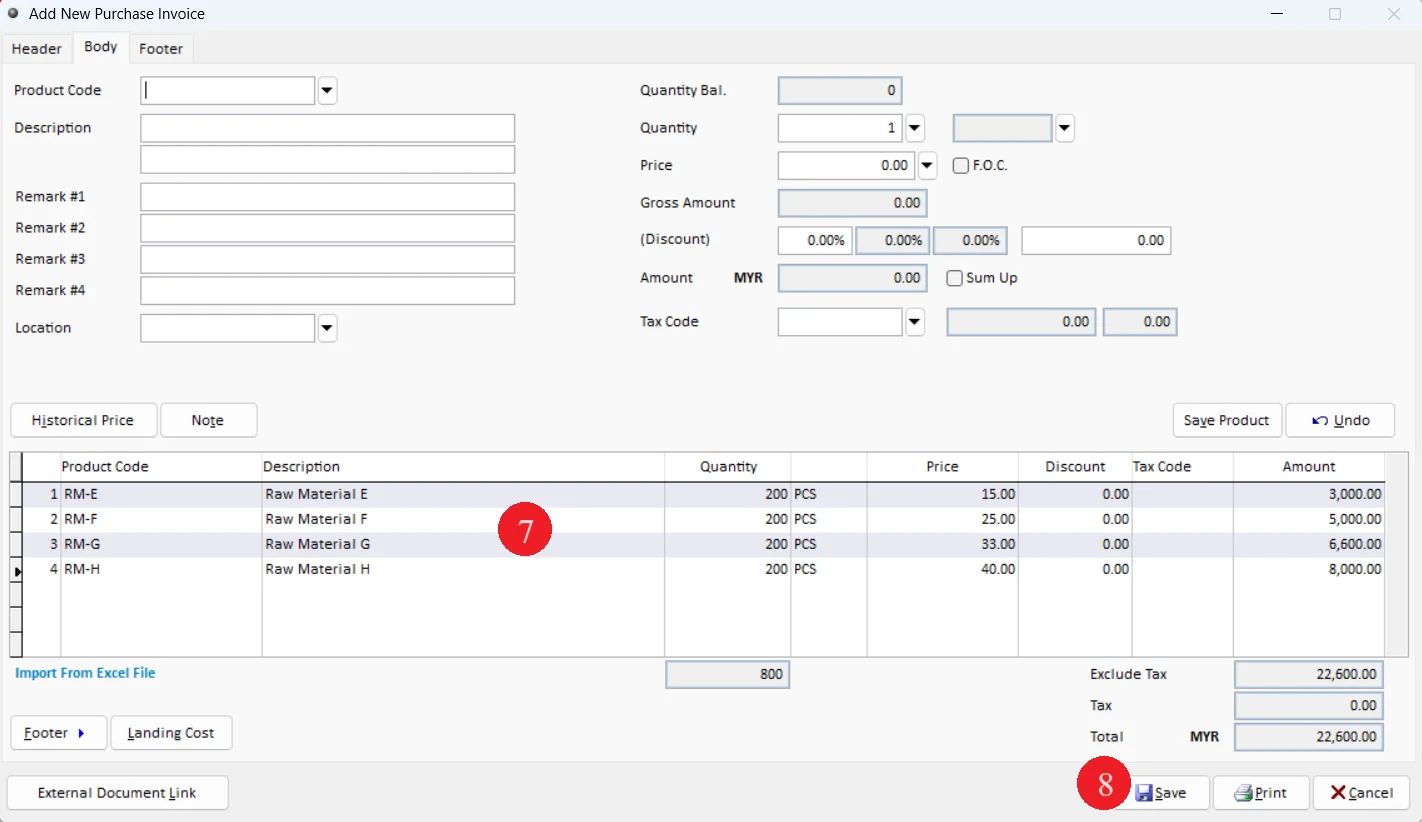
7. Continue to enter second product code according to Table 3
8. Click on Save button
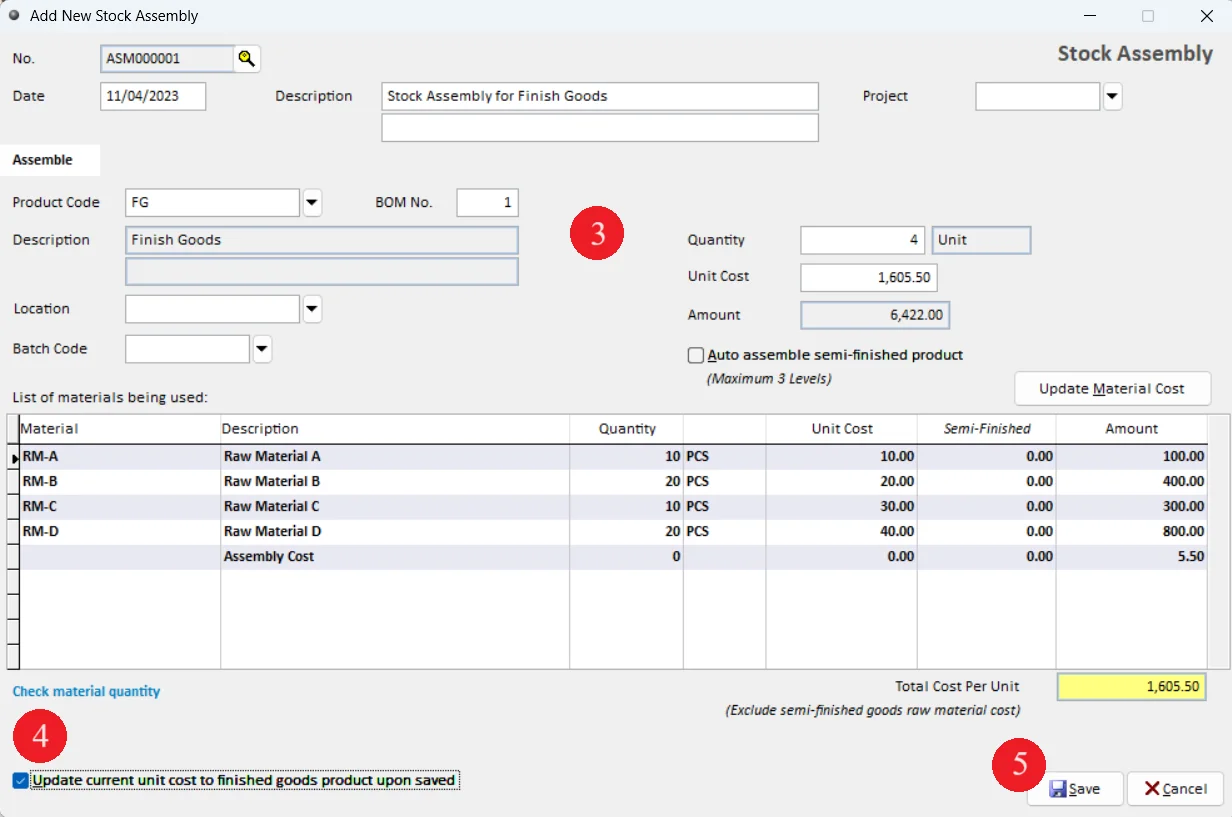
Table 4: Add stock assembly record
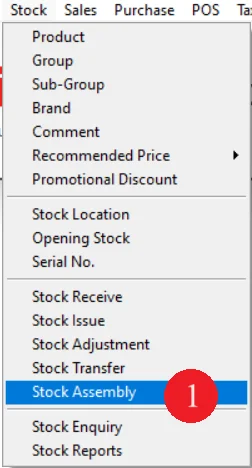
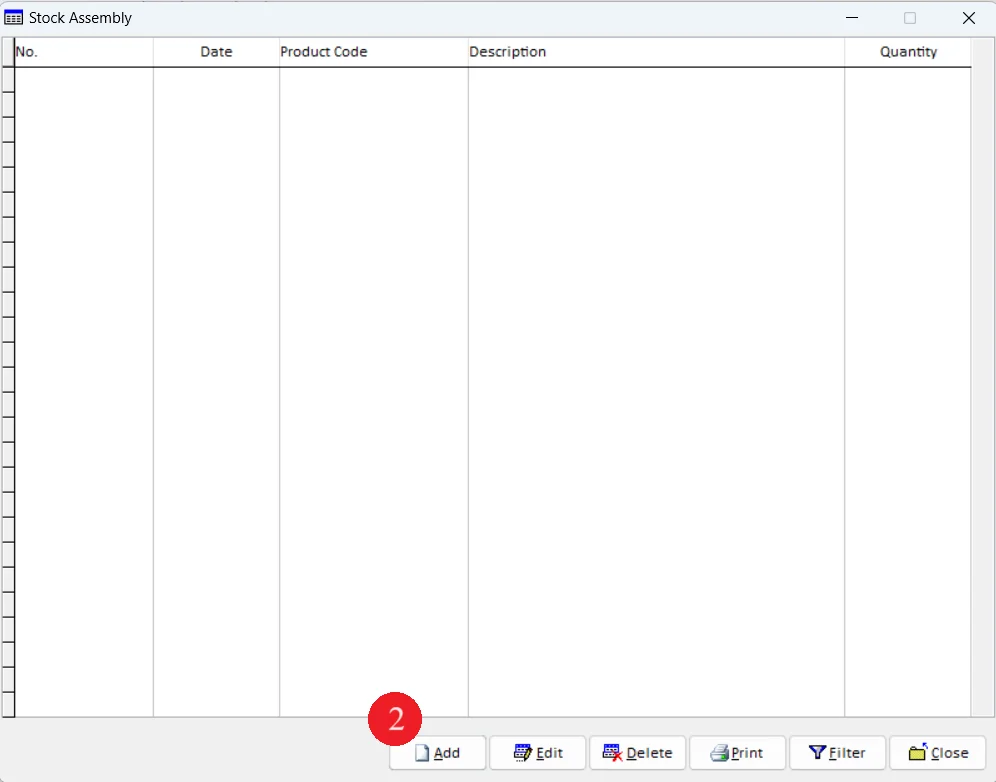
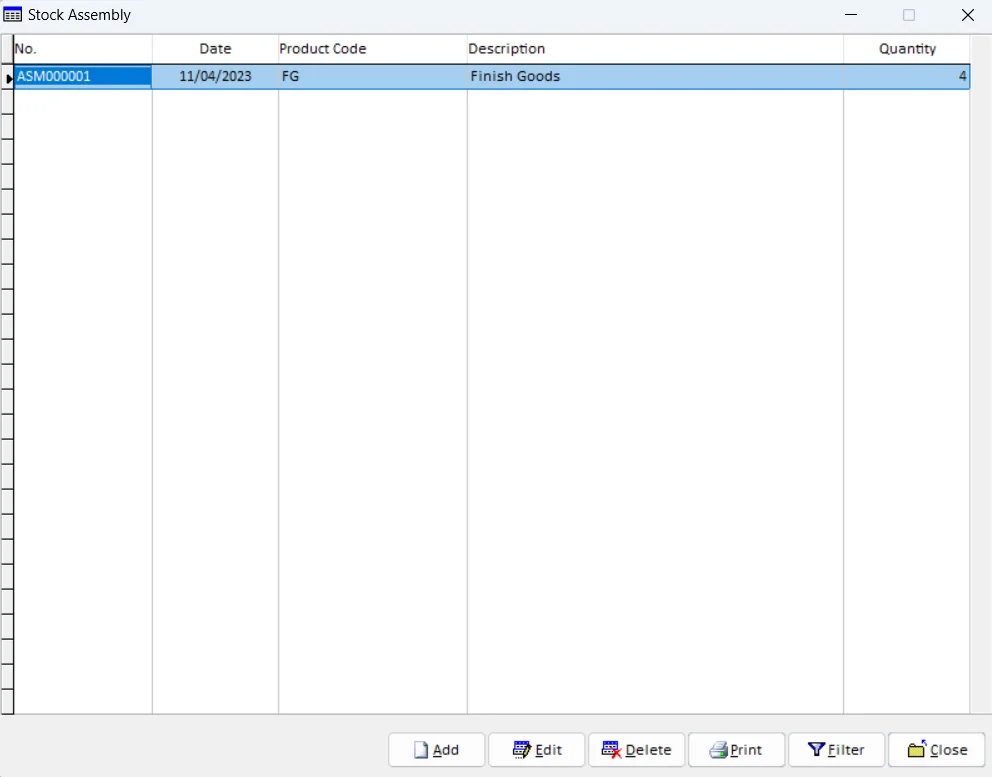
1. Go to Stock then select Stock Assembly
2. Click on Add button
3. Enter the records according to Table 4
4. Tick on Update current unit cost to finish goods product upon saved
5. Click on Save button
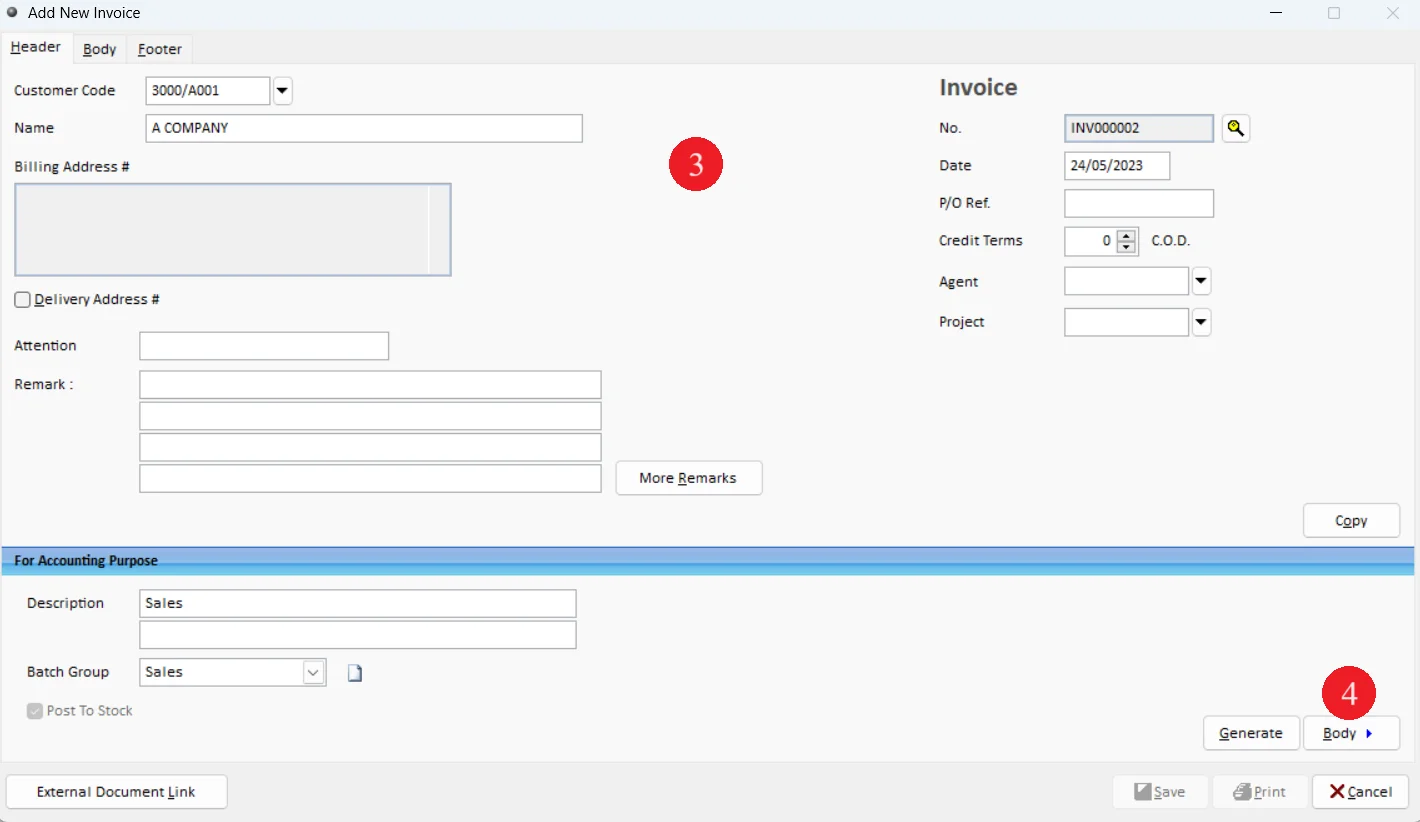
Table 5: Add sales invoice
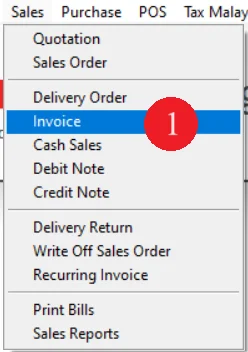
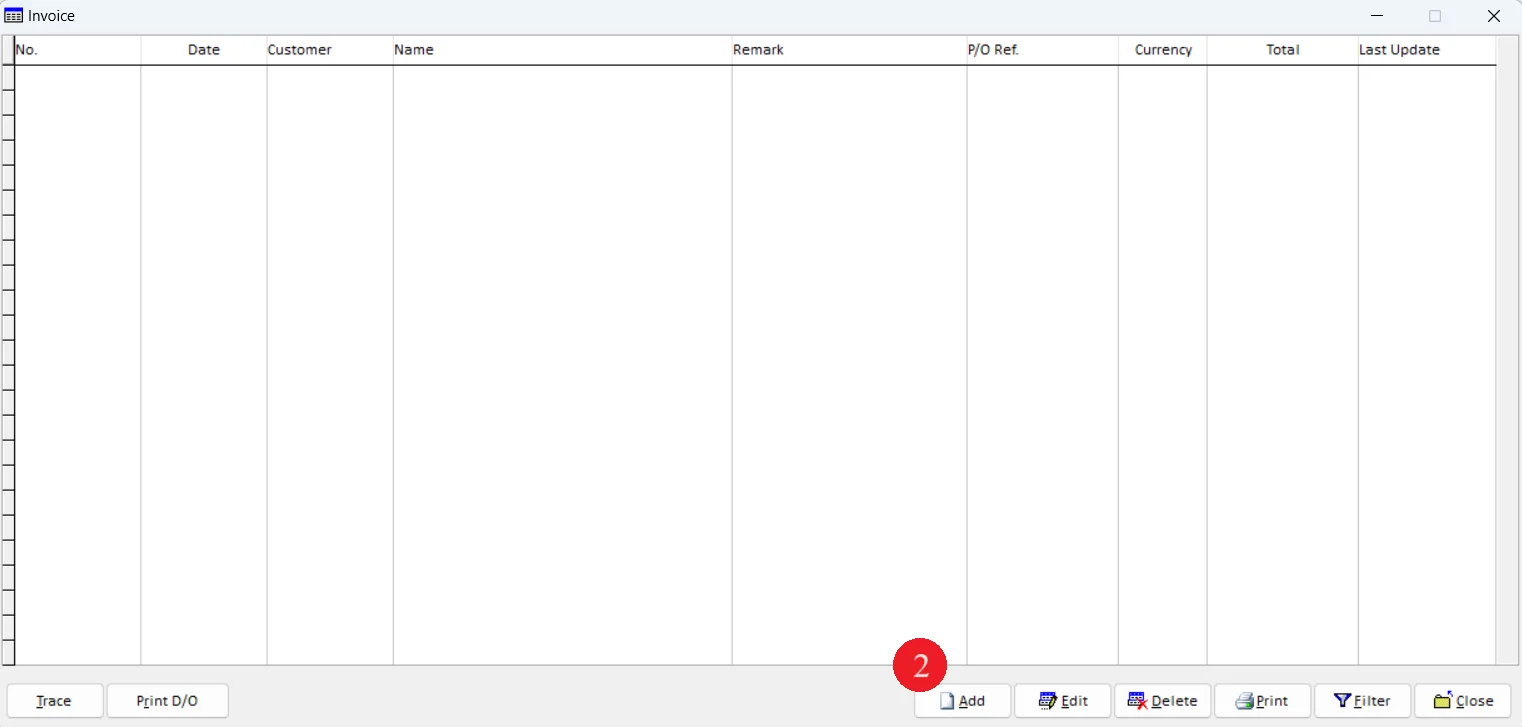
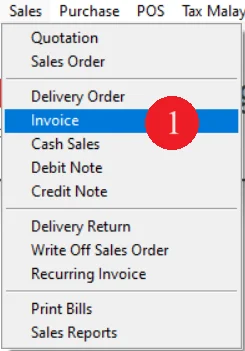
1. Go to Sales and select Invoice
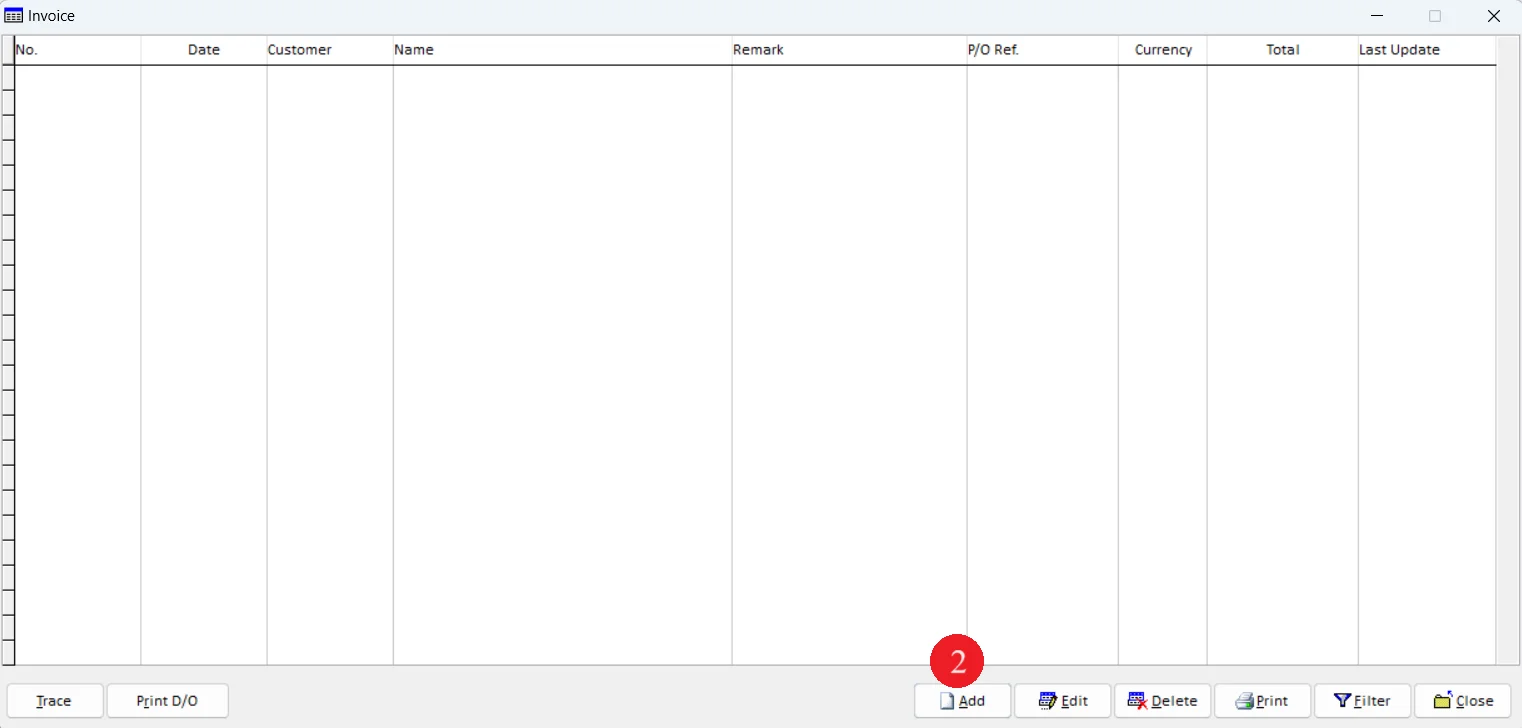
2. Click on Add button
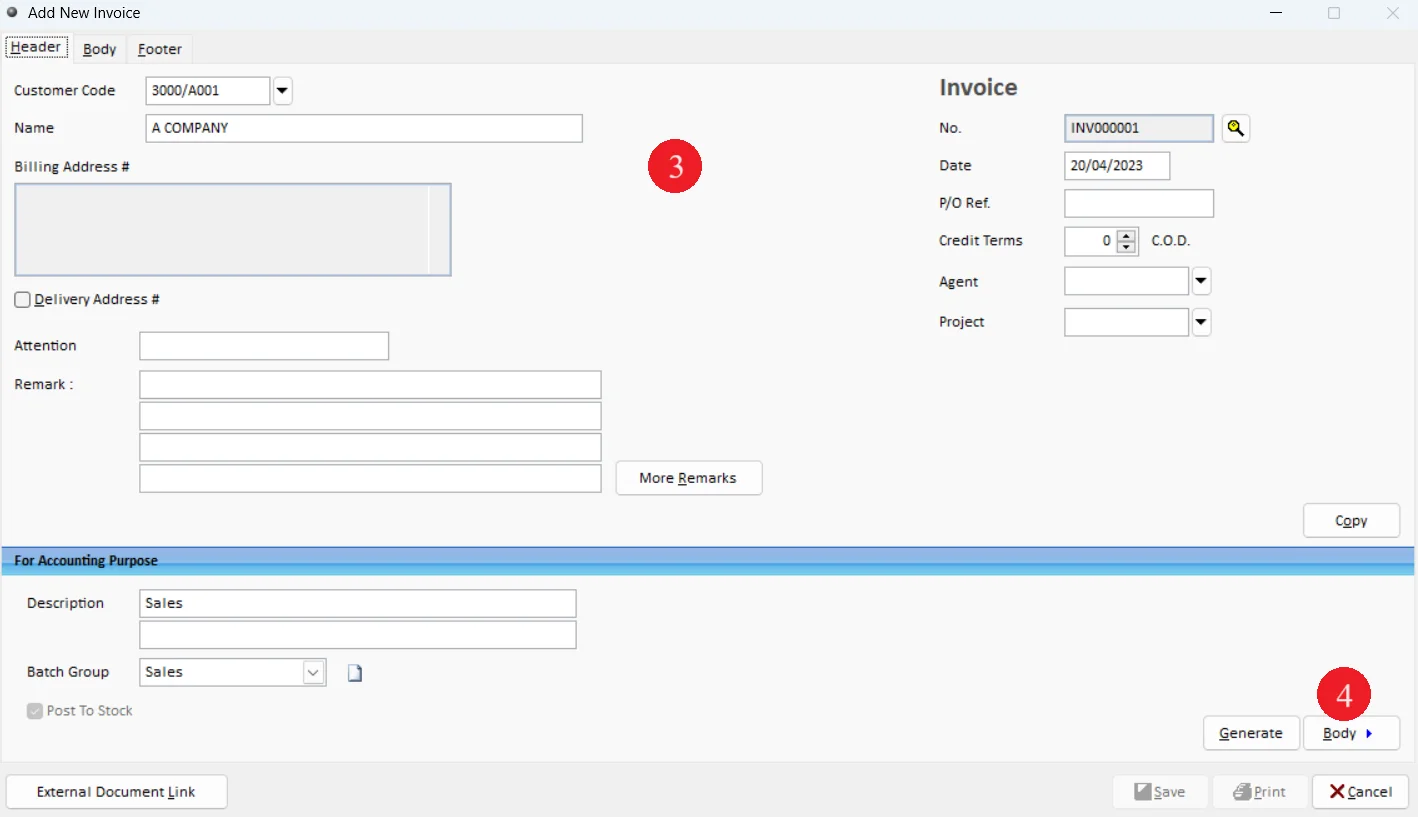
3. Enter Header detail according to Table 5
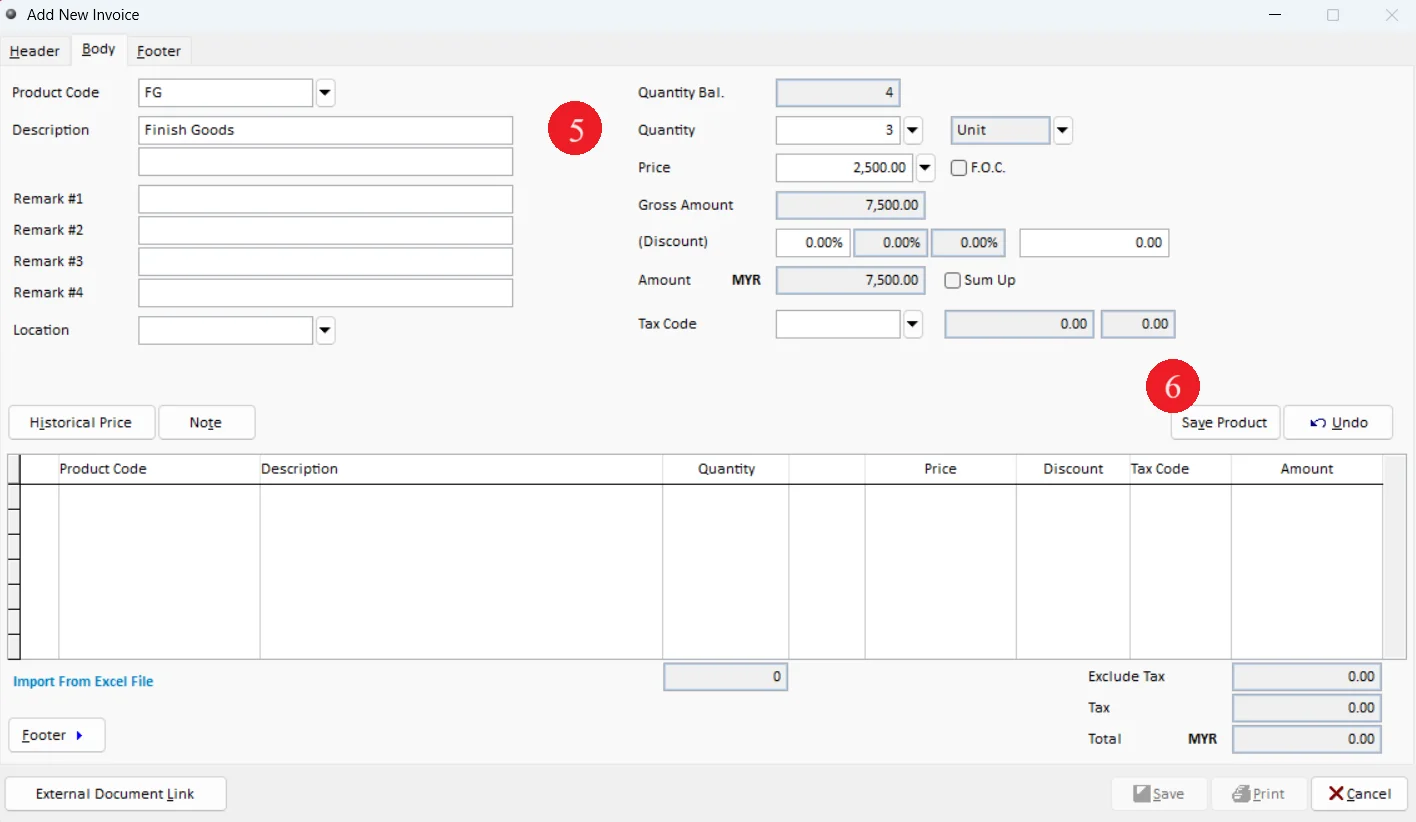
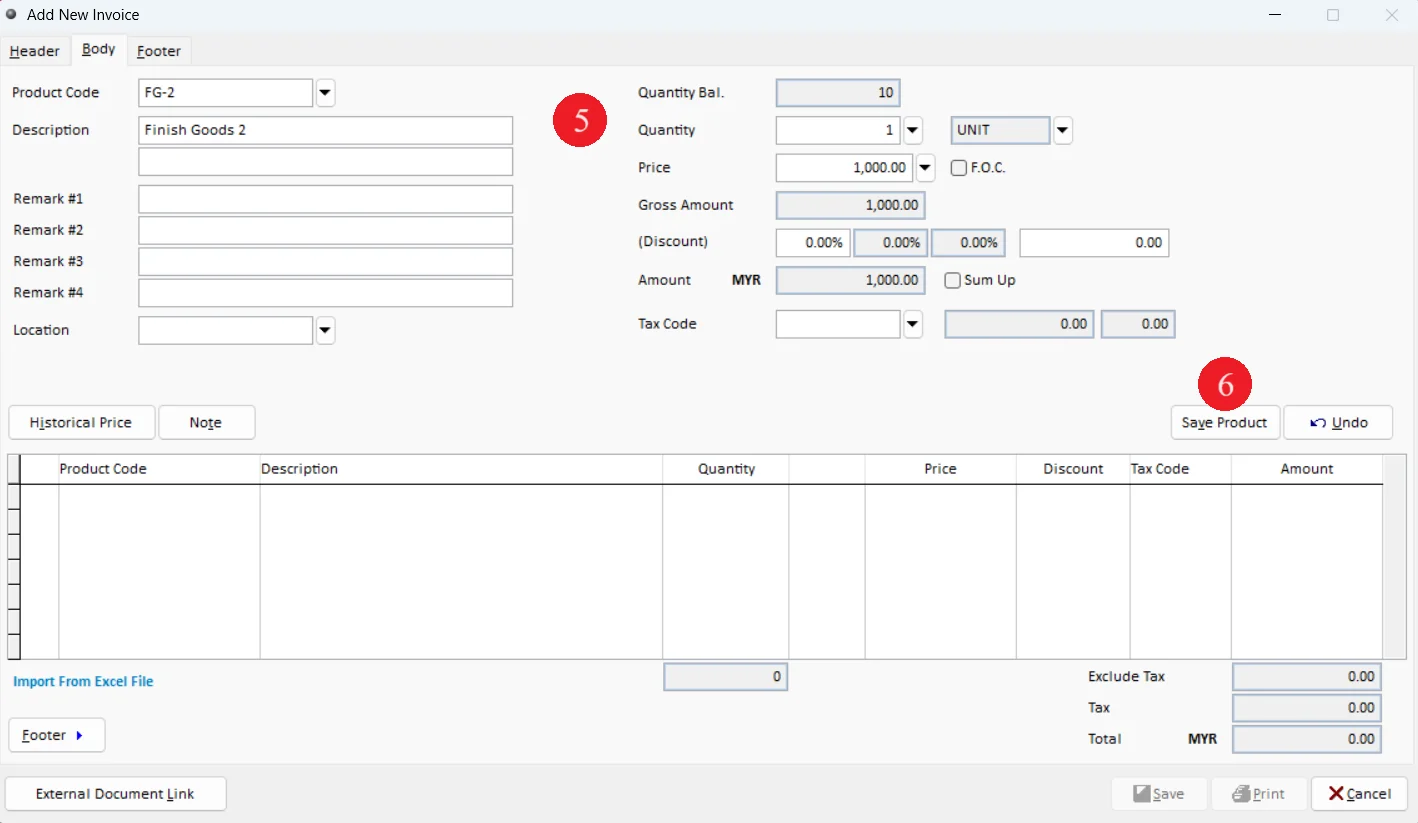
4. Go to Body Tab
5. Enter Body detail according to Table 5
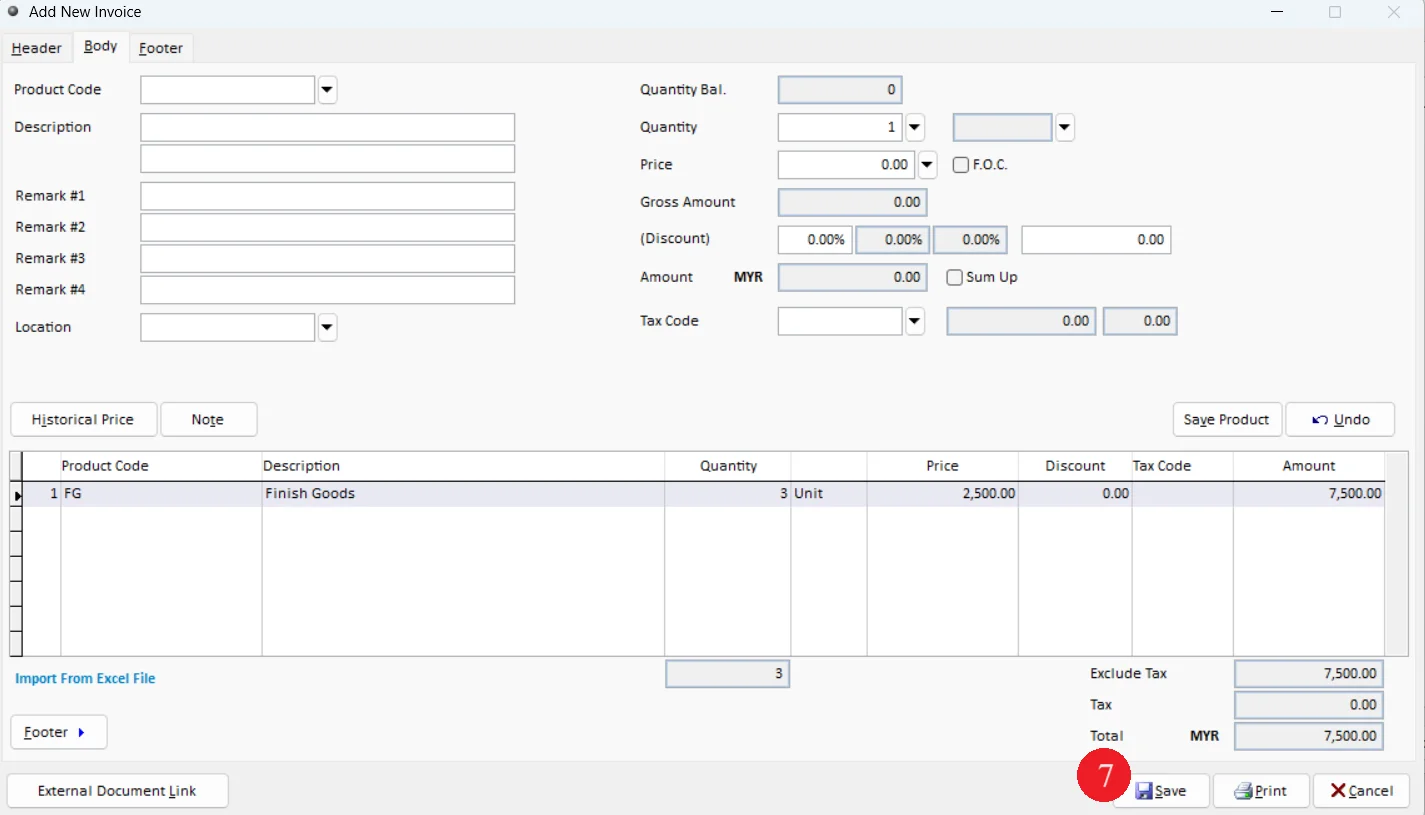
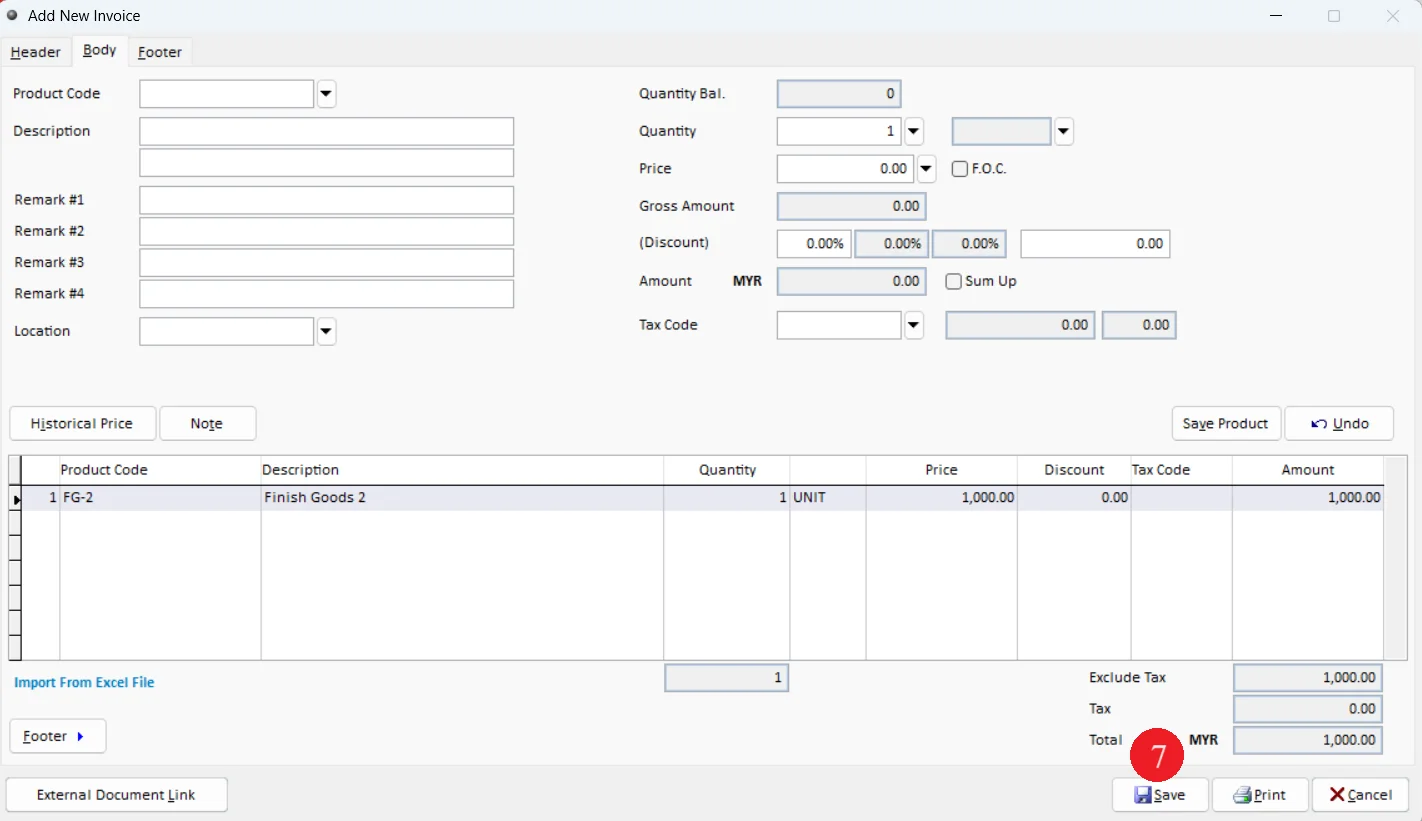
6. Click on Save Product button
7. Click on Save button
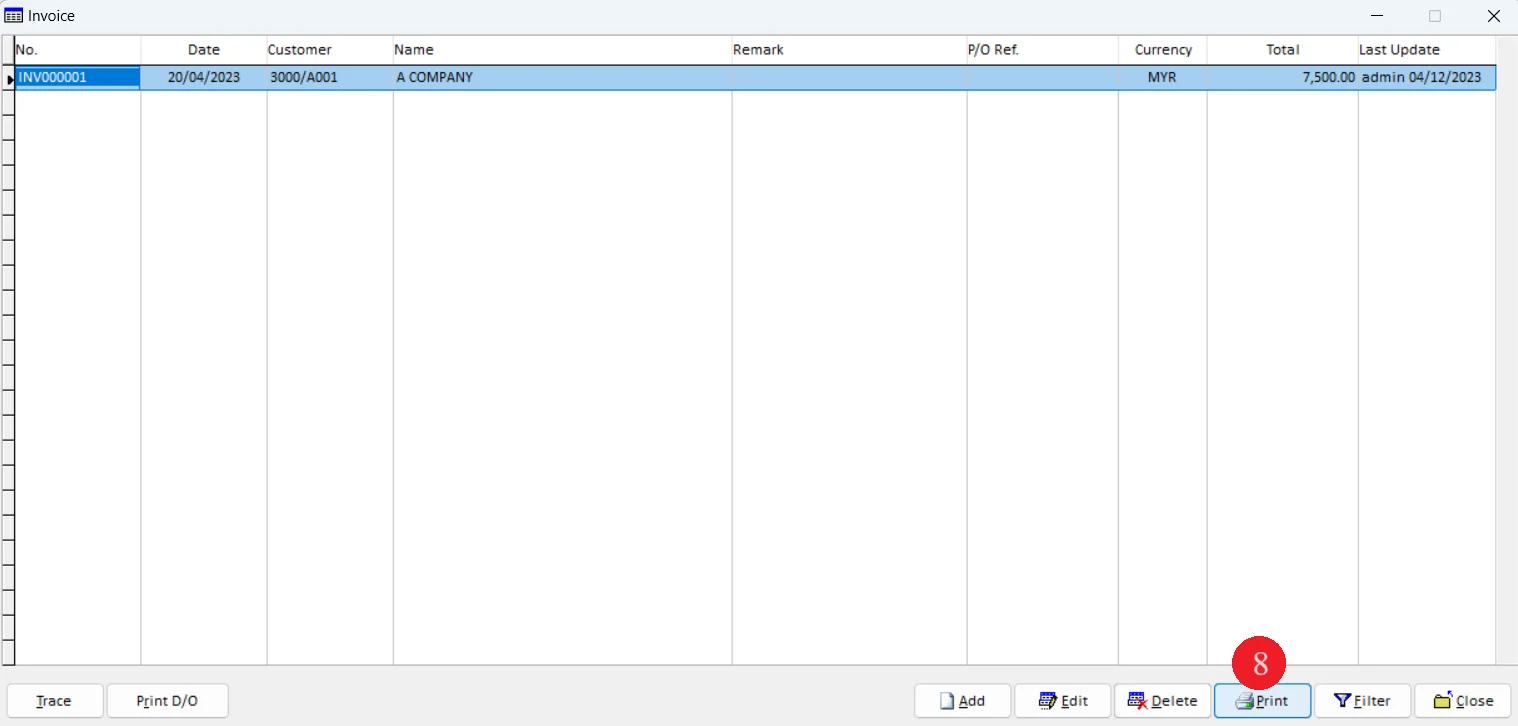
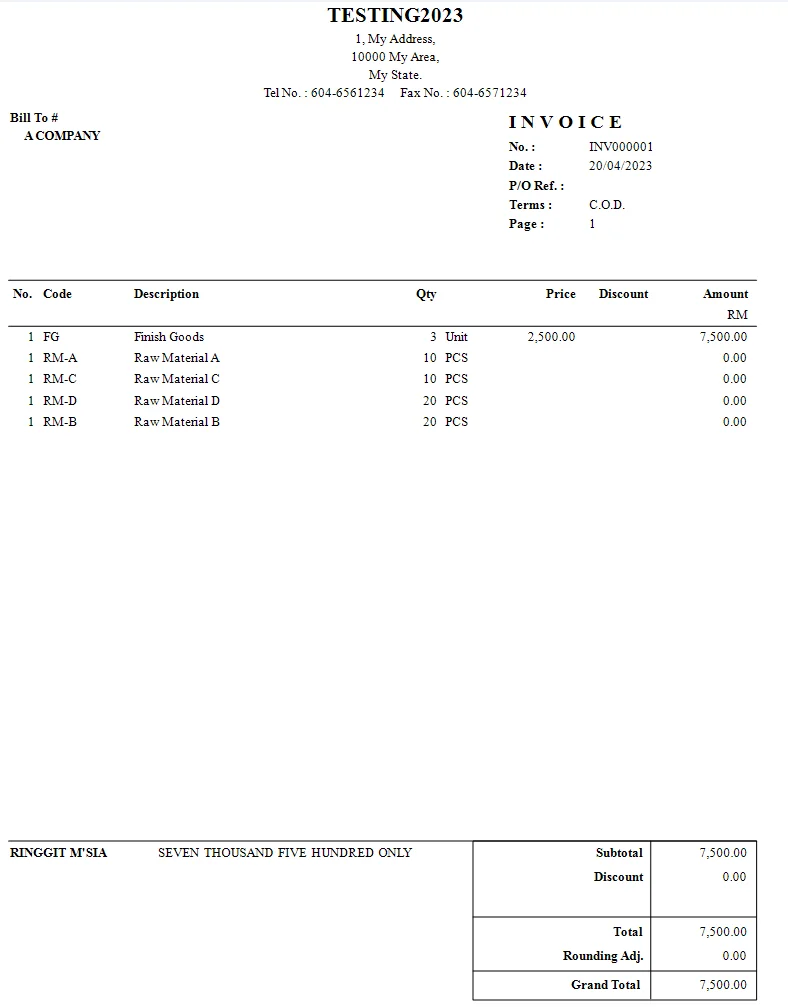
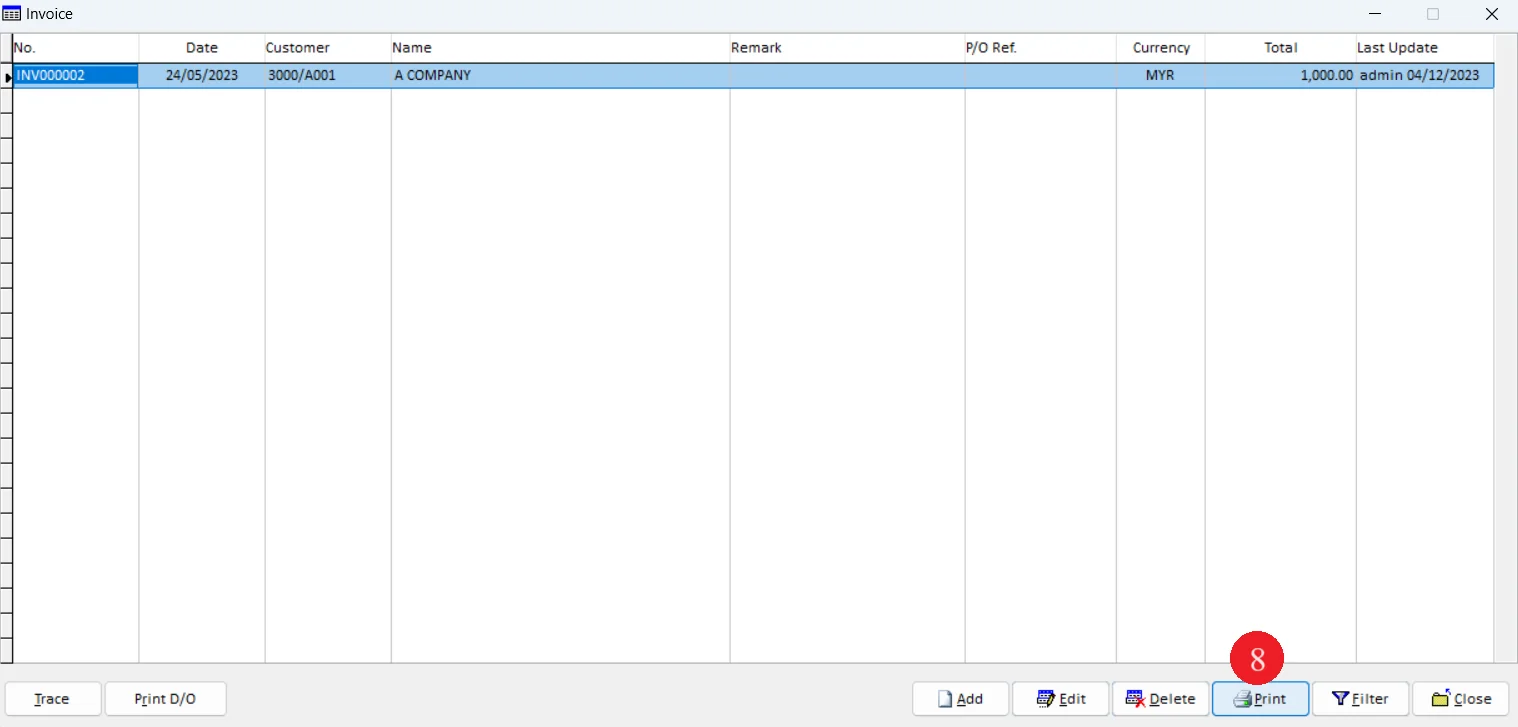
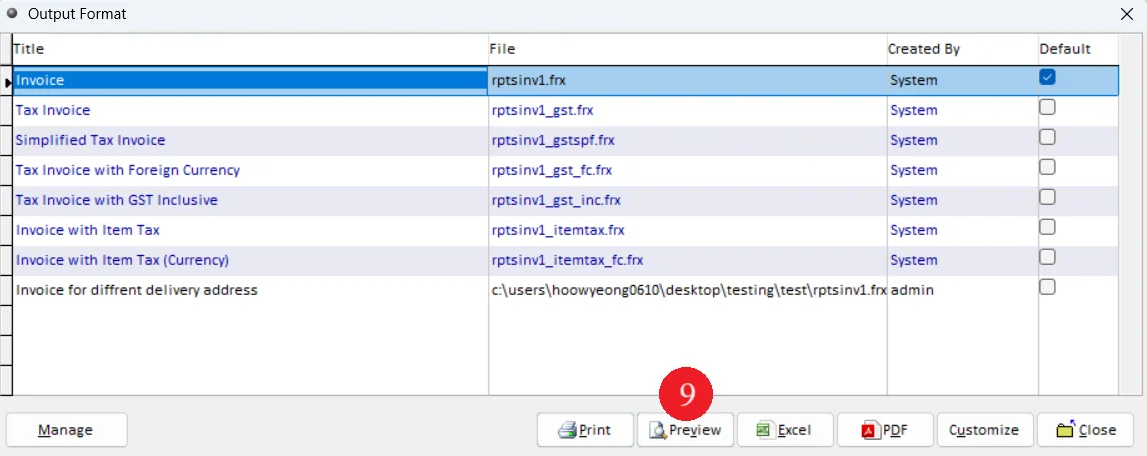
8. Click on Print button to print out the invoice
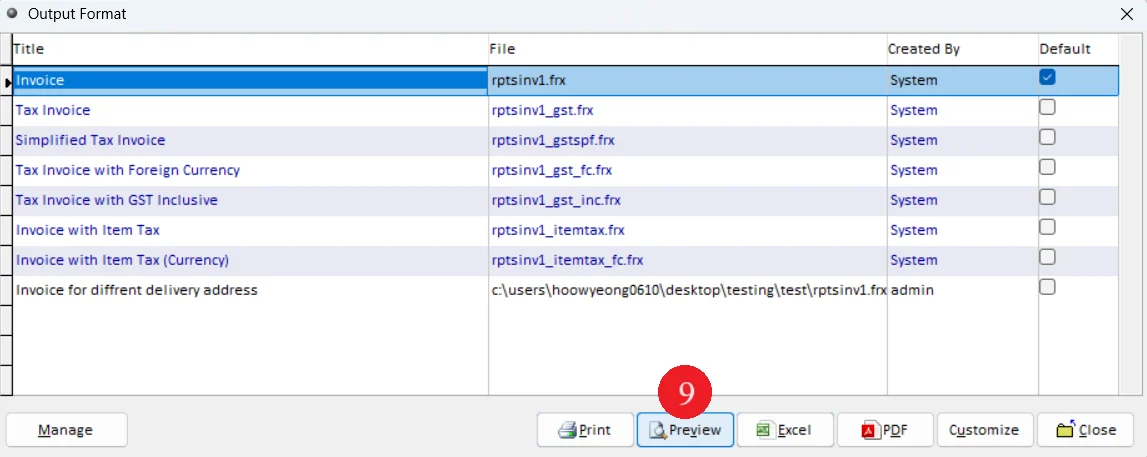
9. Select the format and click on Preview button
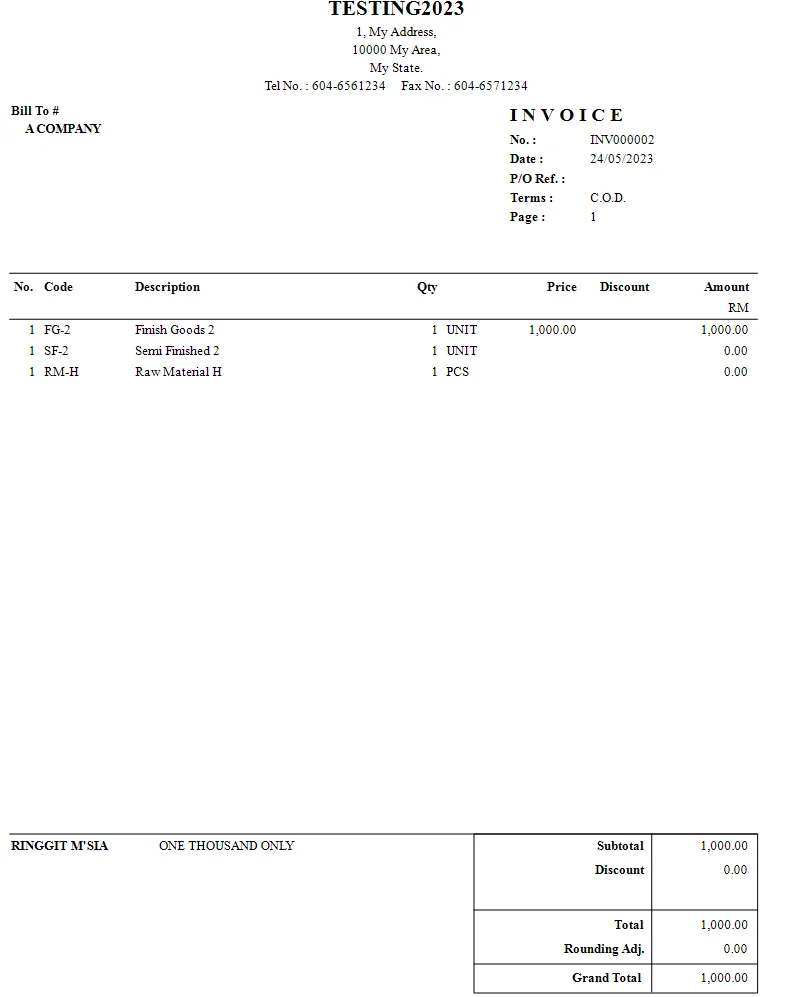
The outcome of the report as follow:
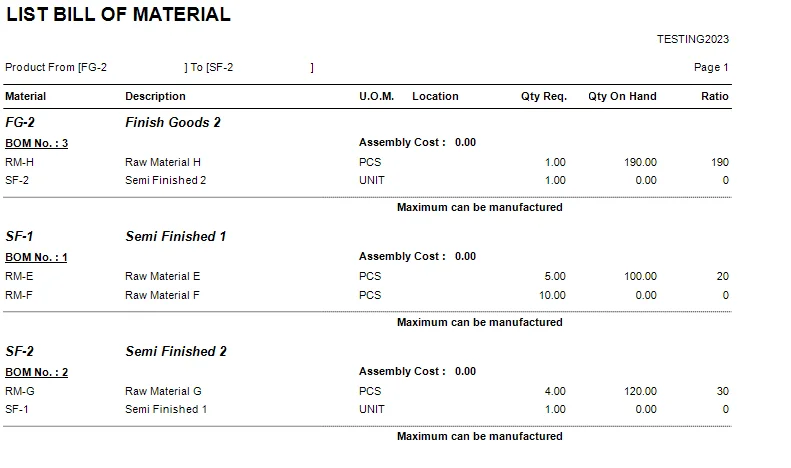
Through this report, user able to trace quantity on hand that available to generate finished goods and estimate the maximum finished goods quantity that can be generated.
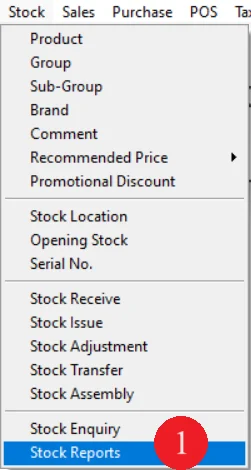
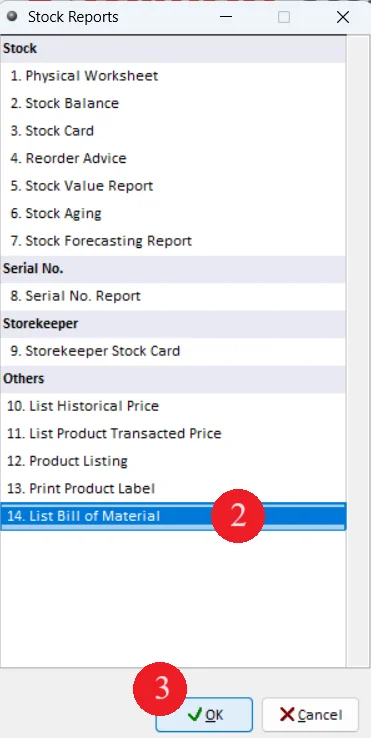
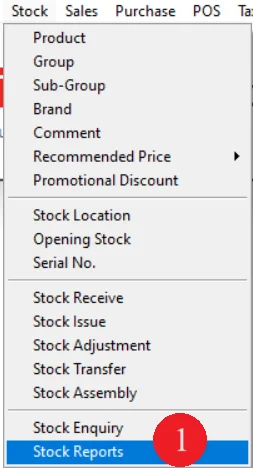
1. Go to Stock and select Stock Reports
2. Select the List Bill of Material report
3. Click on OK button
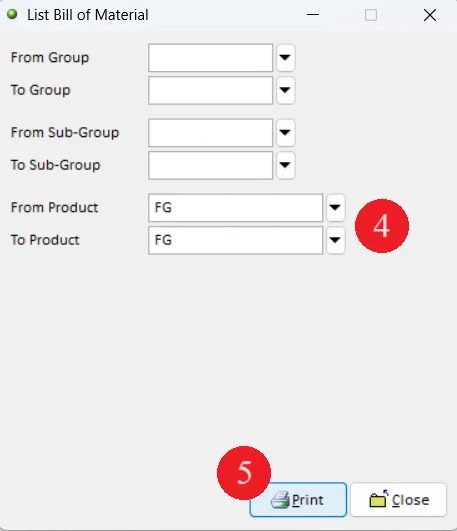
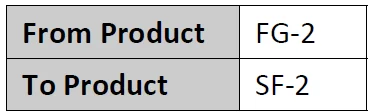
4. Enter the detail as follow:
5. Click on Print button
6. Click on Preview button
The outcome of the report as follow:
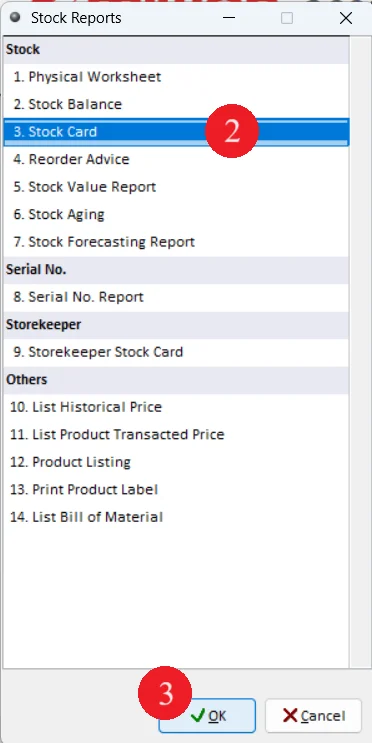
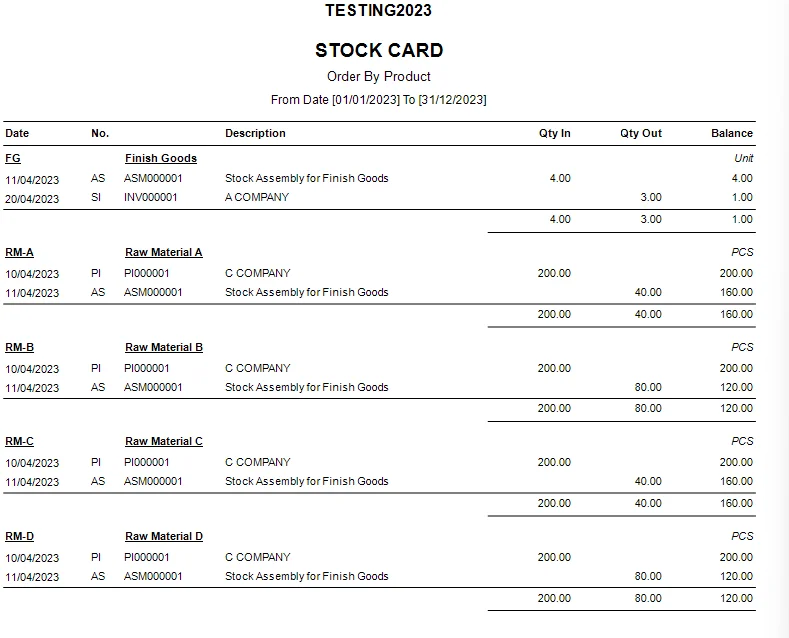
1. Go to Stock and select Stock Reports
2. Select on Stock Card report
3. Click on OK button
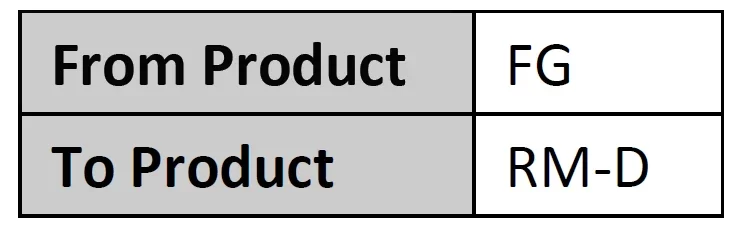
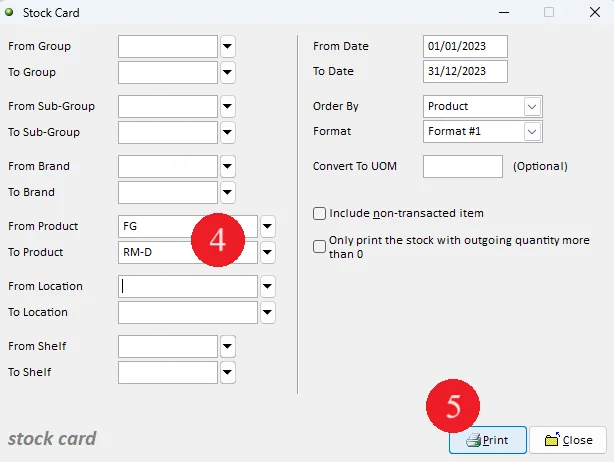
4. Enter the detail as follow:
5. Click on Print button
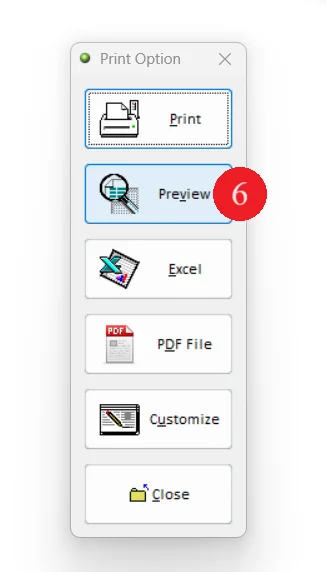
6. Click on Preview button
The outcome of the report as follow:
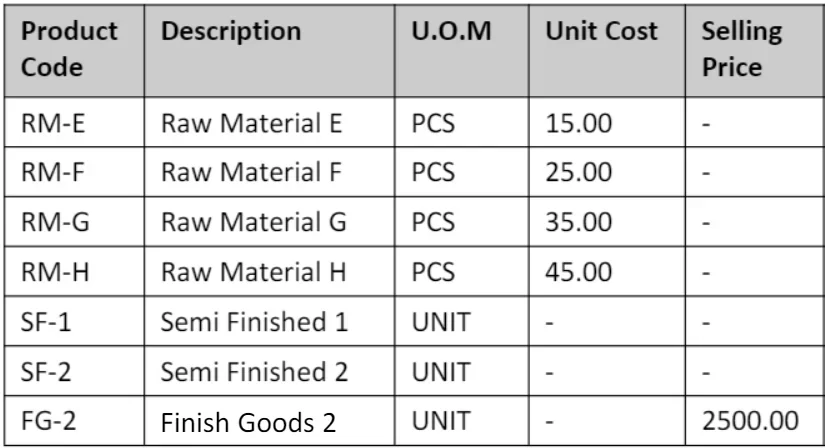
Table 1: Add product record
1. Go to Stock and select Product
2. When Product screen appears, click on Add button
3. Enter product detail on Table 1
4. Click on Save button
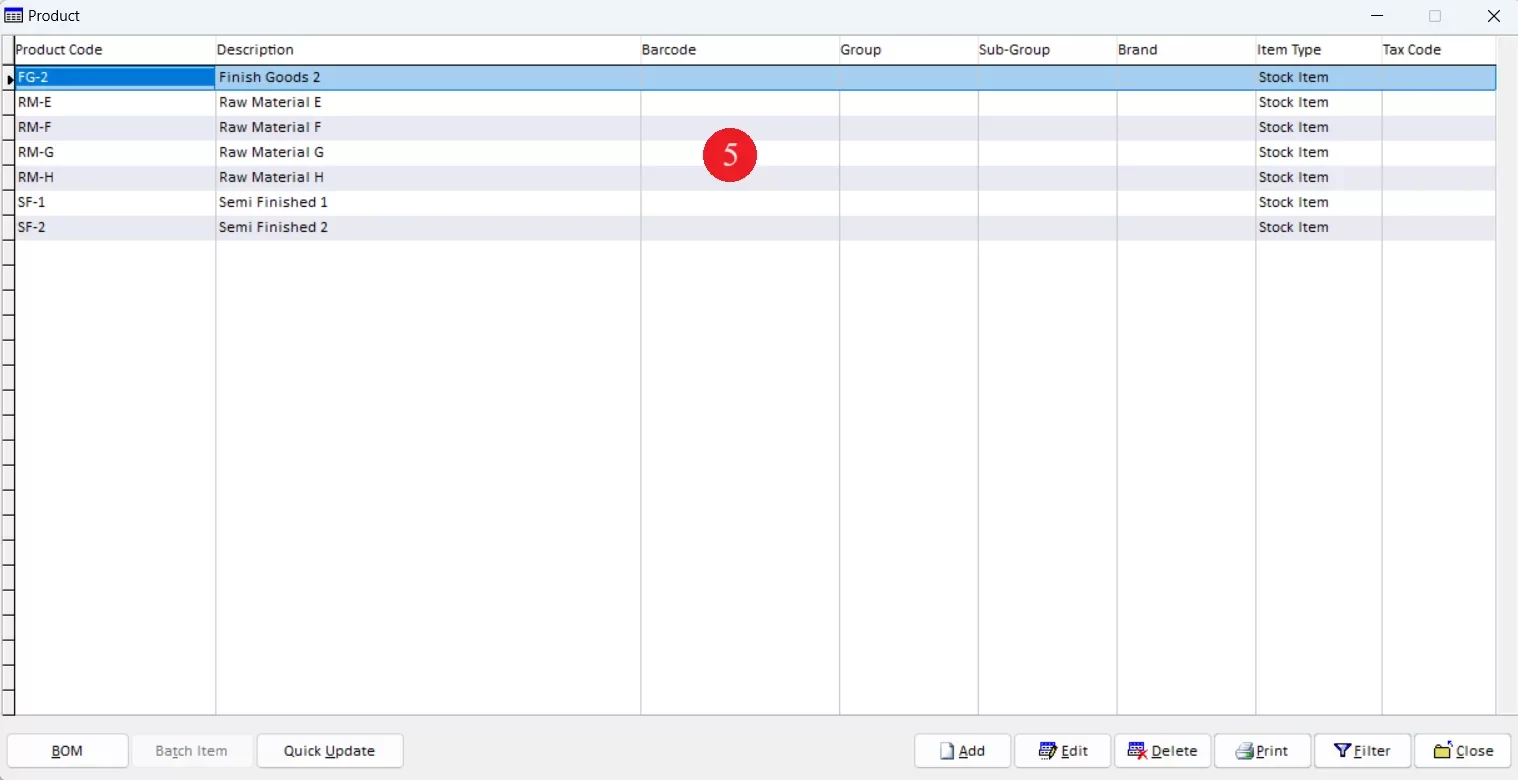
5. Continue enter next product record according to Table 1
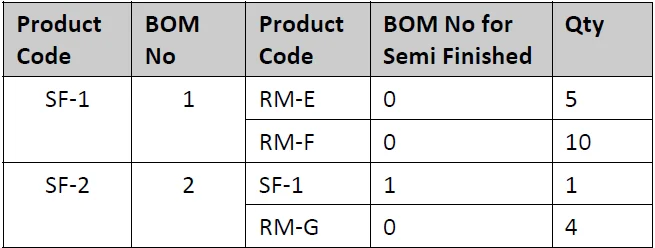
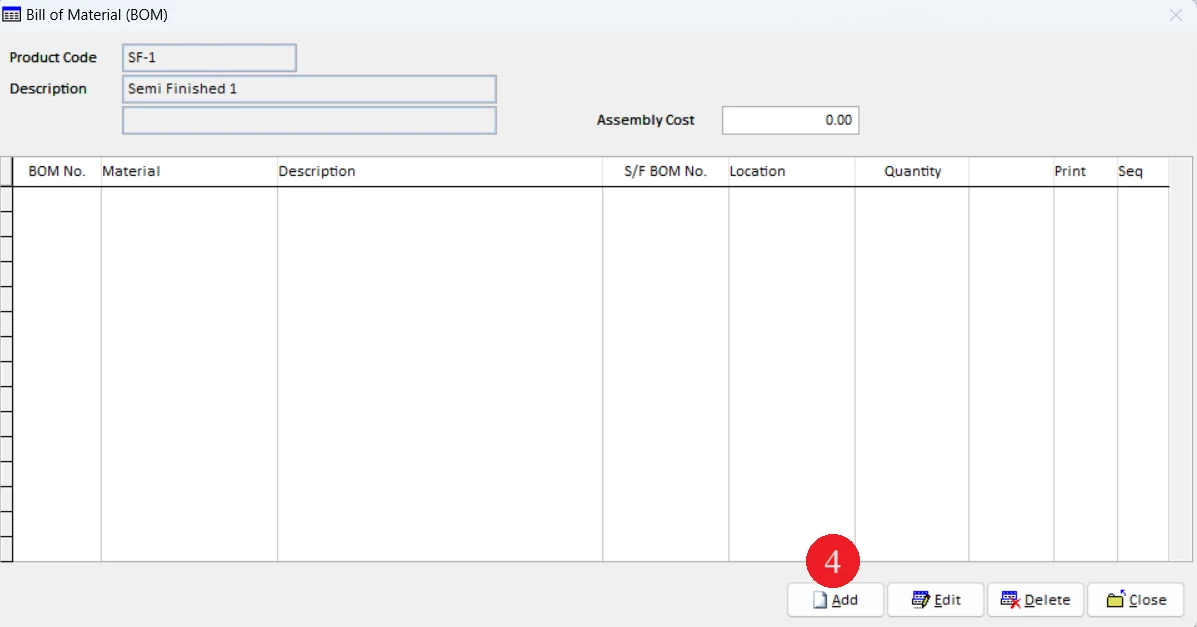
Table 2: Add components to semi-finished goods
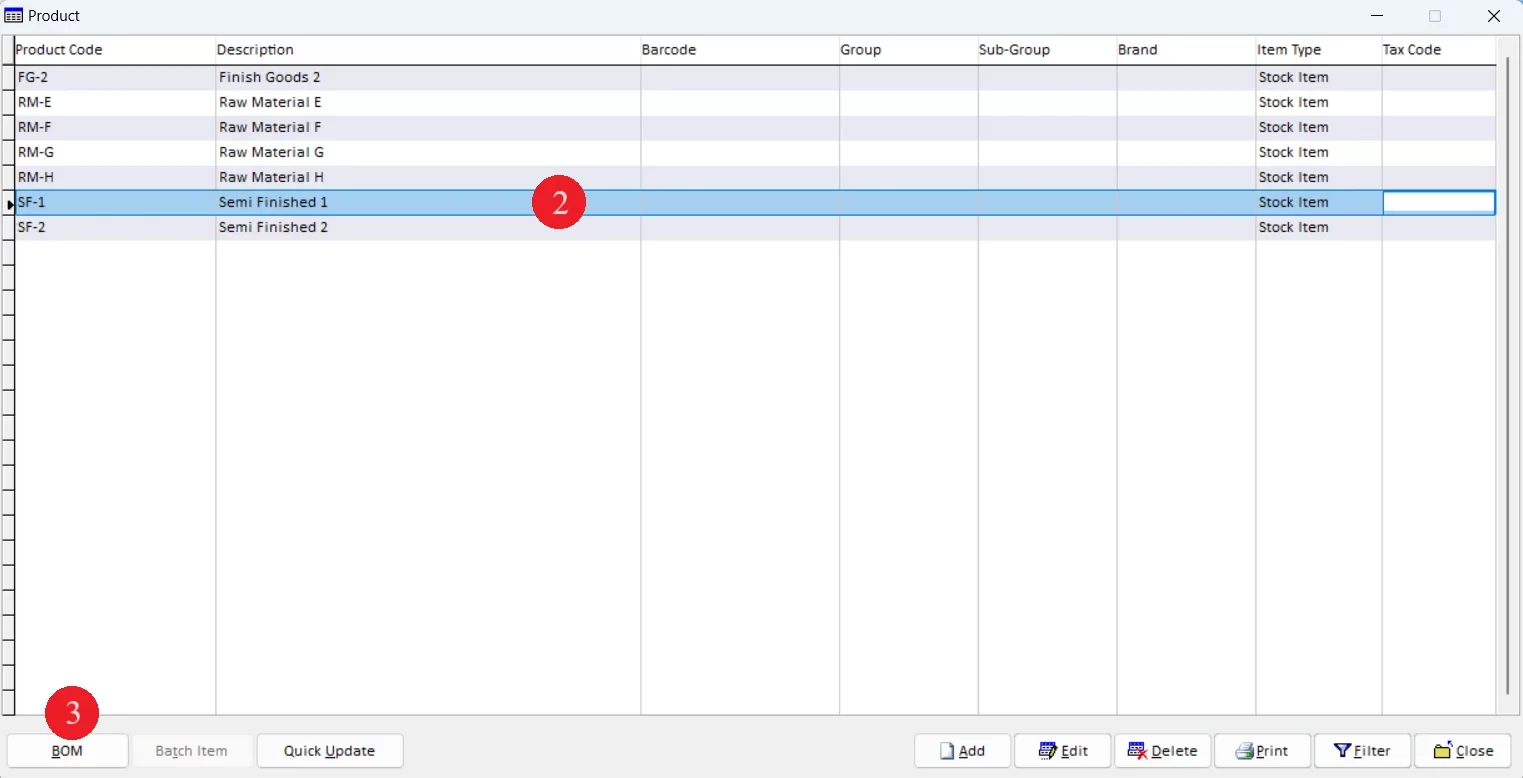
1. Go to Stock and select Product
2. Select first product code according to Table 2
3. Click on BOM button
4. Click on Add button
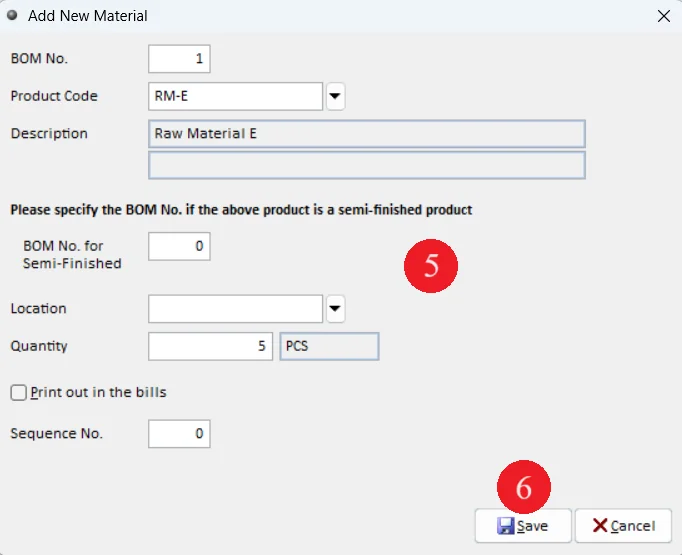
5. Enter record according to Table 2
6. Click on Save button
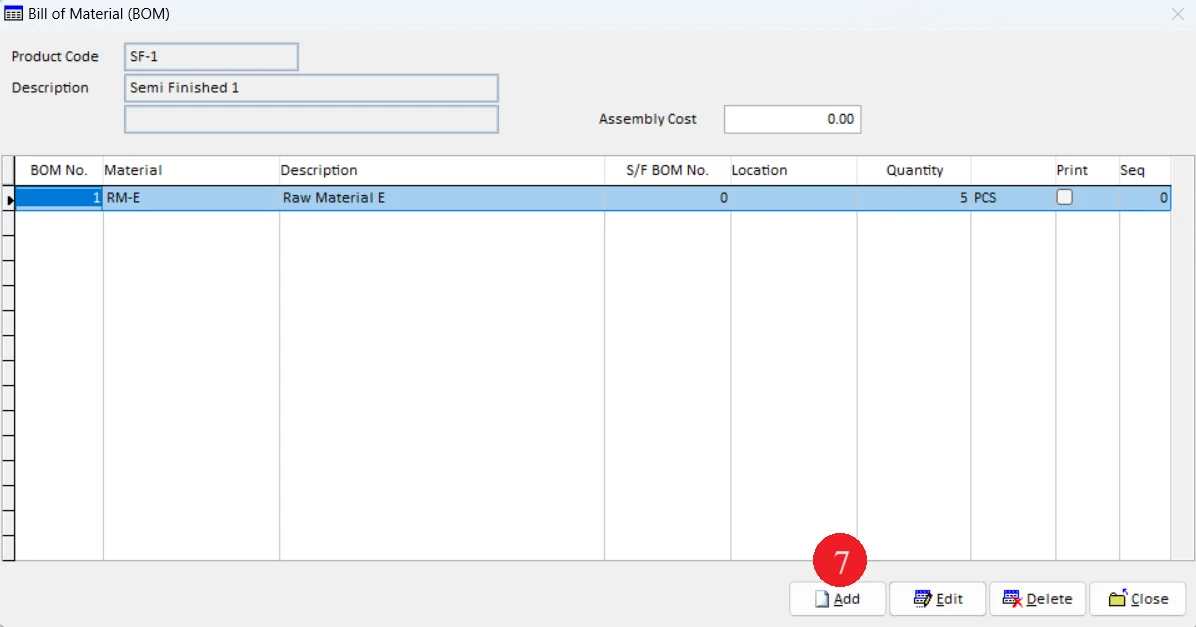
7. First item for semi-finished goods displayed, click on Add button to add second item
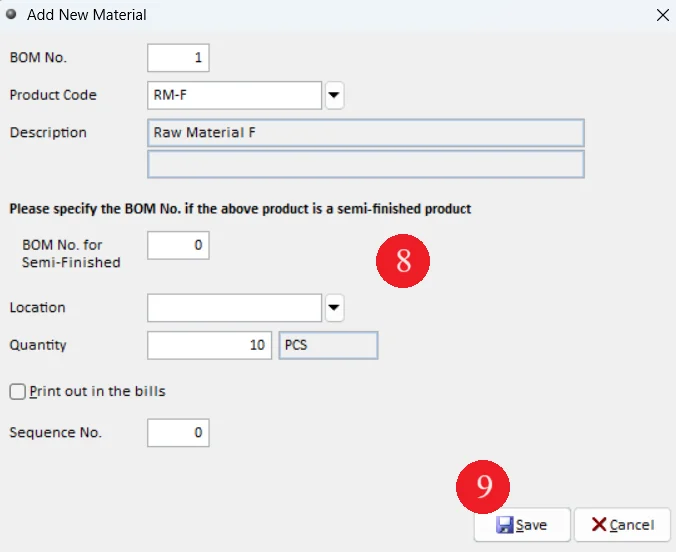
8. Enter record according to Table 2
9. Click on Save button
10. Repeat step 2 to step 9 to enter second semi-finished goods
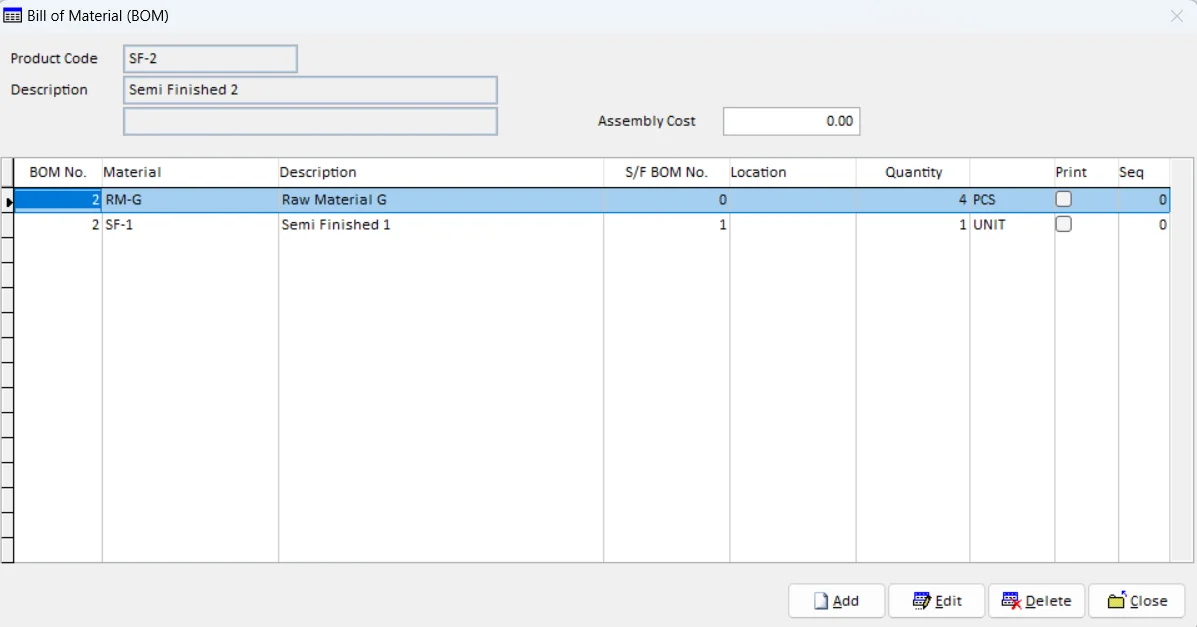
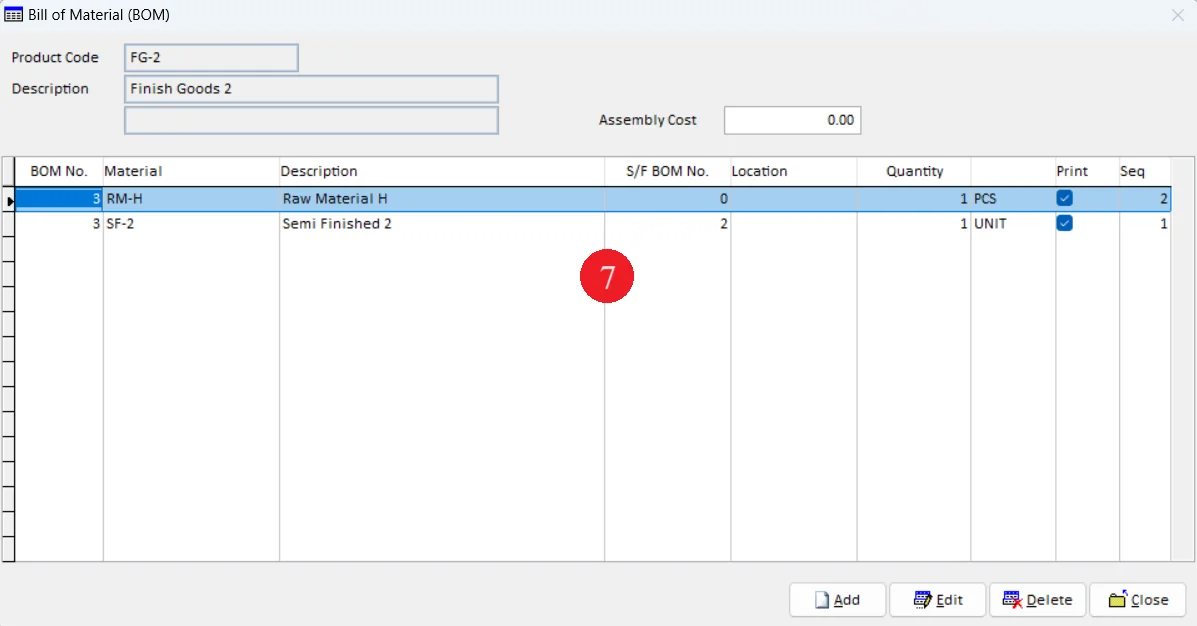
Table 3: Add semi finished goods component to finished goods
1. Go to Stock and select Product
2. Select product code according to Table 3
3. Click on BOM button
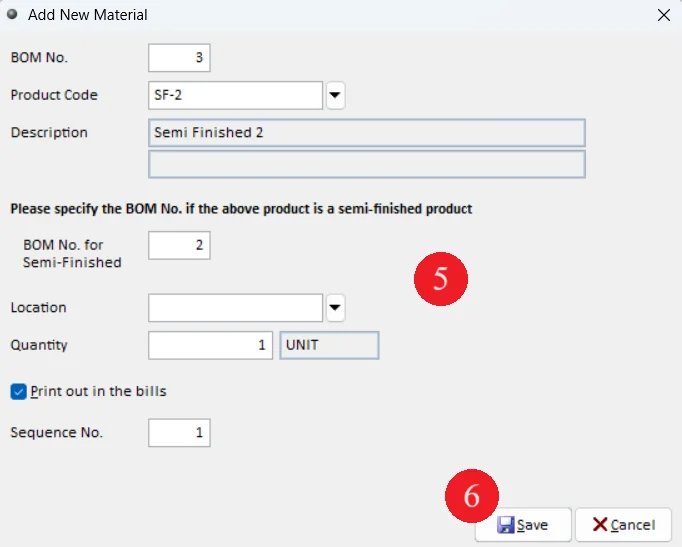
4. Click on Add button
5. Enter record according to Table 3
6. Click on Save button
7. Repeat step 4 to step 6 for second record
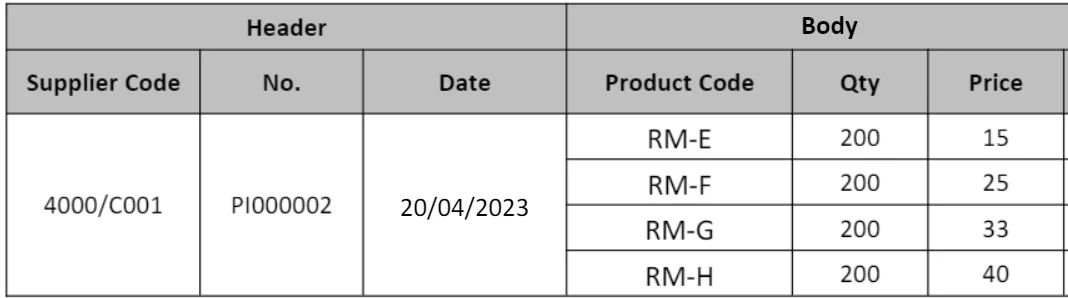
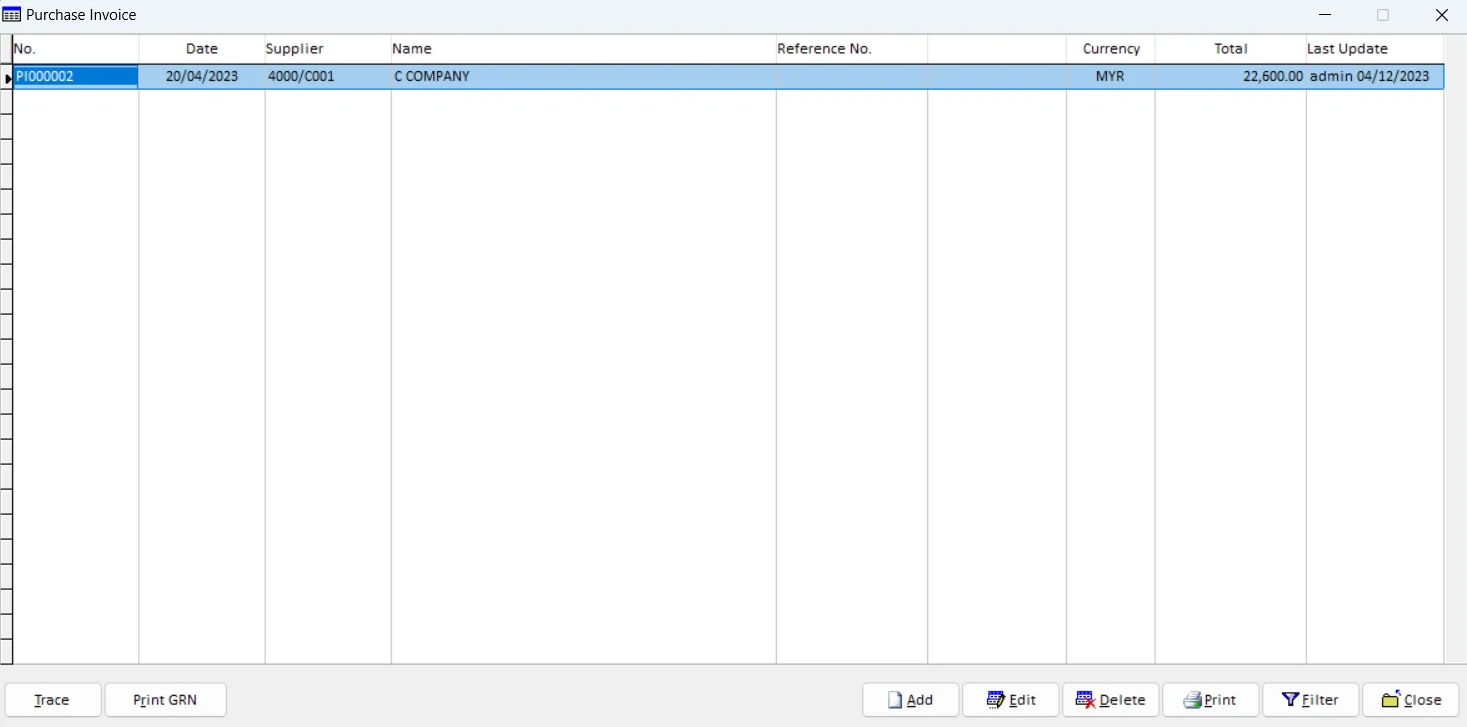
Table 4: Add purchase invoice
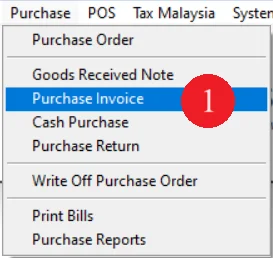
1. Go to Purchase and select Purchase Invoice
2. Click on Add button
3. Enter Header detail according to Table 4
4. Go to Body Tab
5. Enter Body detail according to Table 4
6. Click on Save A/C button
7. Continue to enter next product code according to Table 4
8. Click on Save button
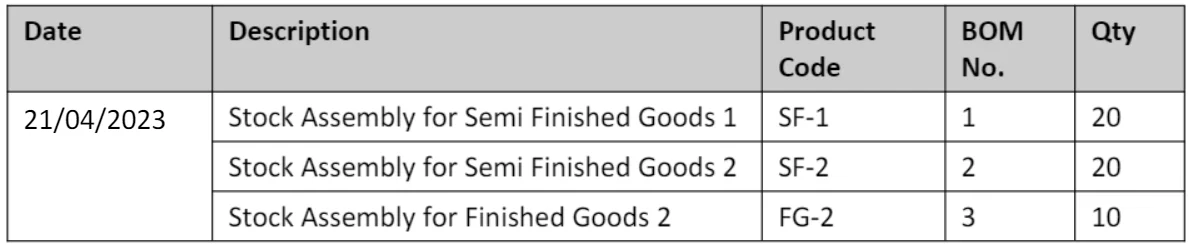
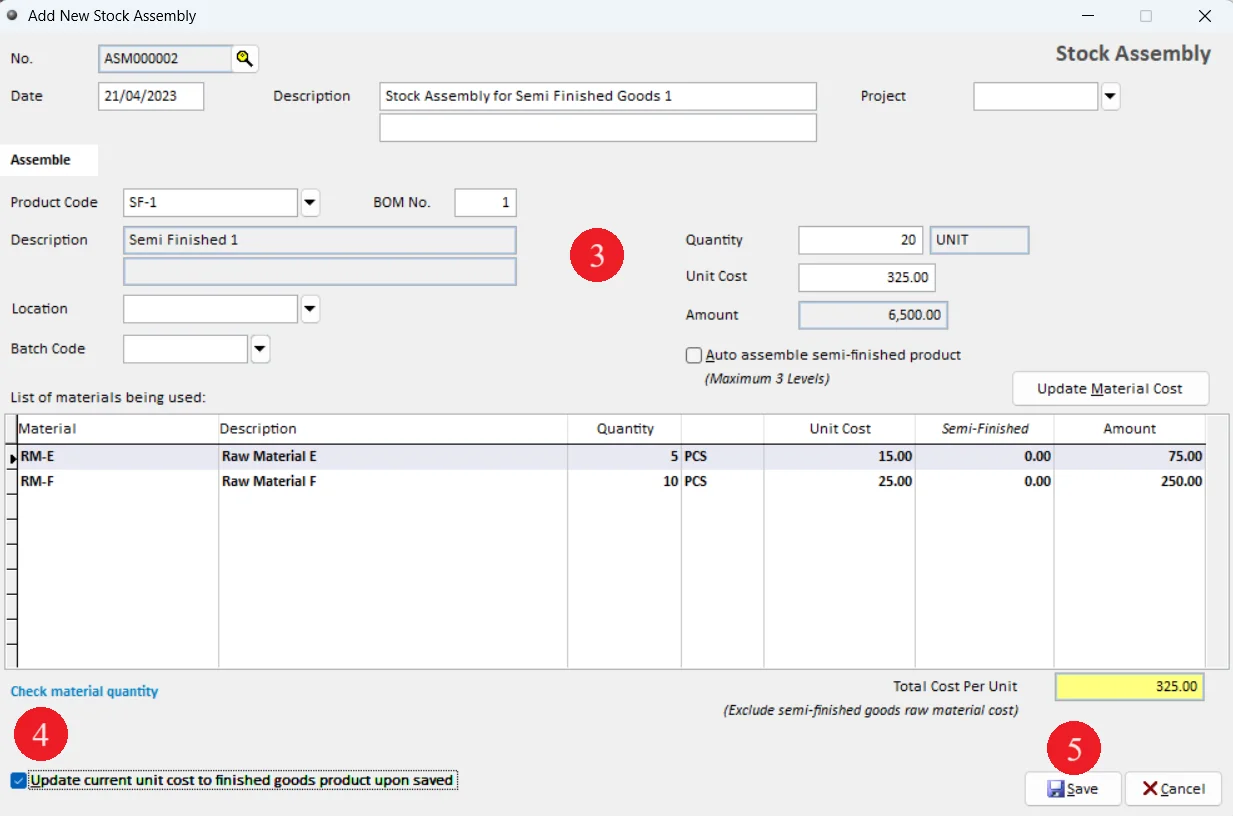
Table 5: Add stock assembly record
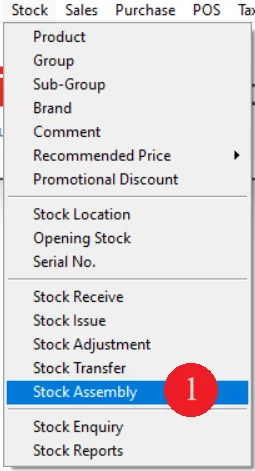
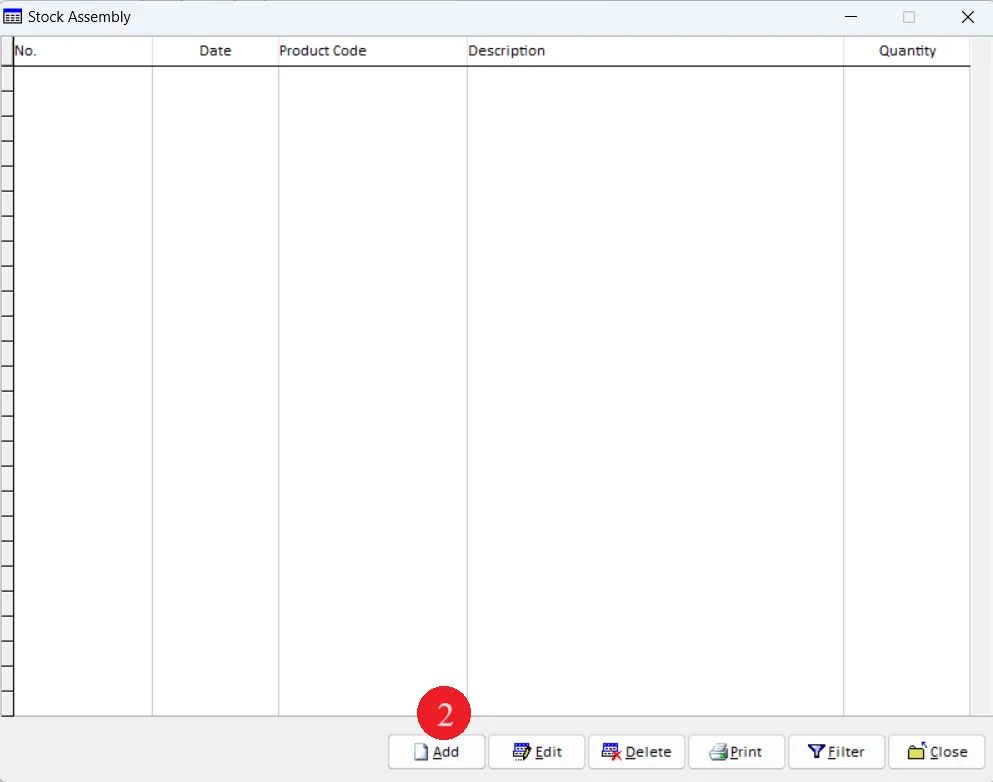
1. Go to Stock then select Stock Assembly
2. Click on Add button
3. Enter the records according to Table 5
4. Tick on Update current unit cost to finish goods product upon saved
5. Click on Save button
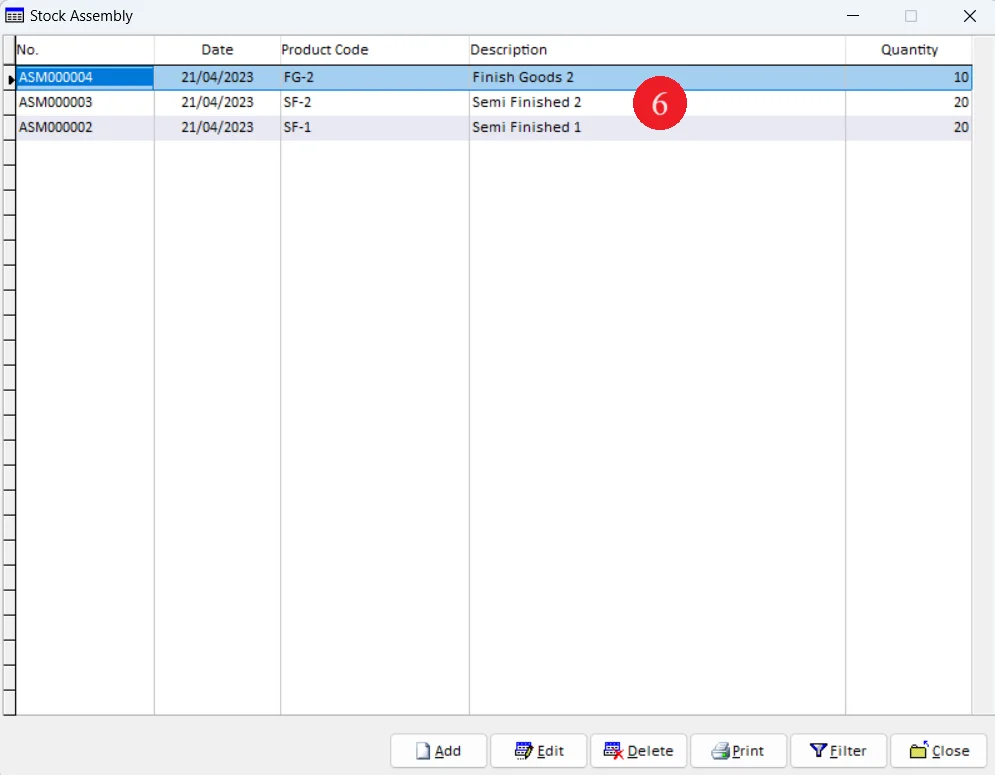
6. Continue to enter next record by repeating step 2 to step 5
Table 6: Add sales invoice
1. Go to Sales and select Invoice
2. Click on Add button
3. Enter Header detail according to Table 6
4. Go to Body Tab
5. Enter Body detail according to Table 6
6. Click on Save Product button
7. Click on Save button
8. Click on Print button to print out the invoice
9. Select the format and click on Preview button
The outcome of the report as follow:
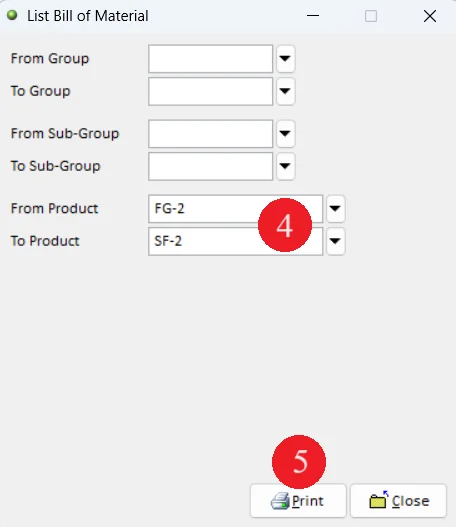
1. Go to Stock and select Stock Reports
2. Select the List Bill of Material report
3. Click on OK button
4. Enter the detail as follow:
5. Click on Print button then Preview button
The outcome of the report as follow:
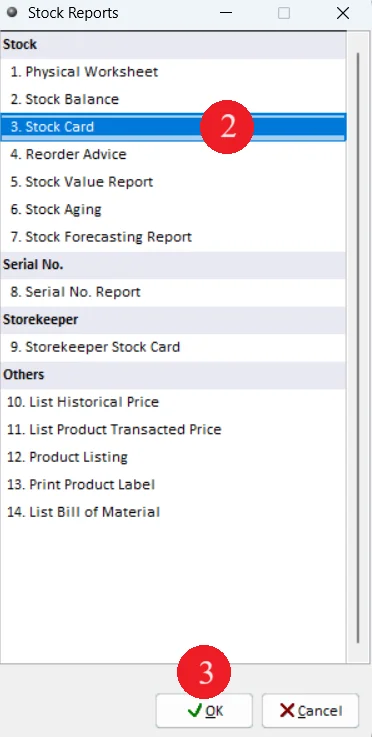
1. Go to Stock and select Stock Reports
2. Select the Stock Card report
3. Click on OK button
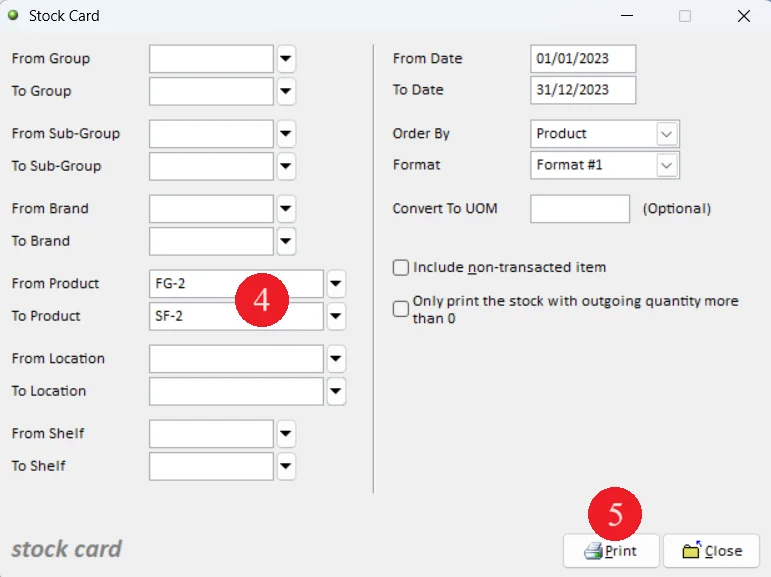
4. Enter the detail as follow:
5. Click on Print button then Preview button
The outcome of the report as follow: