
What can we help you with?


This function enable user saved the GL Description so that user can repeatedly apply the description when enter transactions.
Below are the overall content for this topic:
Step 1: Maintain GL Description
Step 2: Apply GL Description in Creditor Purchase Invoice
Step 3: Apply GL Description in Debtor Invoice
Step 4: Apply GL Description in Cash Book Payment
Step 5: Apply GL Description GL Transaction
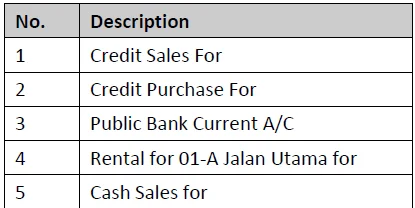
Table 1: Add GL Description
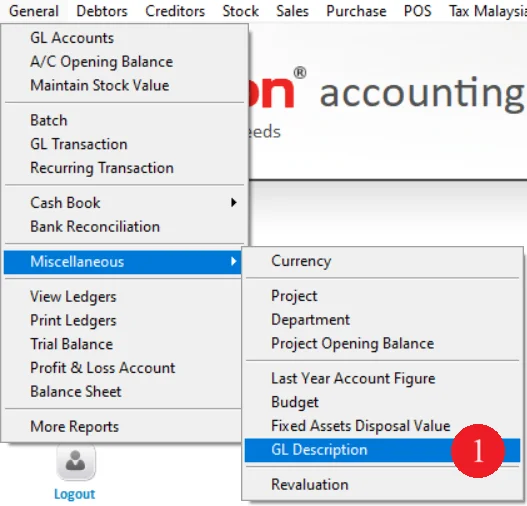
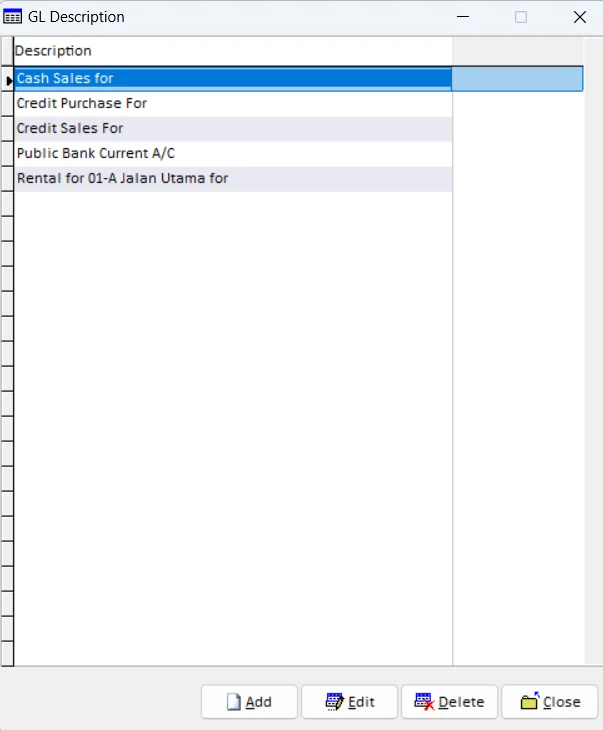
1. Go to General and select Miscellaneous then GL Description
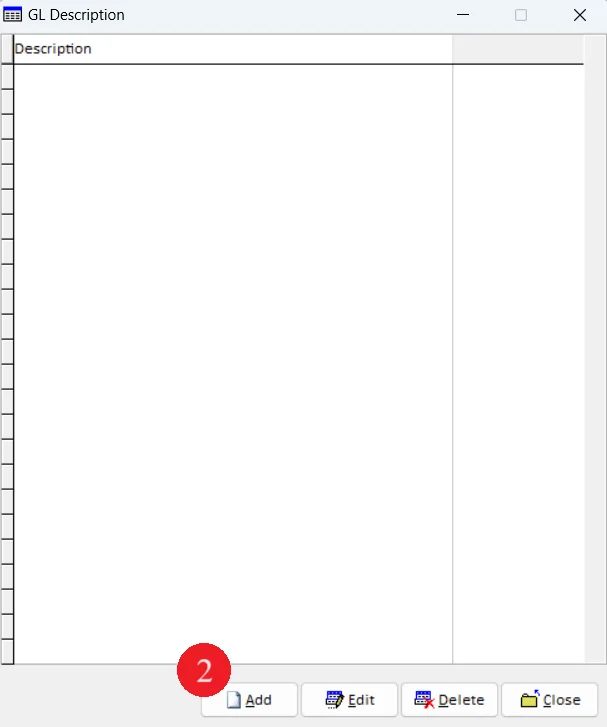
2. Click on Add
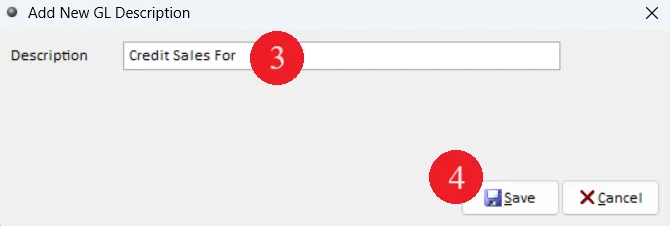
3. Enter record according to Table 1
4. Click on Save
Table 2: Add purchase invoice
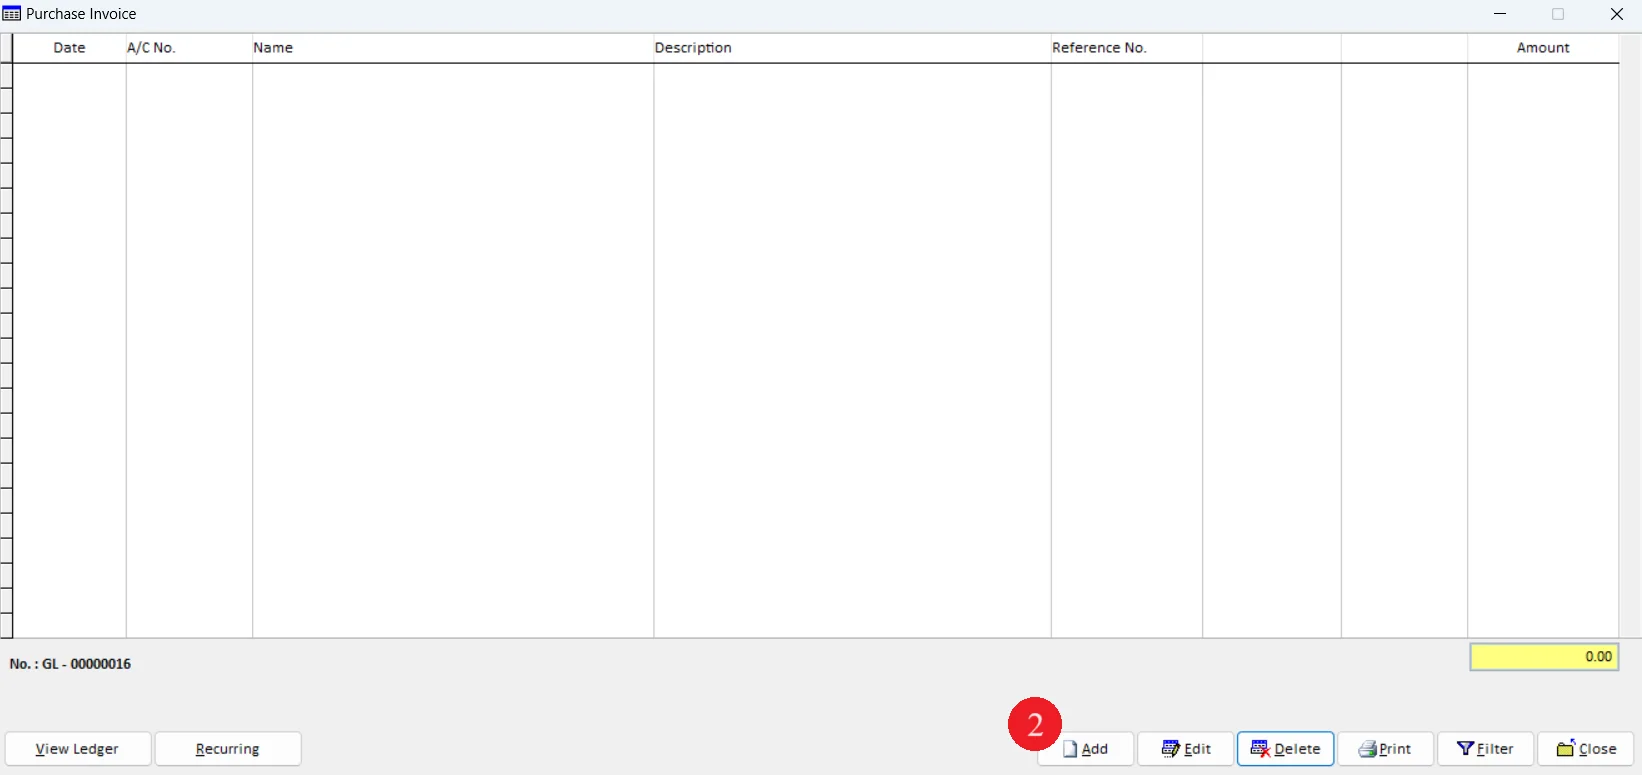
1. Go to Creditors and select Purchase Invoice
2. Click on Add to create a new purchase invoice
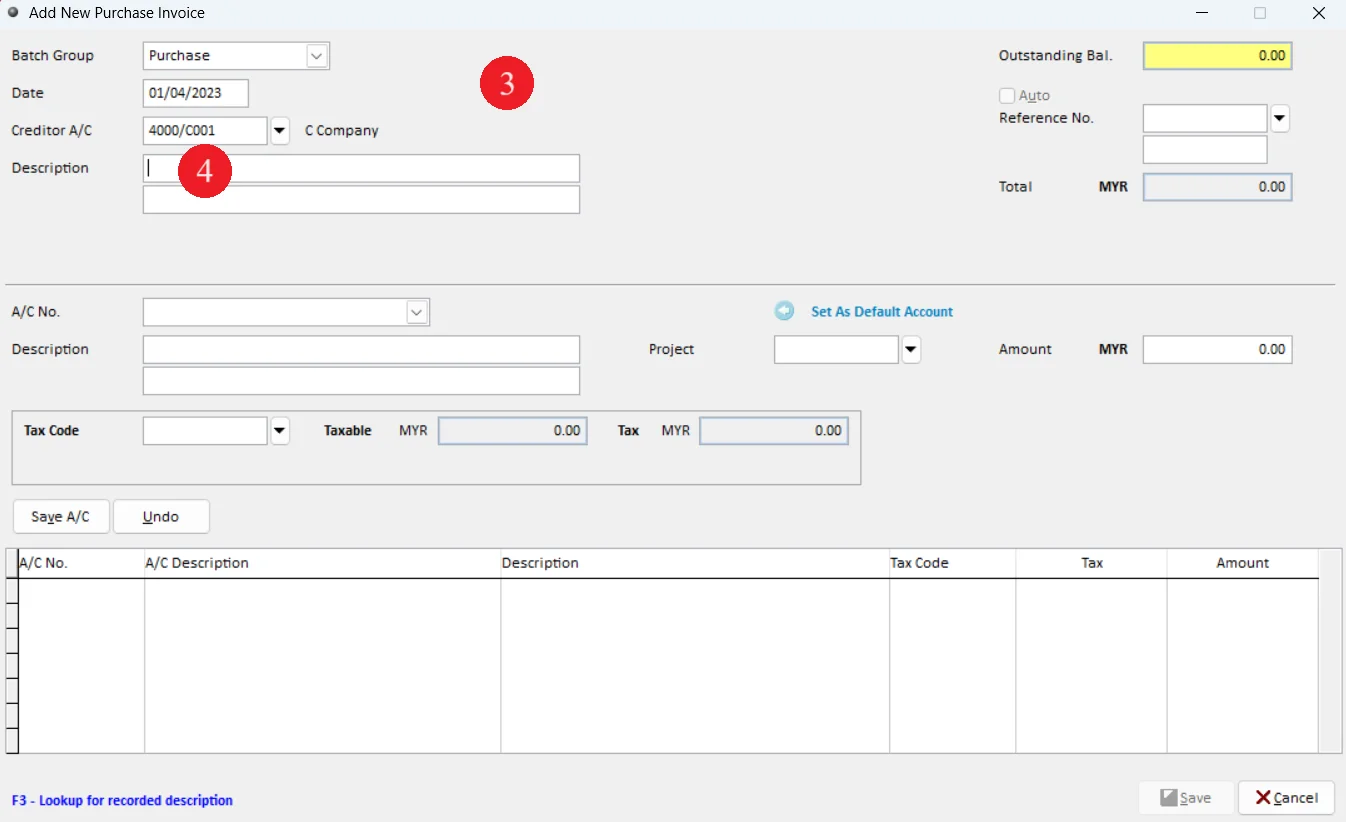
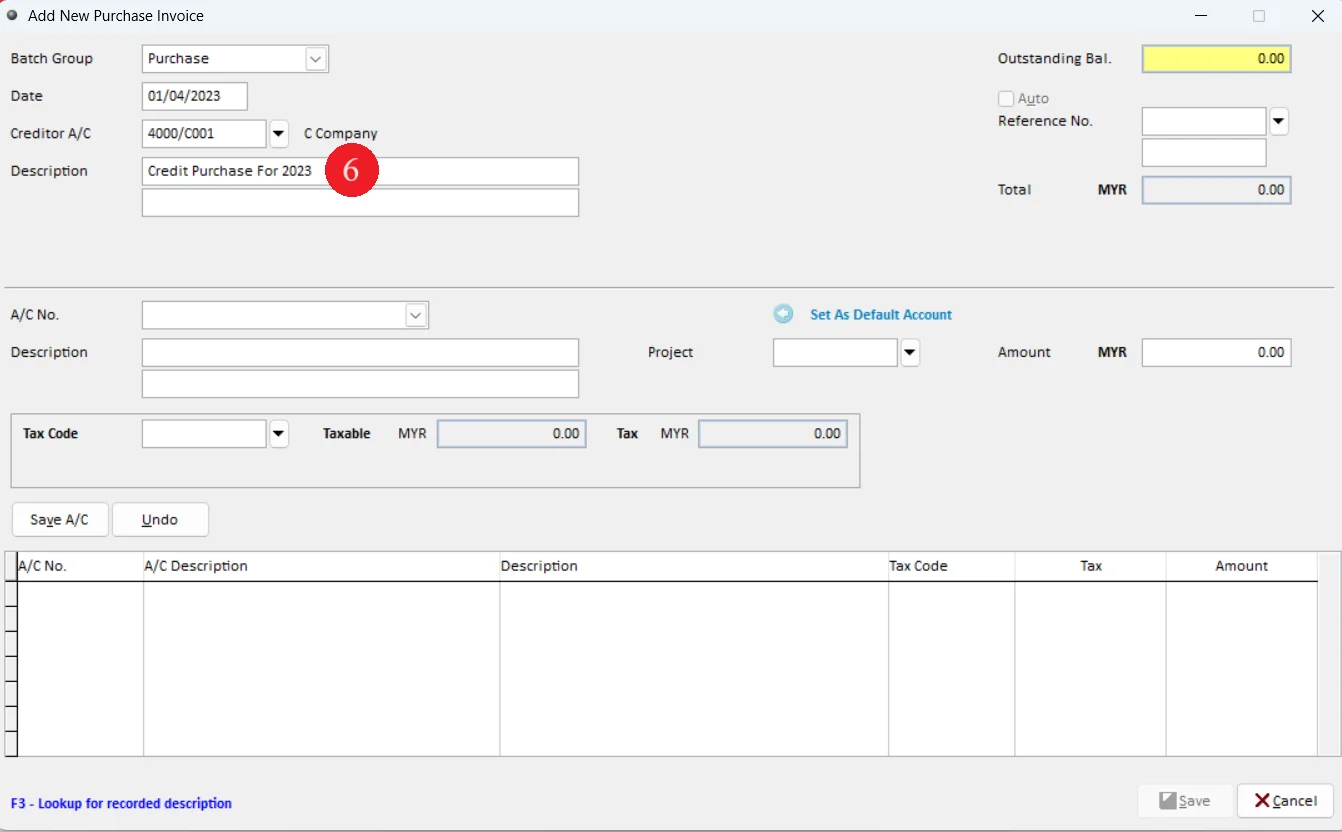
3. Enter the Date and Creditor A/C, accordingly to Table 2
4. In Description#1, press F3
NOTES: This function only available when system displayed blue highlight notice F3-Lookup for recorded description at the bottom
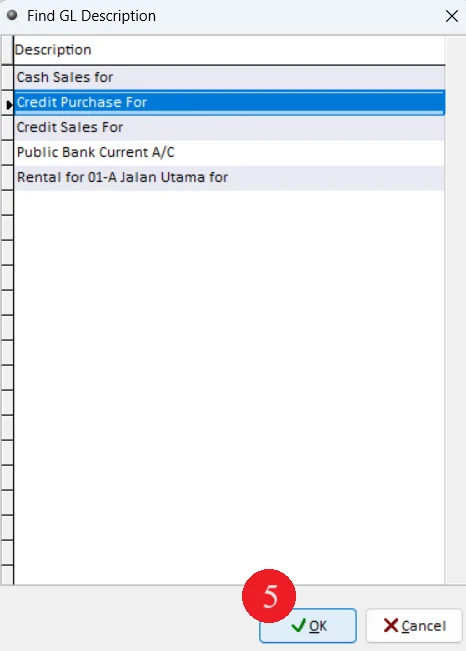
5. Select description then click OK
6. Enter the remaining Description#1
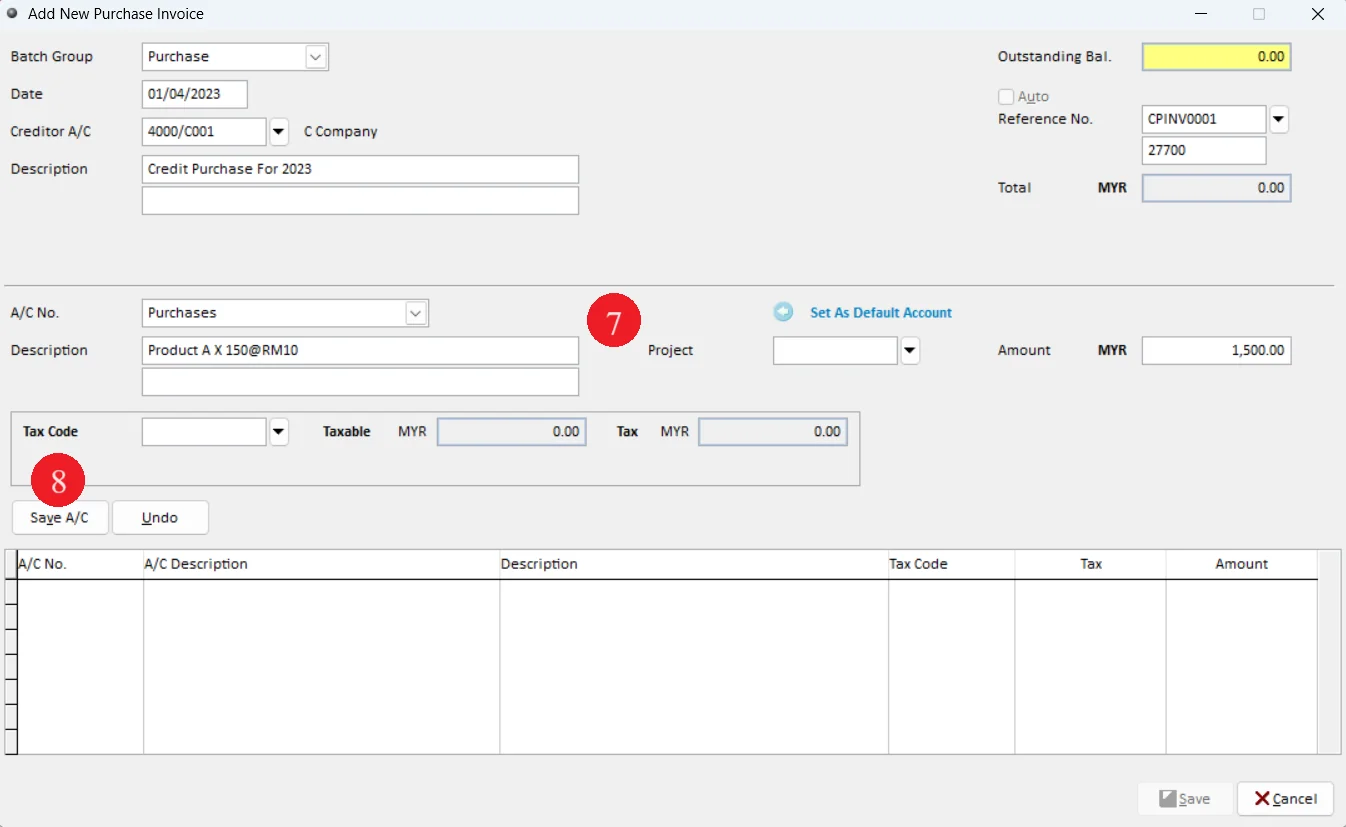
7. Continue to enter record according to Table 2
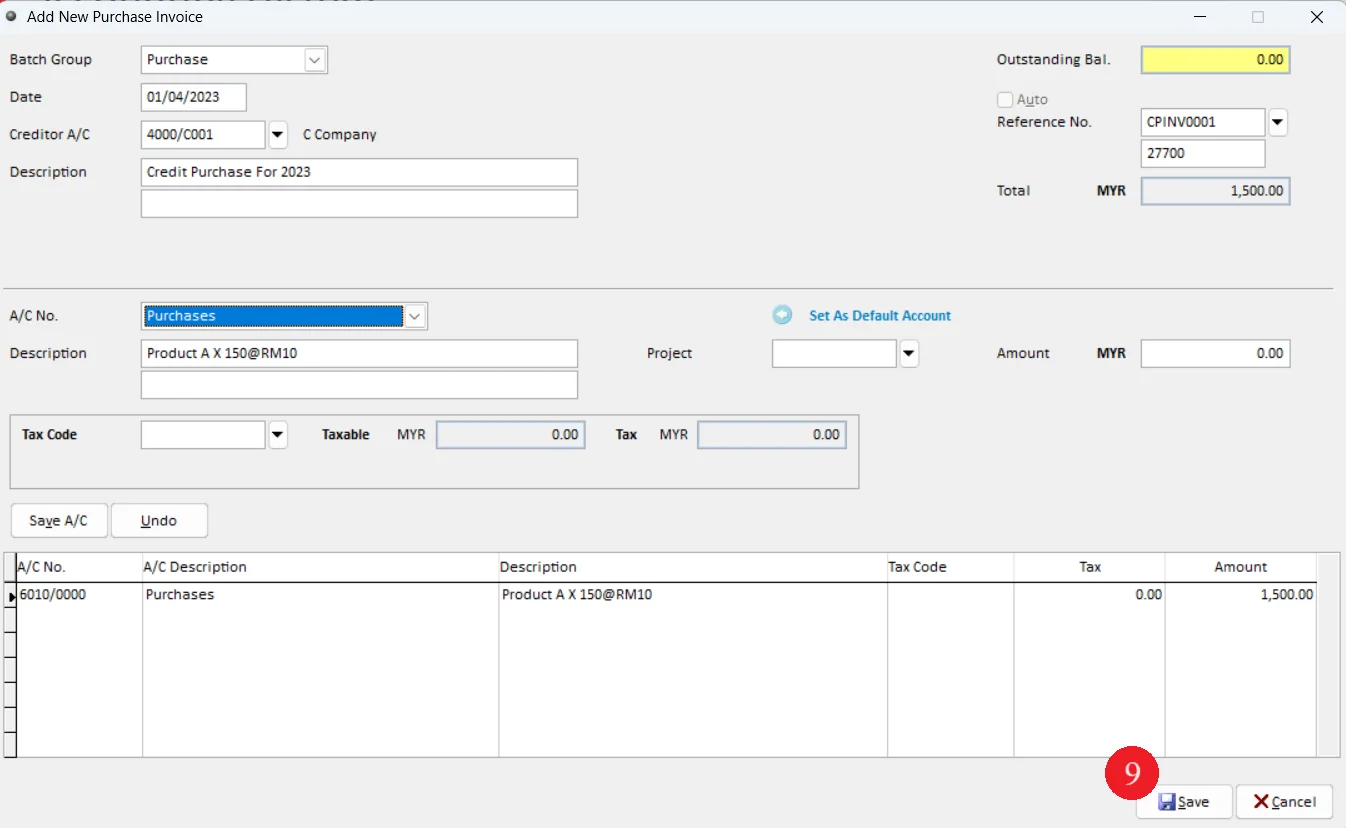
8. Click on Save A/C
9. Click on Save
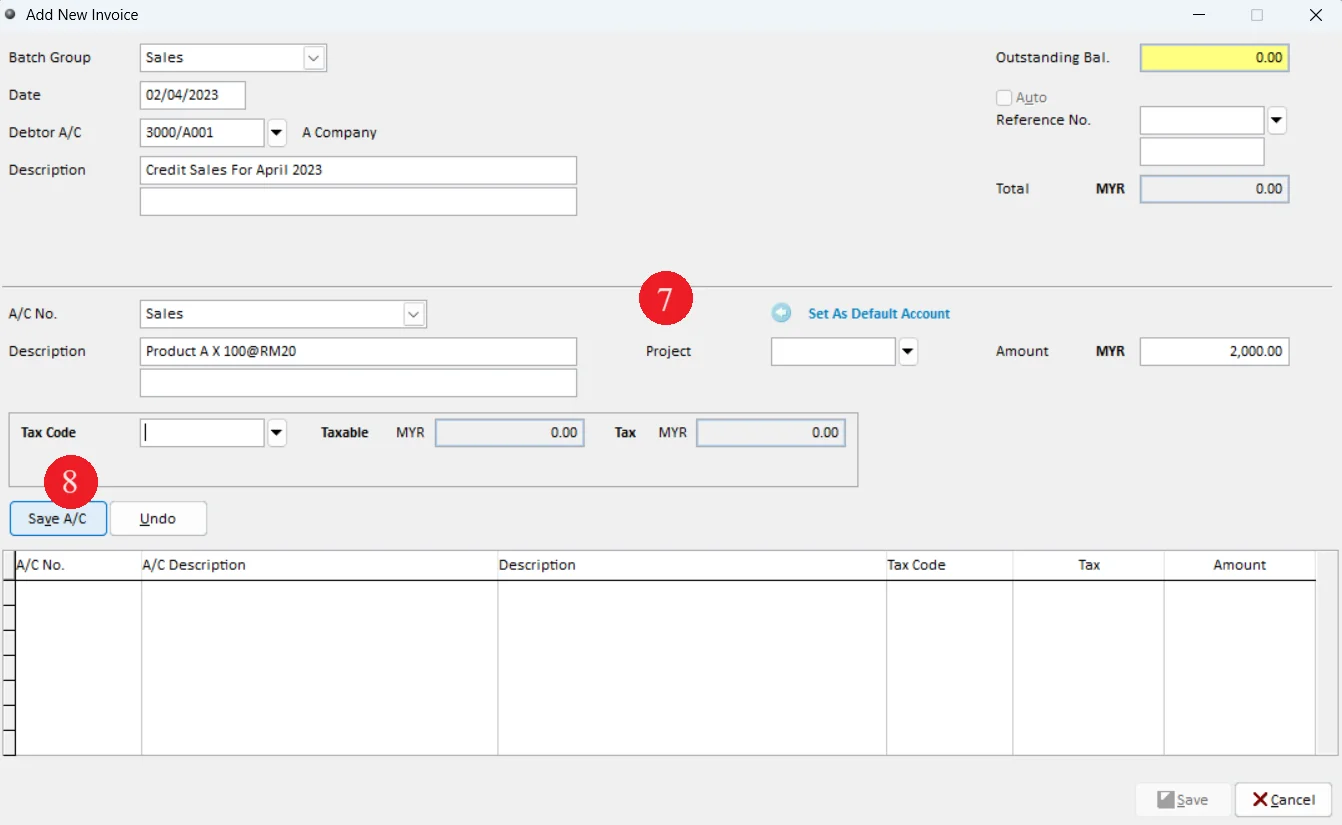
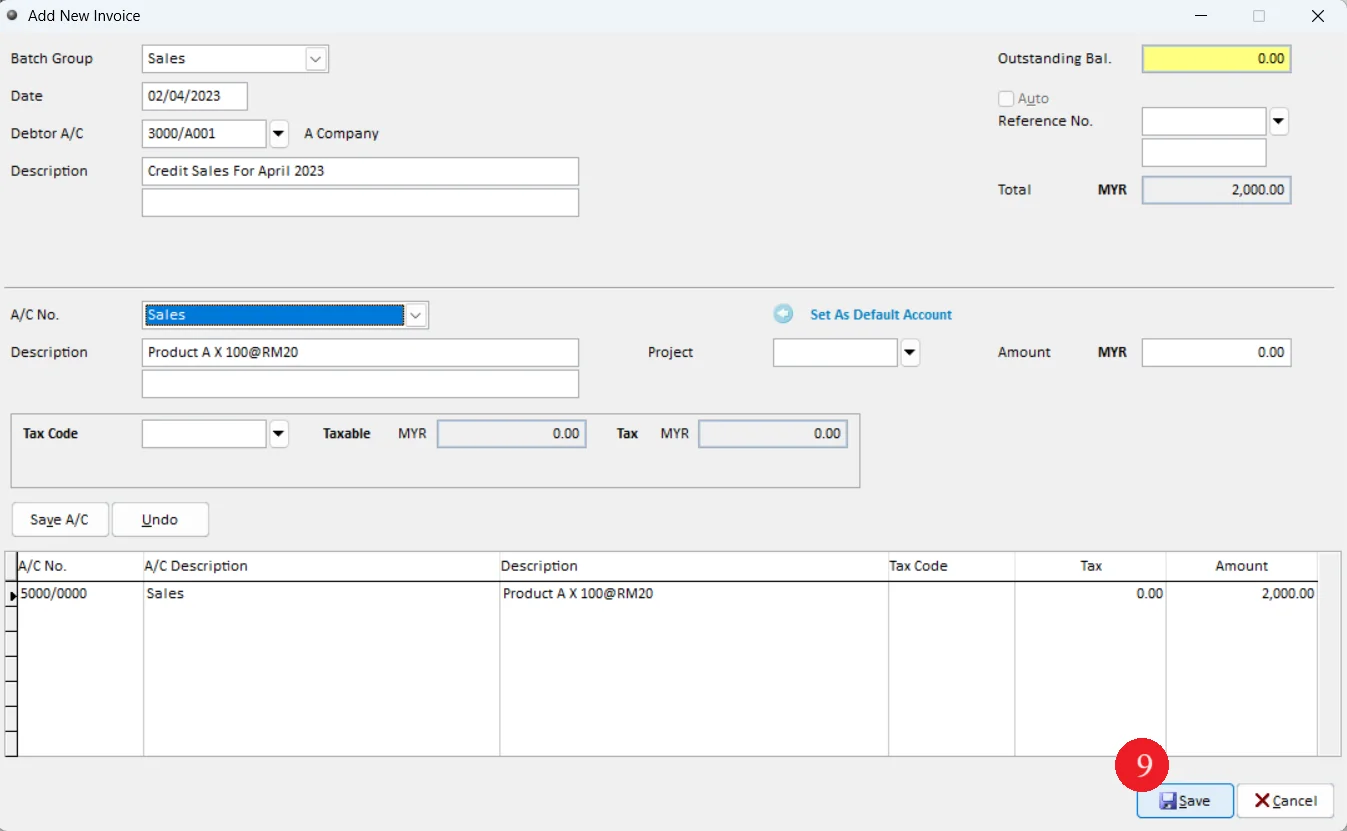
Table 3: Add sales invoice
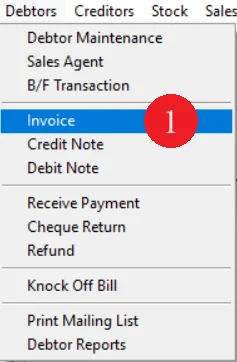
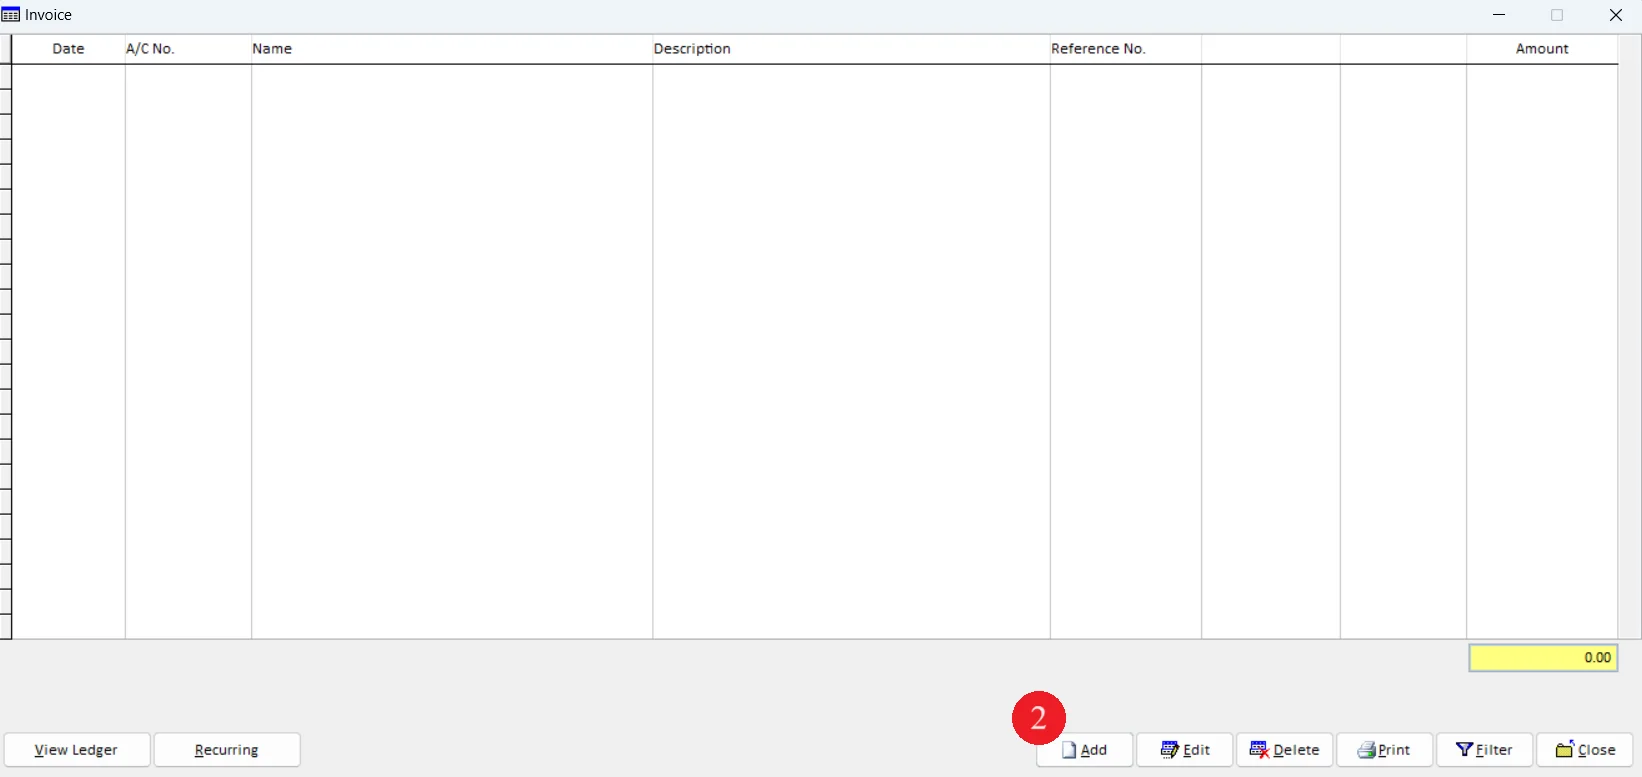
1. Go to Debtors and select Invoice
2. Click Add to create a new invoice
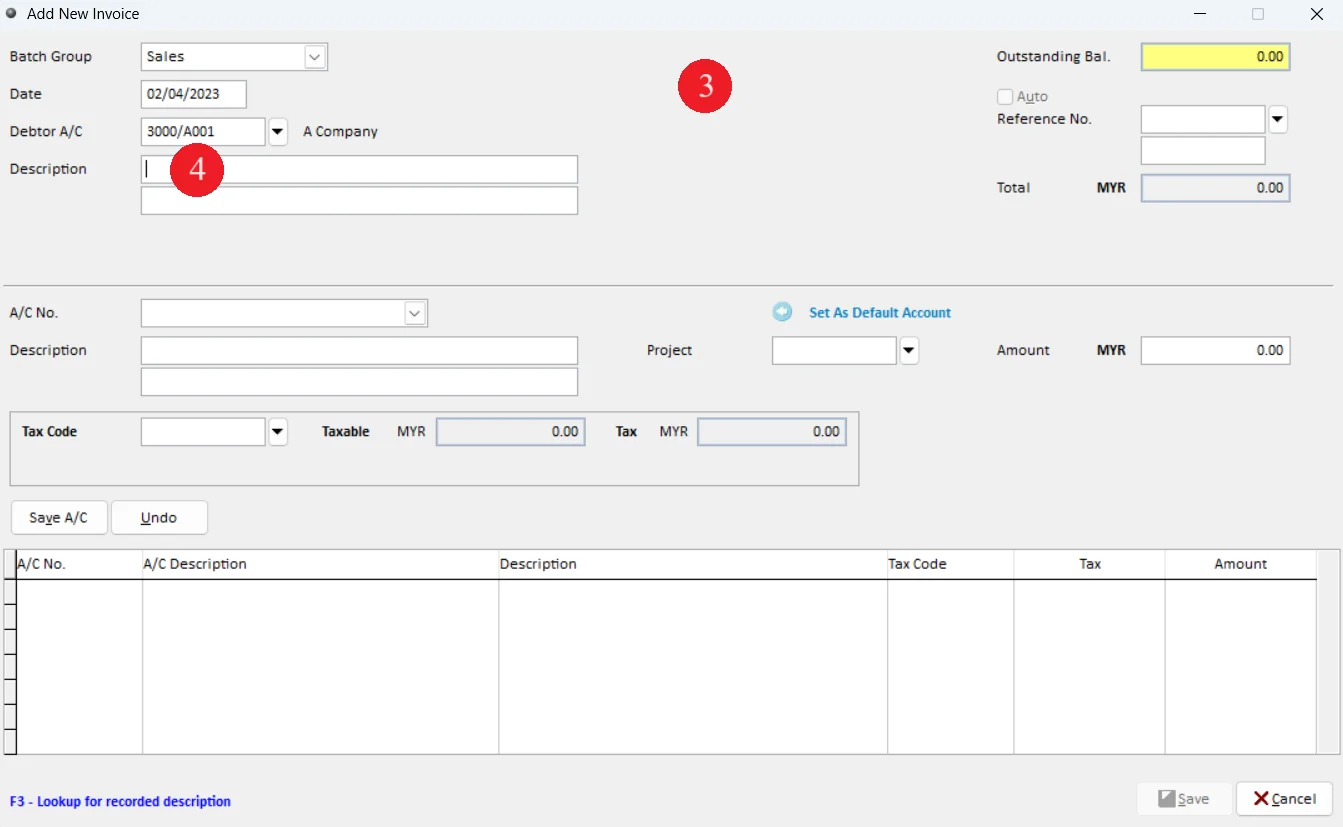
3. Enter Date and Dector A/C according to Table 3
4. In Description#1, press F3
NOTES: This function only available when system displayed blue highlight note F3-Lookup for recorded description at the bottom
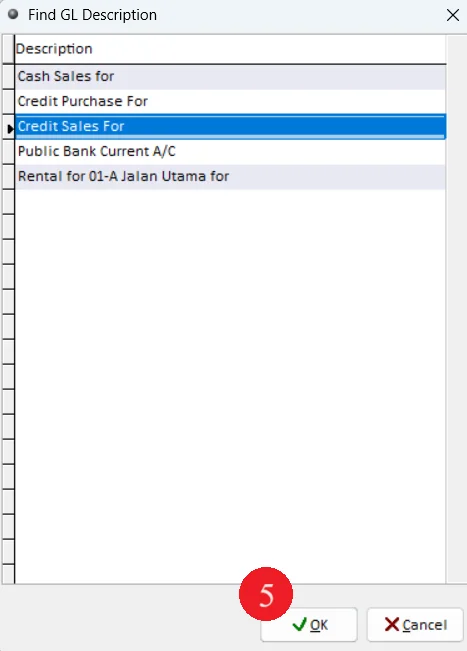
5. Select description then click OK
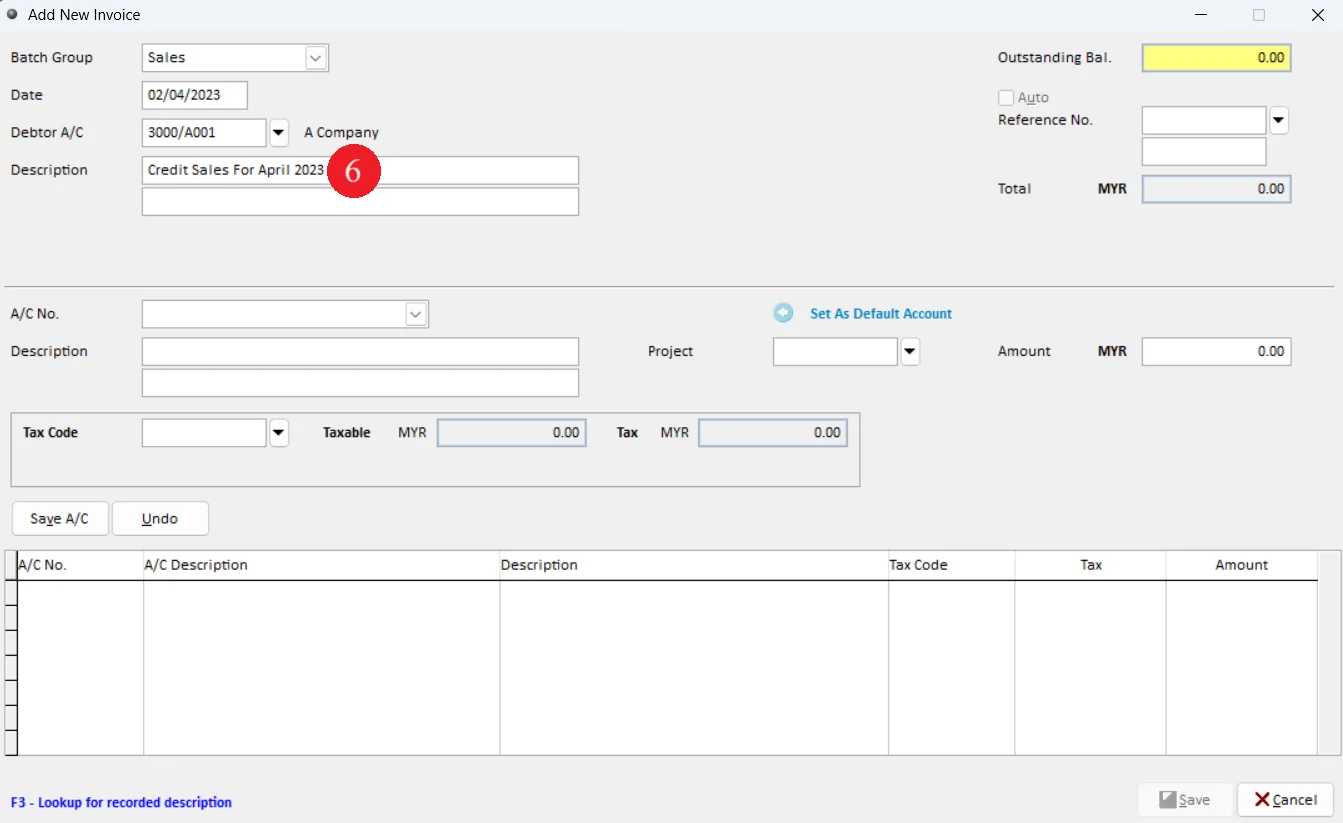
6. Enter the remaining Description#1.
7. Continue to enter record according to Table 3
8. Click on Save A/C
9. Click on Save
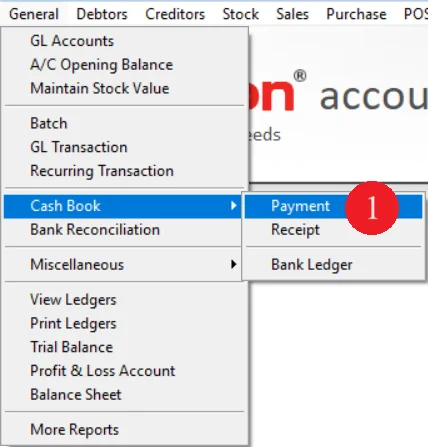
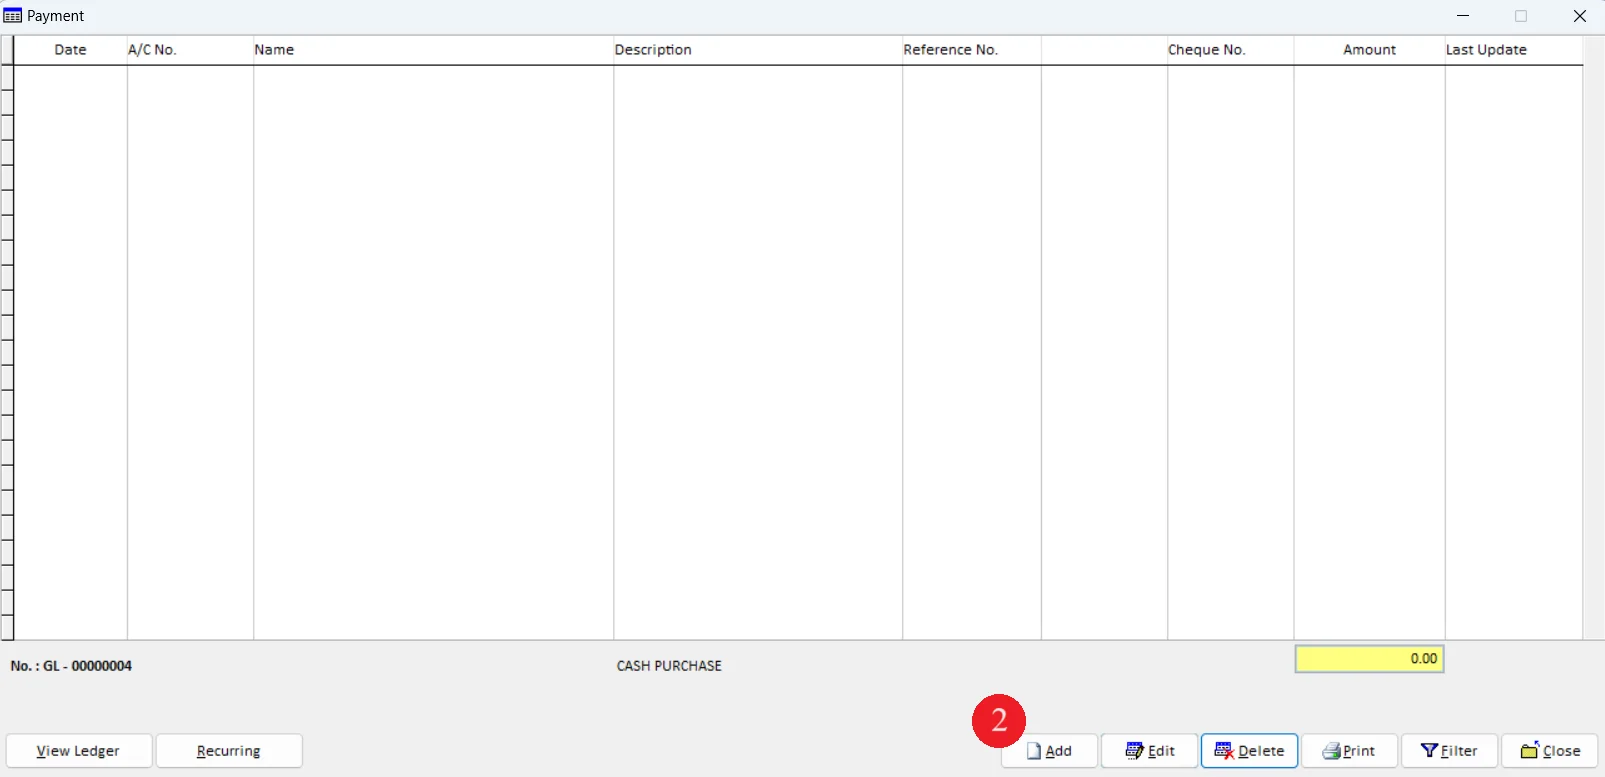
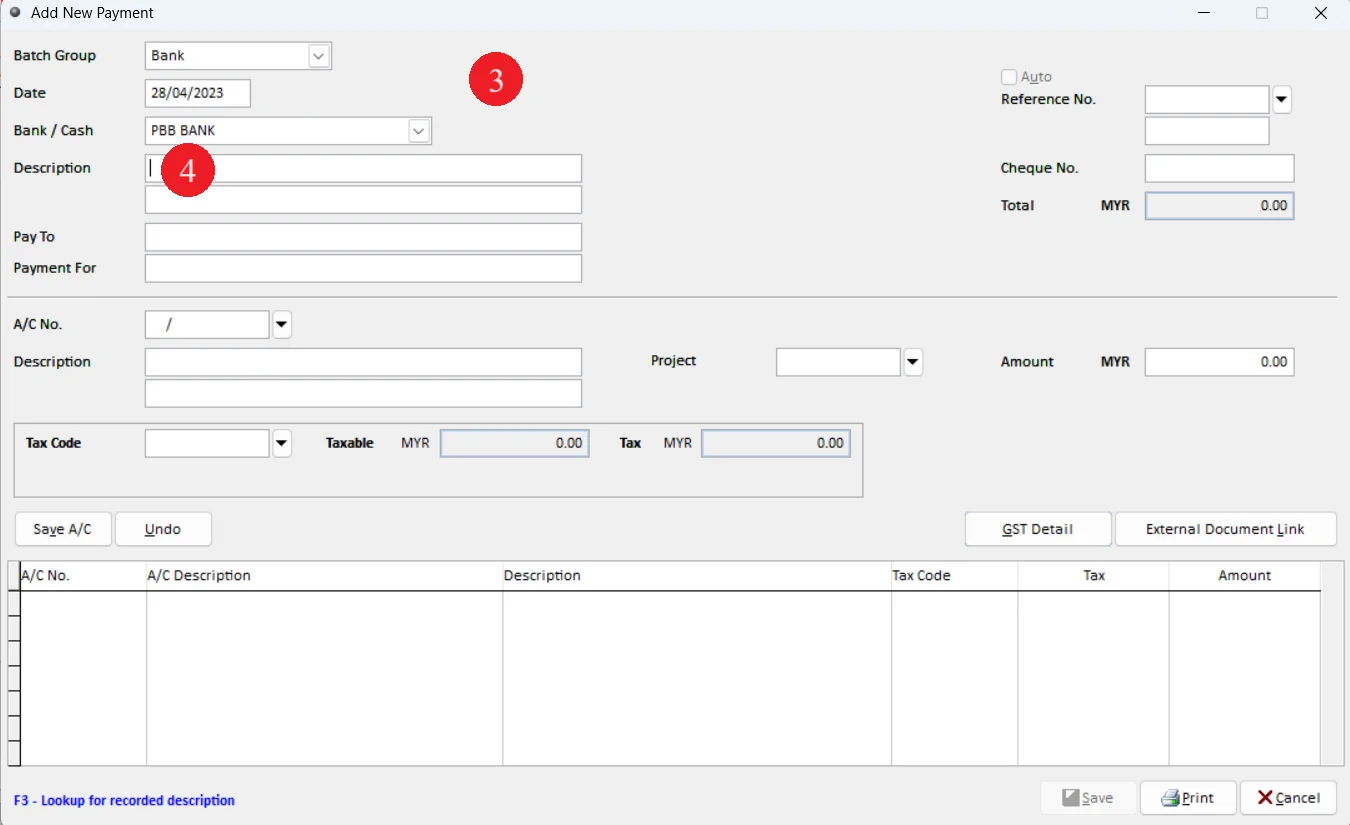
Table 4: Add cash book payment
1. Go to General and click on Cash Book then Payment
2. Click Add
3. Enter Batch, Date and select Bank according to Table 4
4. In Description#1, press F3
NOTES: This function only available when system displayed blue highlight notice F3-Lookup for recorded description at the bottom
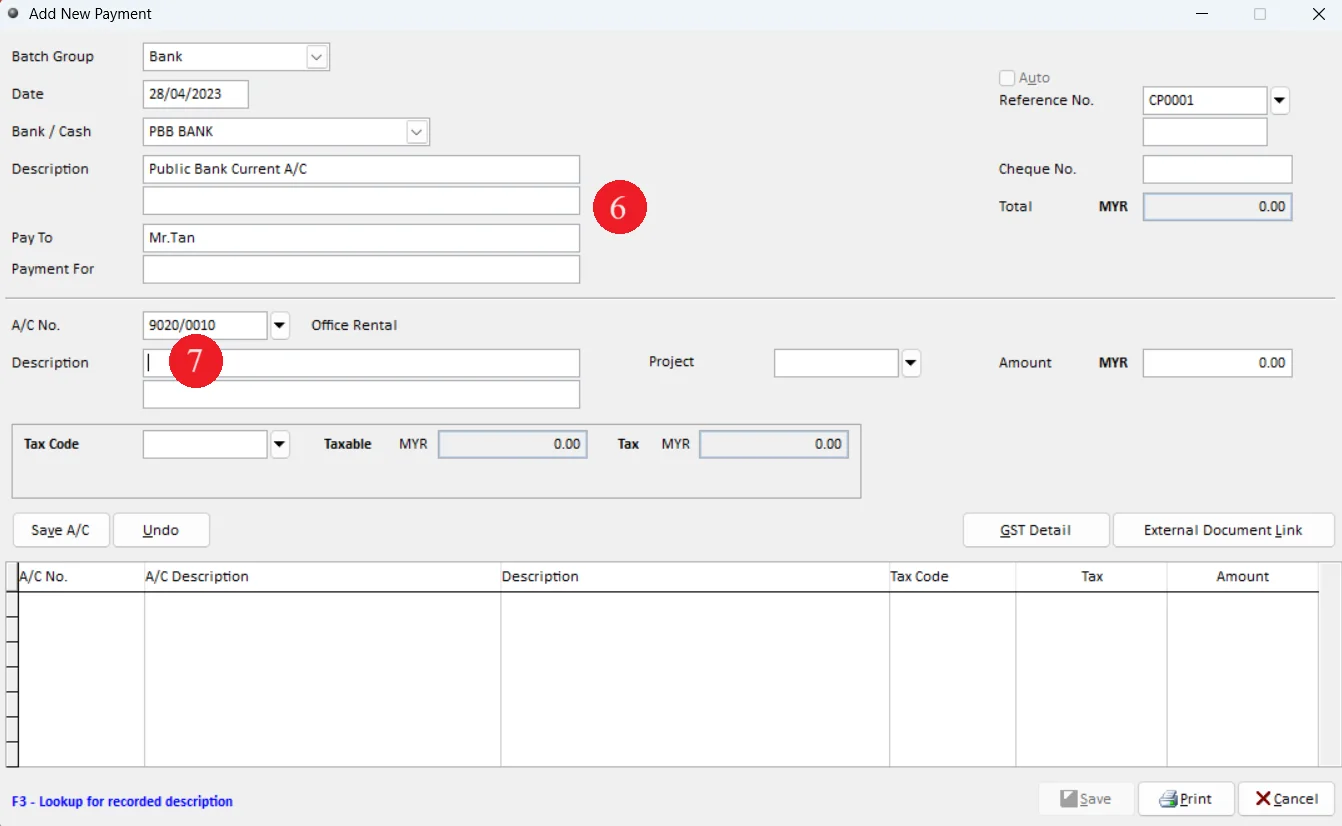
5. Select description then click OK
6. Continue to enter data according to Table 4
7. In Description#2, press F3
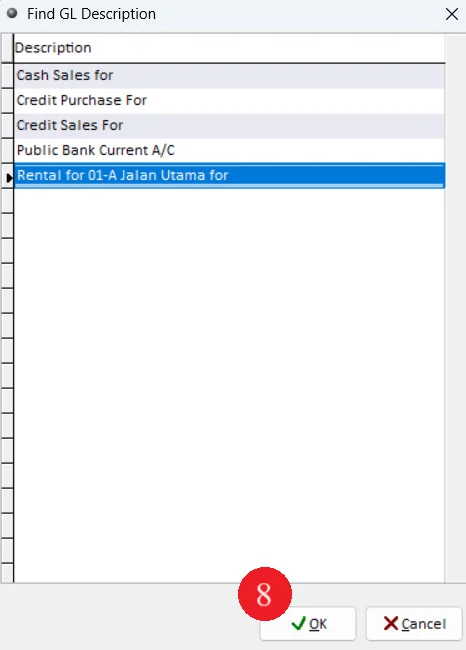
8. Select description then click OK
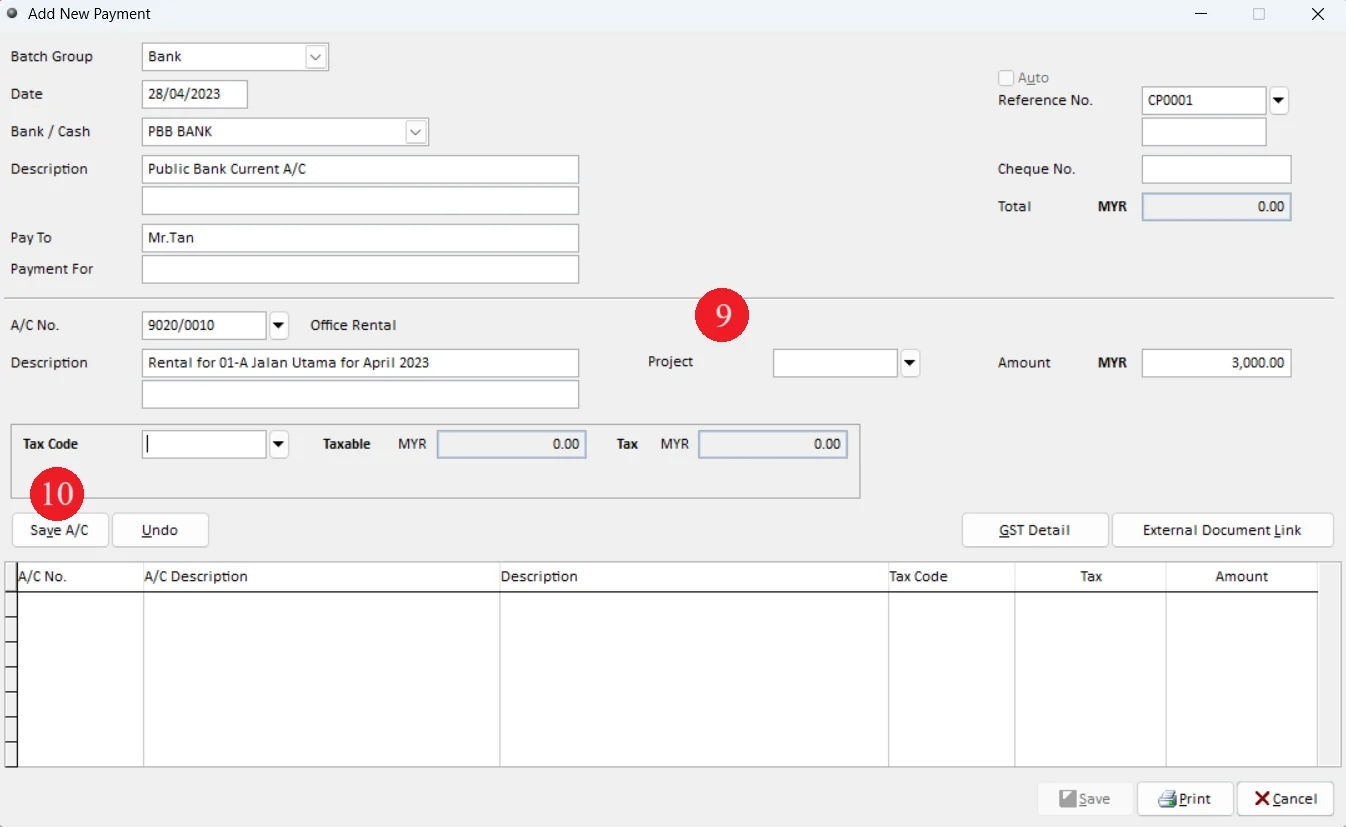
9. Continue to enter data according to Table 4
10. Click on Save A/C
11. Click on Save
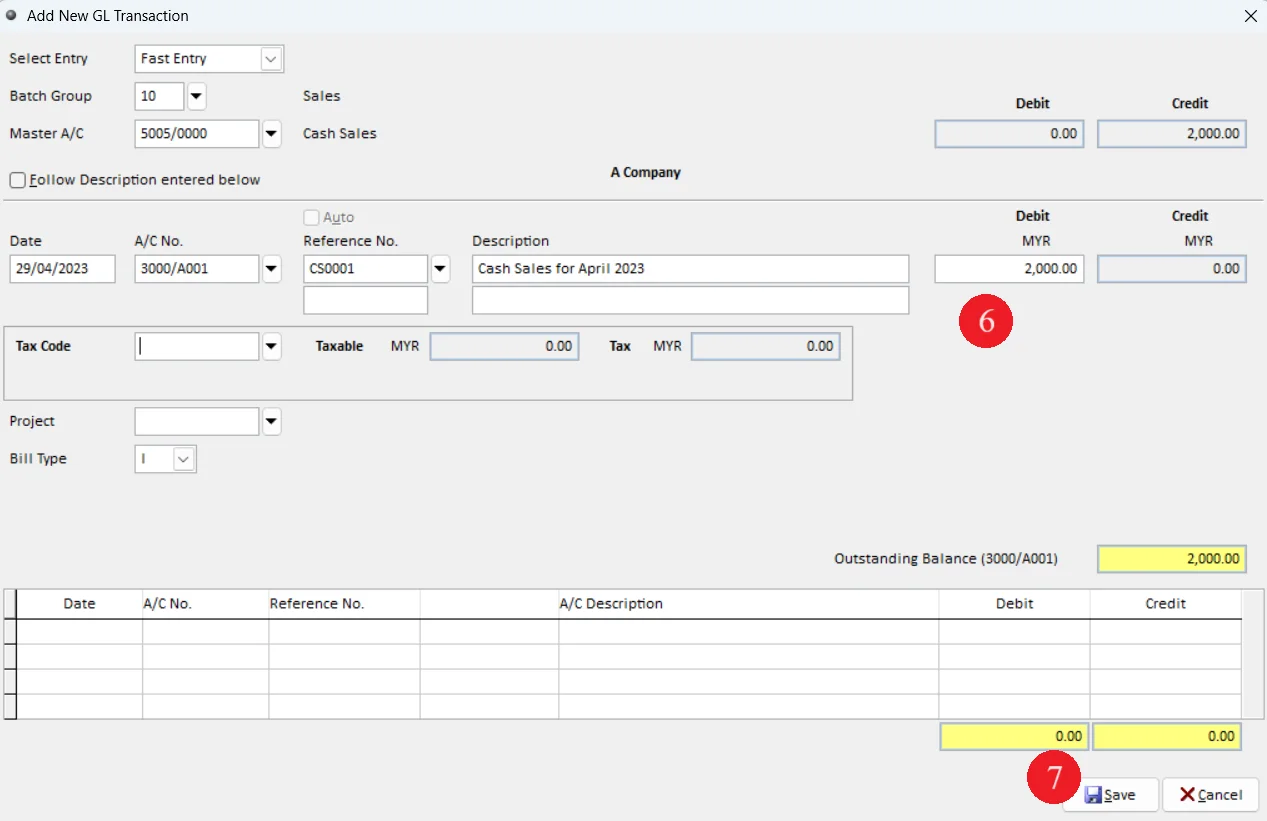
Table 5: Add GL Transaction
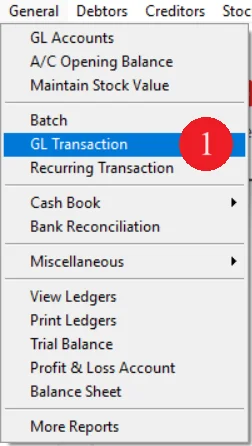
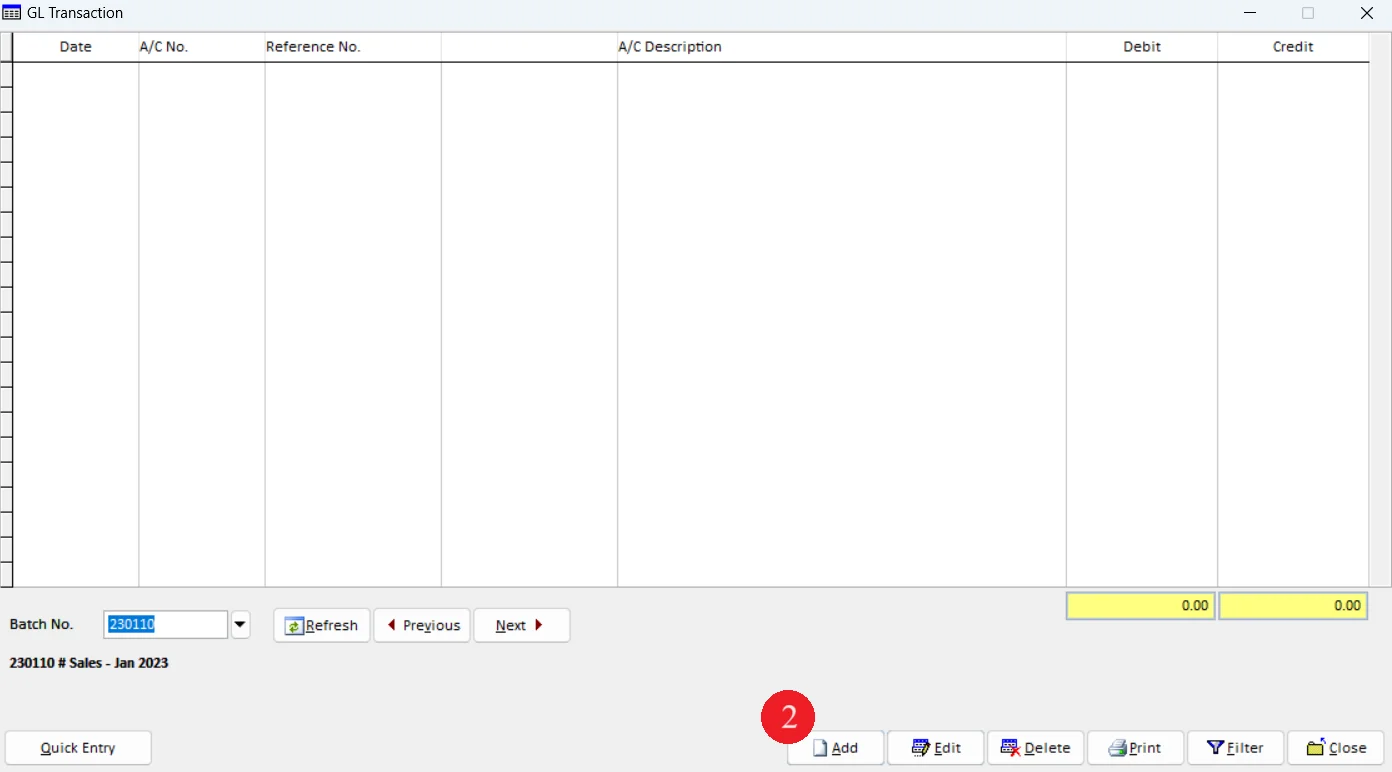
1. Go to General and click on GL Transaction
2. Click Add to create new GL Transaction
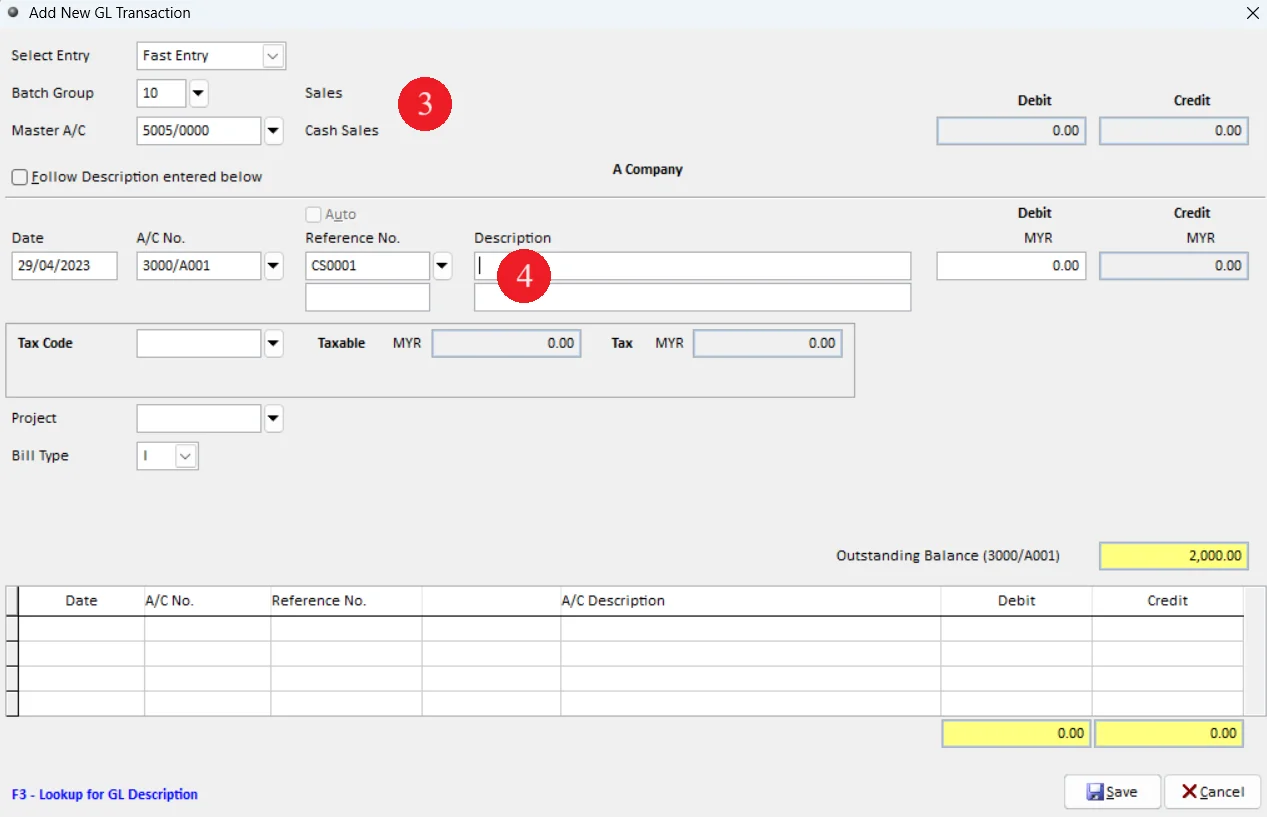
3. Enter data according to Table 5
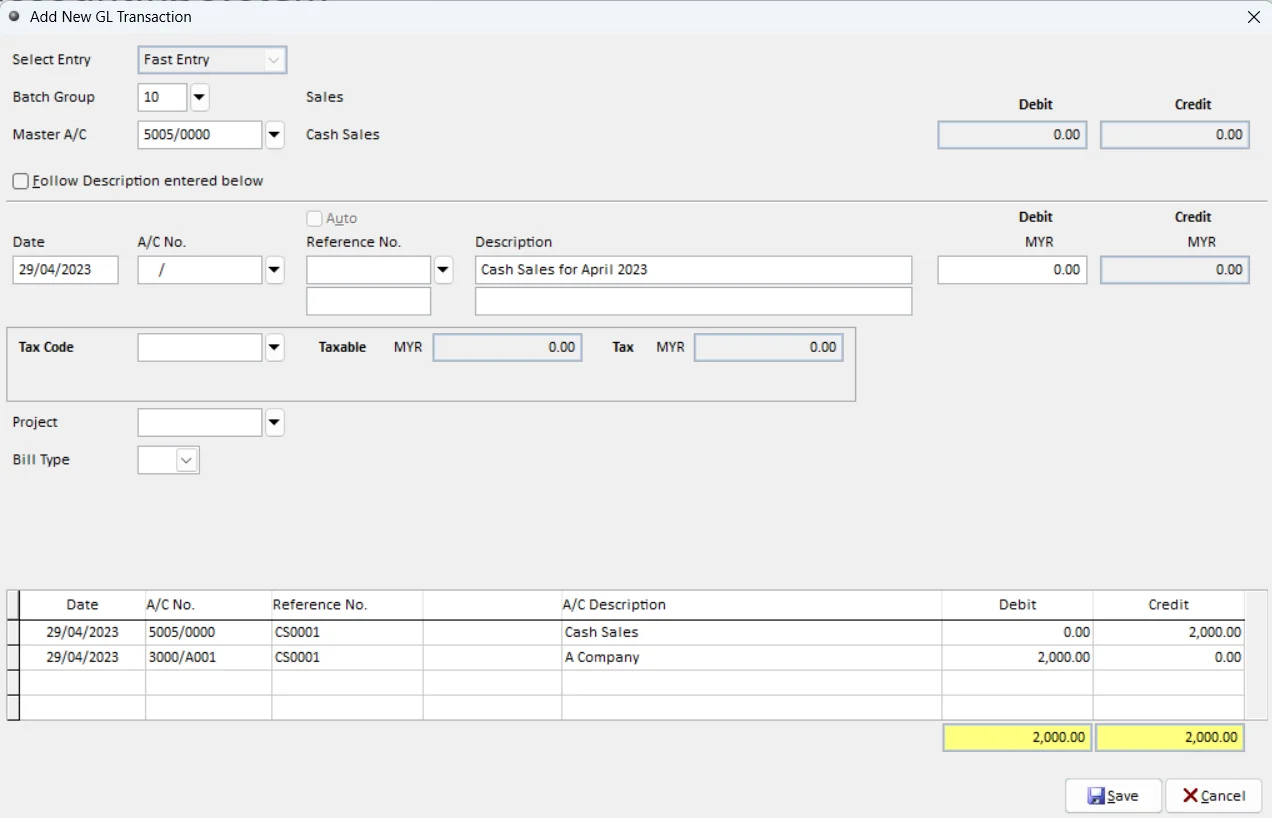
4. In Description field, press on F3
NOTES: This function only available when system displayed blue highlight notice F3-Lookup for recorded description at the bottom
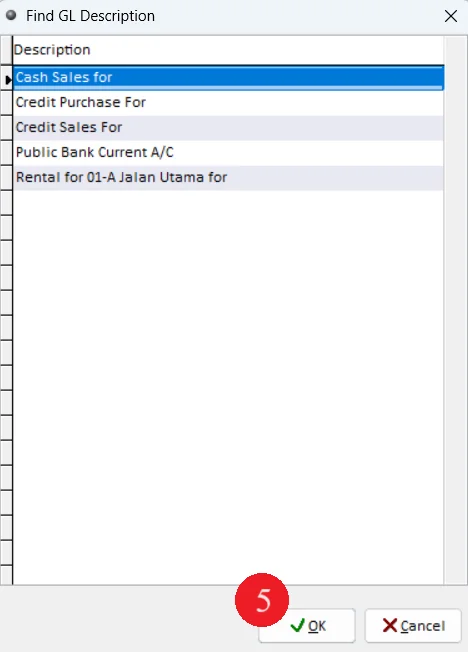
5. Select GL Description and click OK
6. Continue enter data according to Table 5
7. Click on Save