What can we help you with?
Table of Contents
< All Topics
Print
Posted
Updated
ByMillion System
Million Accounting
Check for Bills Due function
The main purpose is allow system prompt a notification message to remind user a specific debtor has reach the credit term and block user from issuing invoices to the debtor until payment has been made.
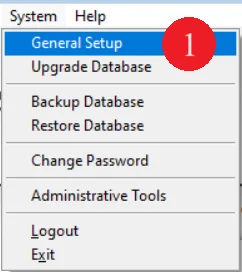
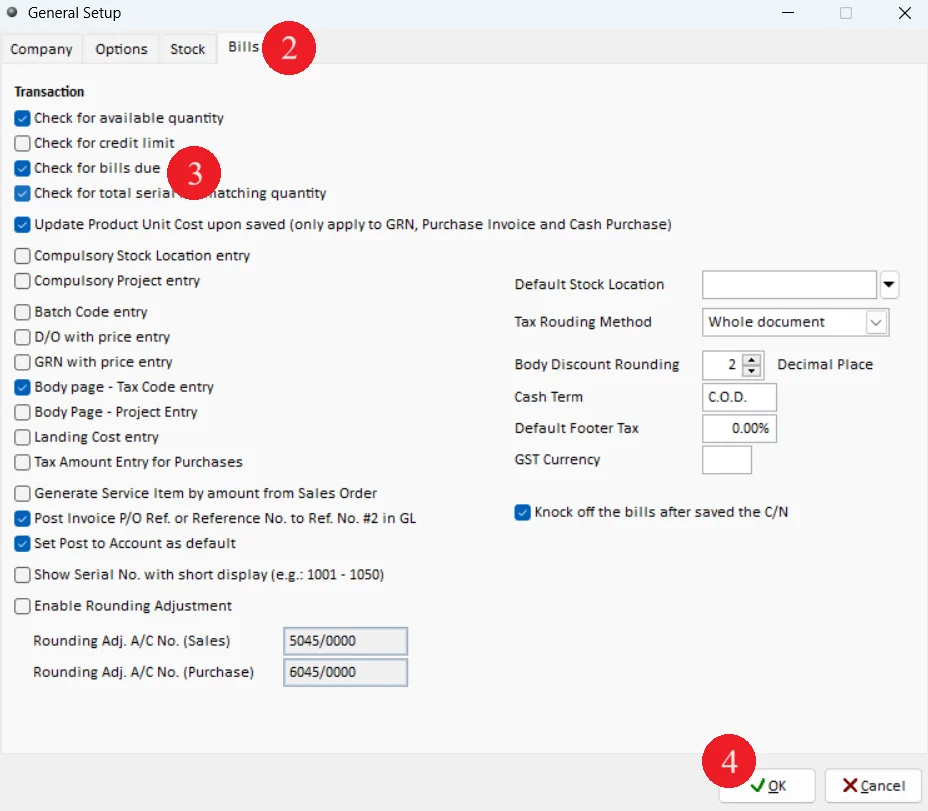
Step 1: Enable Bills Due Function
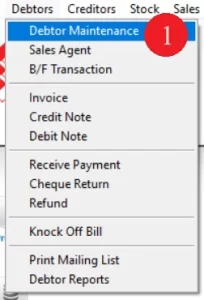
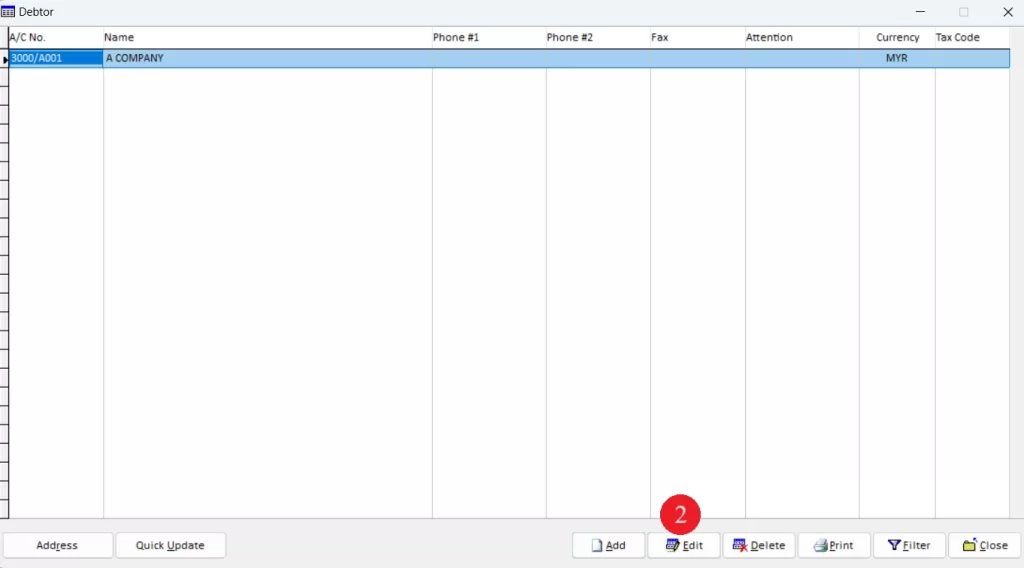
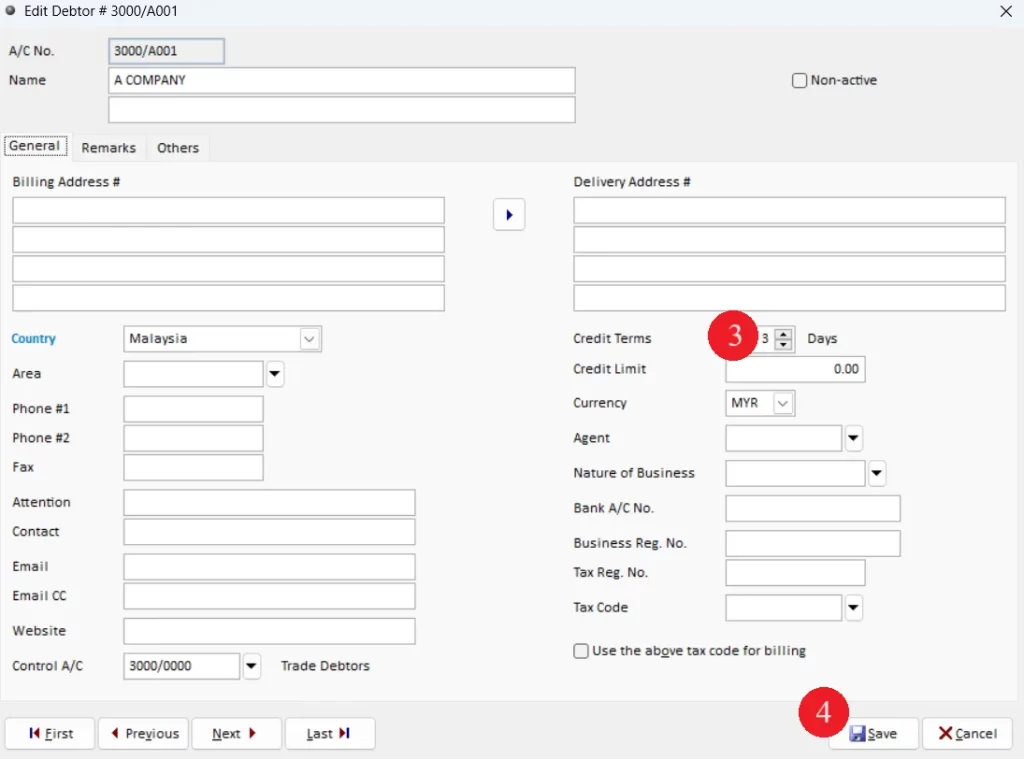
Step 2: Set debtor credit term
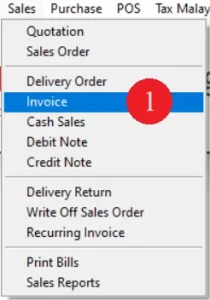
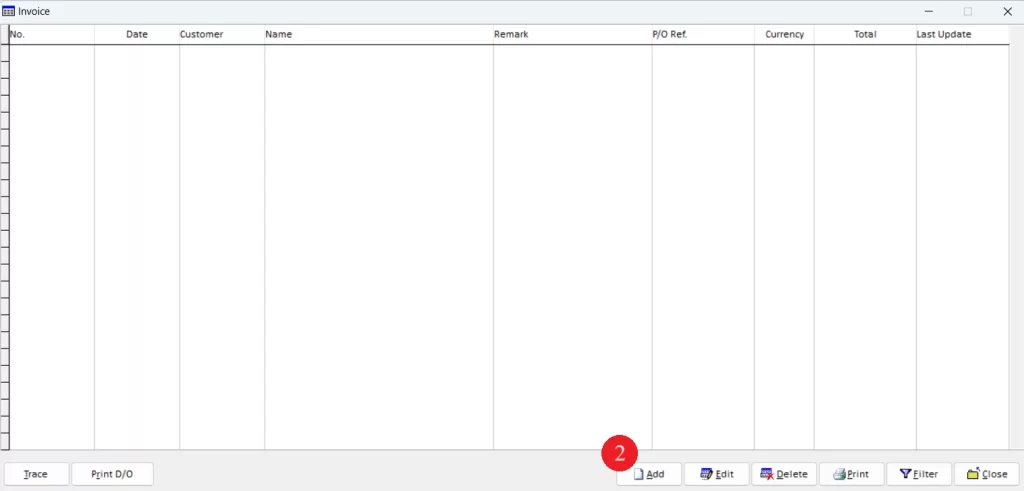
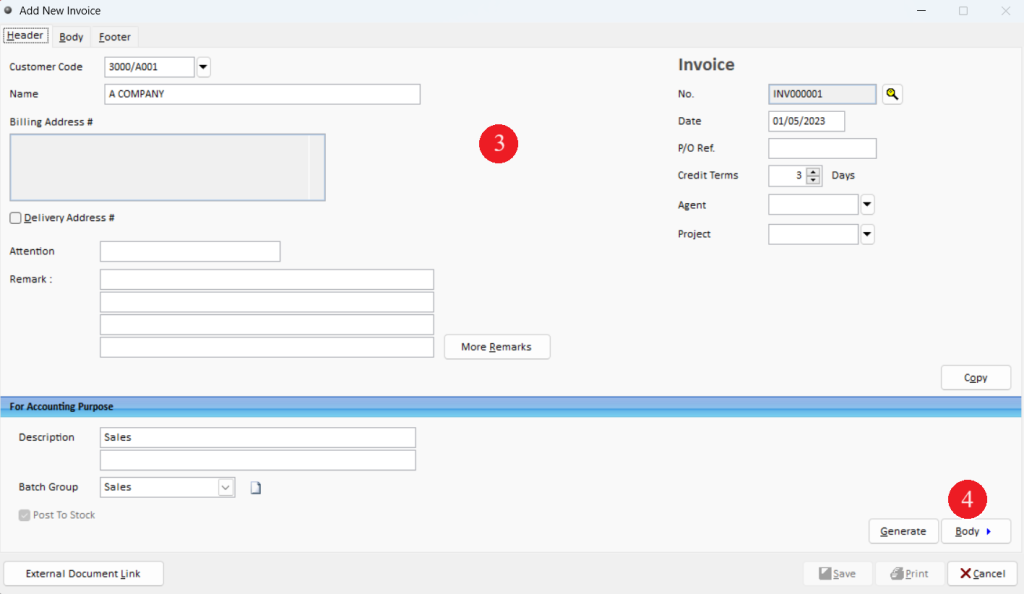
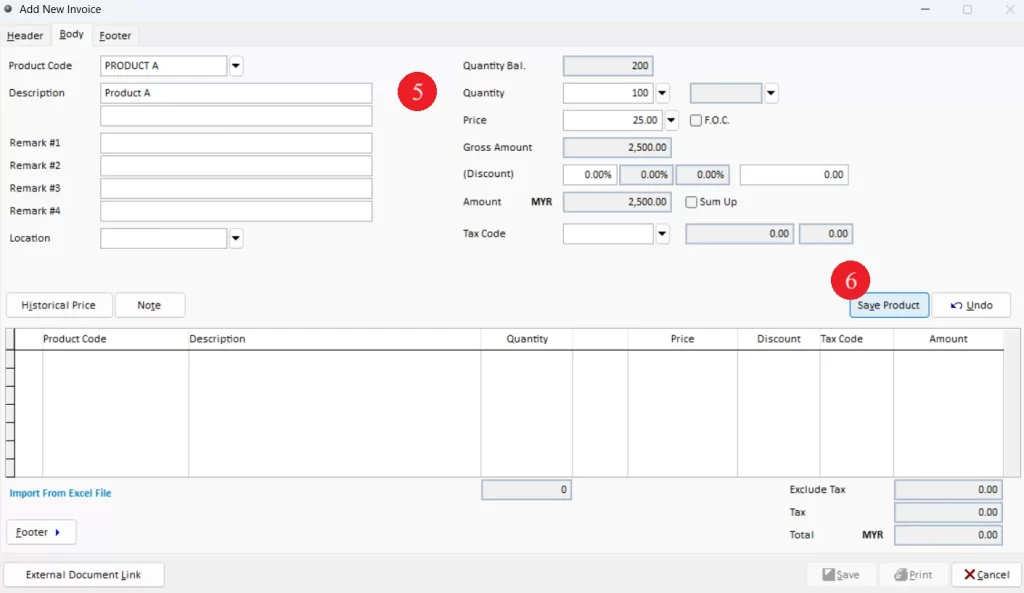
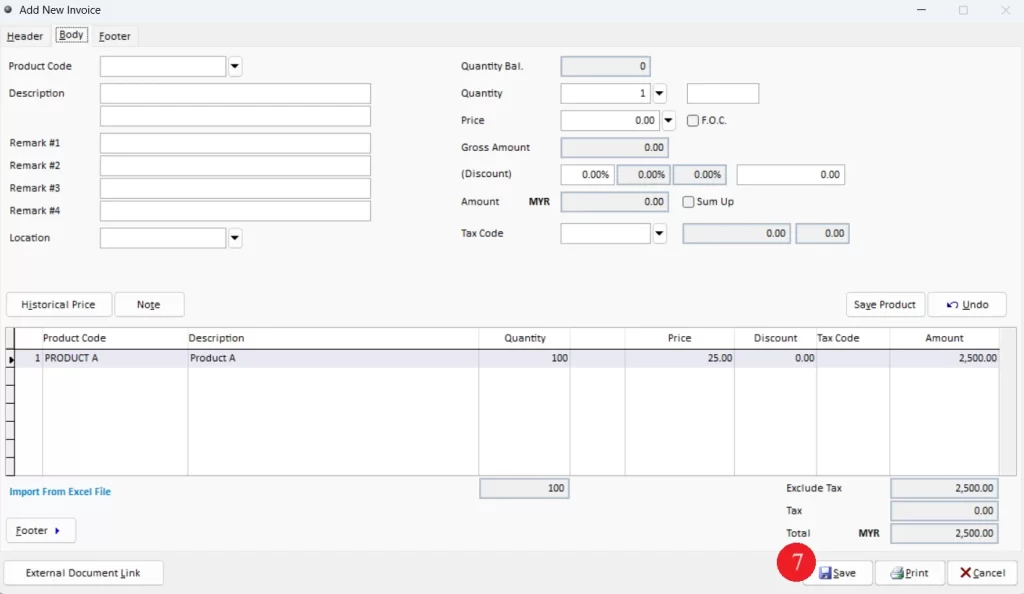
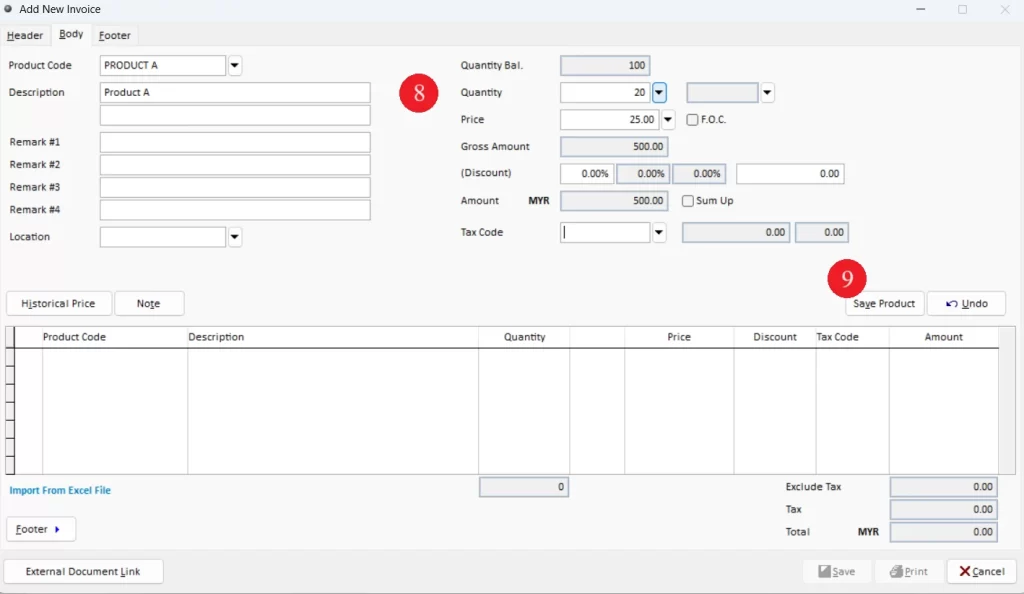
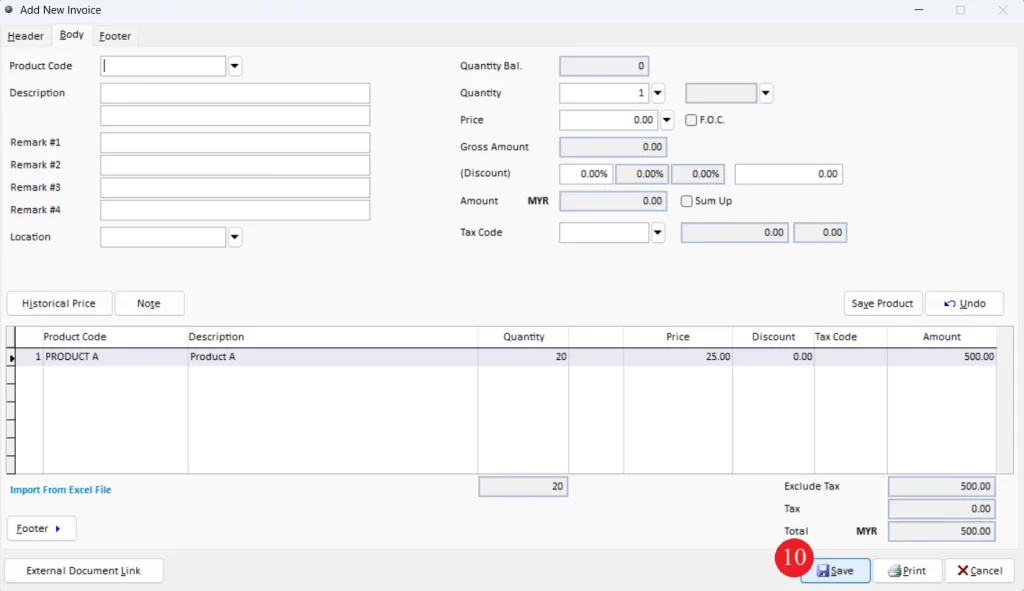
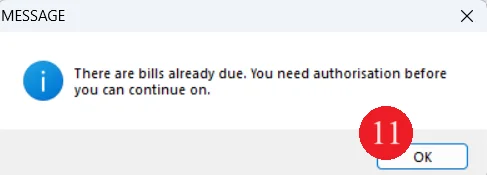
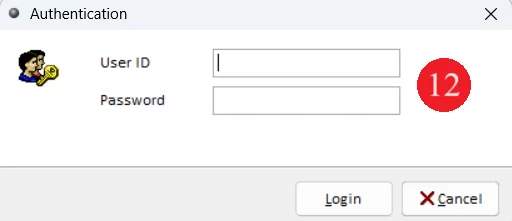
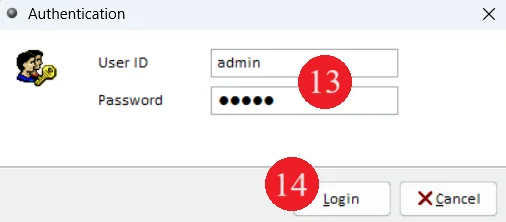
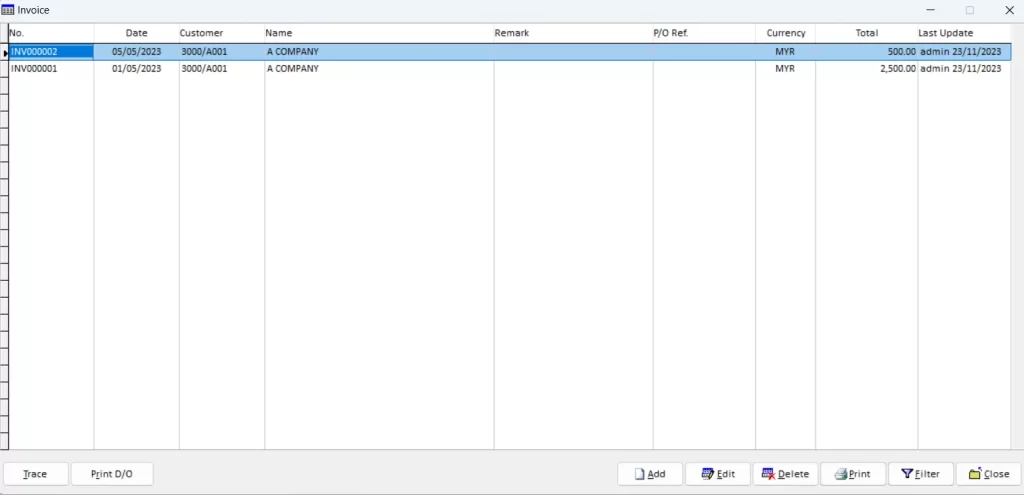
Step 3: Issue sales invoice
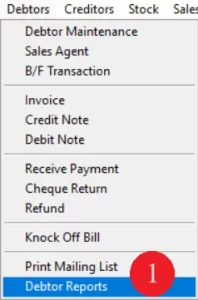
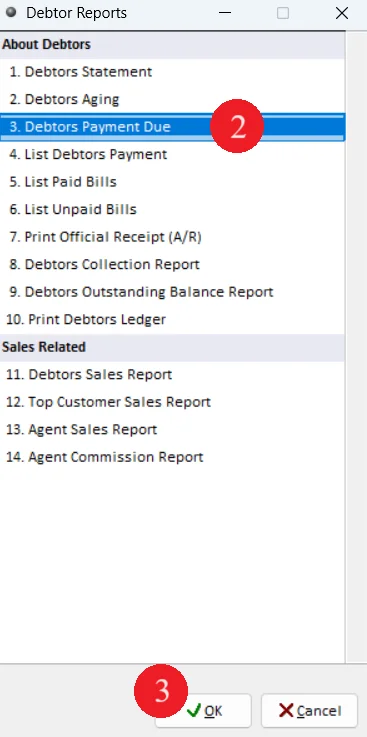
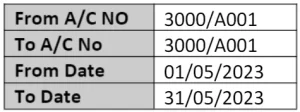
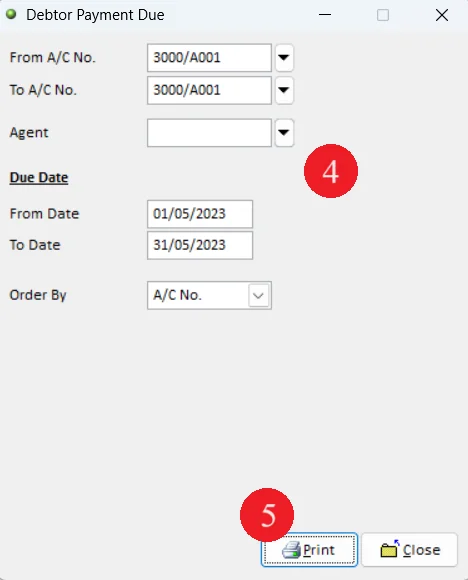
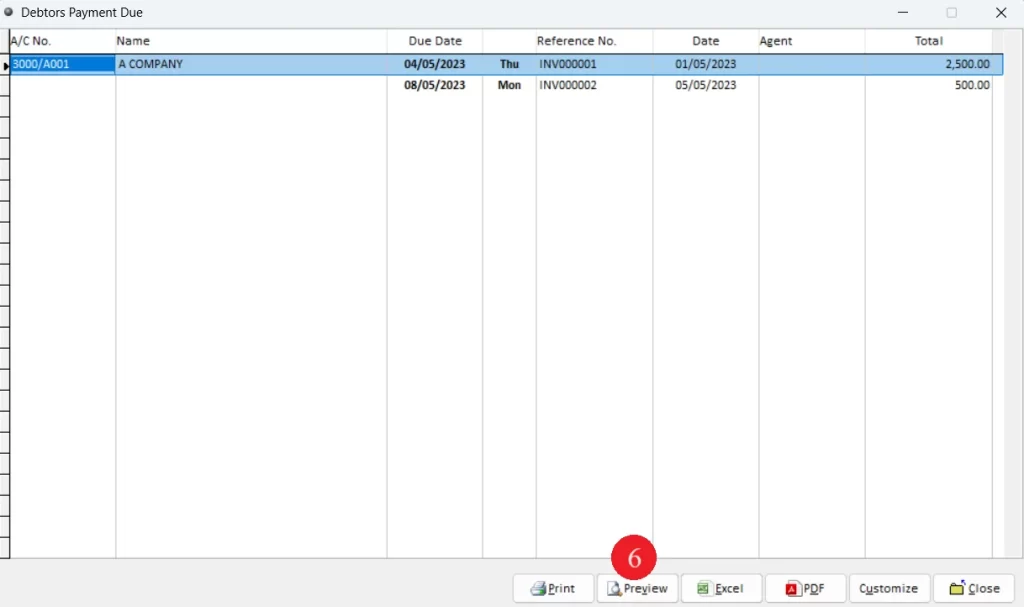
Step 4: View payment due report
Step 1: Enable Bills Due Function
Step 2: Set debtor credit term
Step 3: Issue sales invoice
Step 4: View payment due report
Ready to Buy Million Software System?
-
Million Account & Stock Help File
-
- Product
- Group
- Sub Group
- Brand
- Comment
- Recommended Price
- Promotional Discount
- Stock Location
- Opening Stock
- Serial No.
- Stock Receive
- Stock Issue
- Stock Adjustment
- Stock Transfer
- Stock Assembly
- Stock Enquiry
- Stock Reports
- Show Remaining Articles ( 2 ) Collapse Articles
-
- Add New Reference Number for Accounting
- Advance Search Function
- Asset Disposal
- Backup Reminder
- Backup Server Database from Workstation
- Bank Charges
- Change Key Code
- Cheque Return and Refund
- Closing Stock Value
- Contra Note
- GL Description
- Import GL Account From Other Company
- Import Item Into Sales Transaction
- Import Transaction Using Excel File
- Maintain Budget
- Process for Purchase Return
- Process for Recurring Invoice
- Credit Limit
- Credit Term
- Formula
- Hide Price Tip
- Hide Unit Cost
- Landing Cost
- Price Group Entry
- Multiple Delivery Address
- Bill of Material (BOM)
- Printing Approval
- Progressive Billing
- Send Invoice By Email
- User Group and Access Right
- Show Remaining Articles ( 15 ) Collapse Articles
-
- Articles coming soon
-
Million Payroll Help File
- Articles coming soon
-
Million Accounting Release Notes
